Note: Full resolution copies of all images on this page can be viewed by clicking on them.
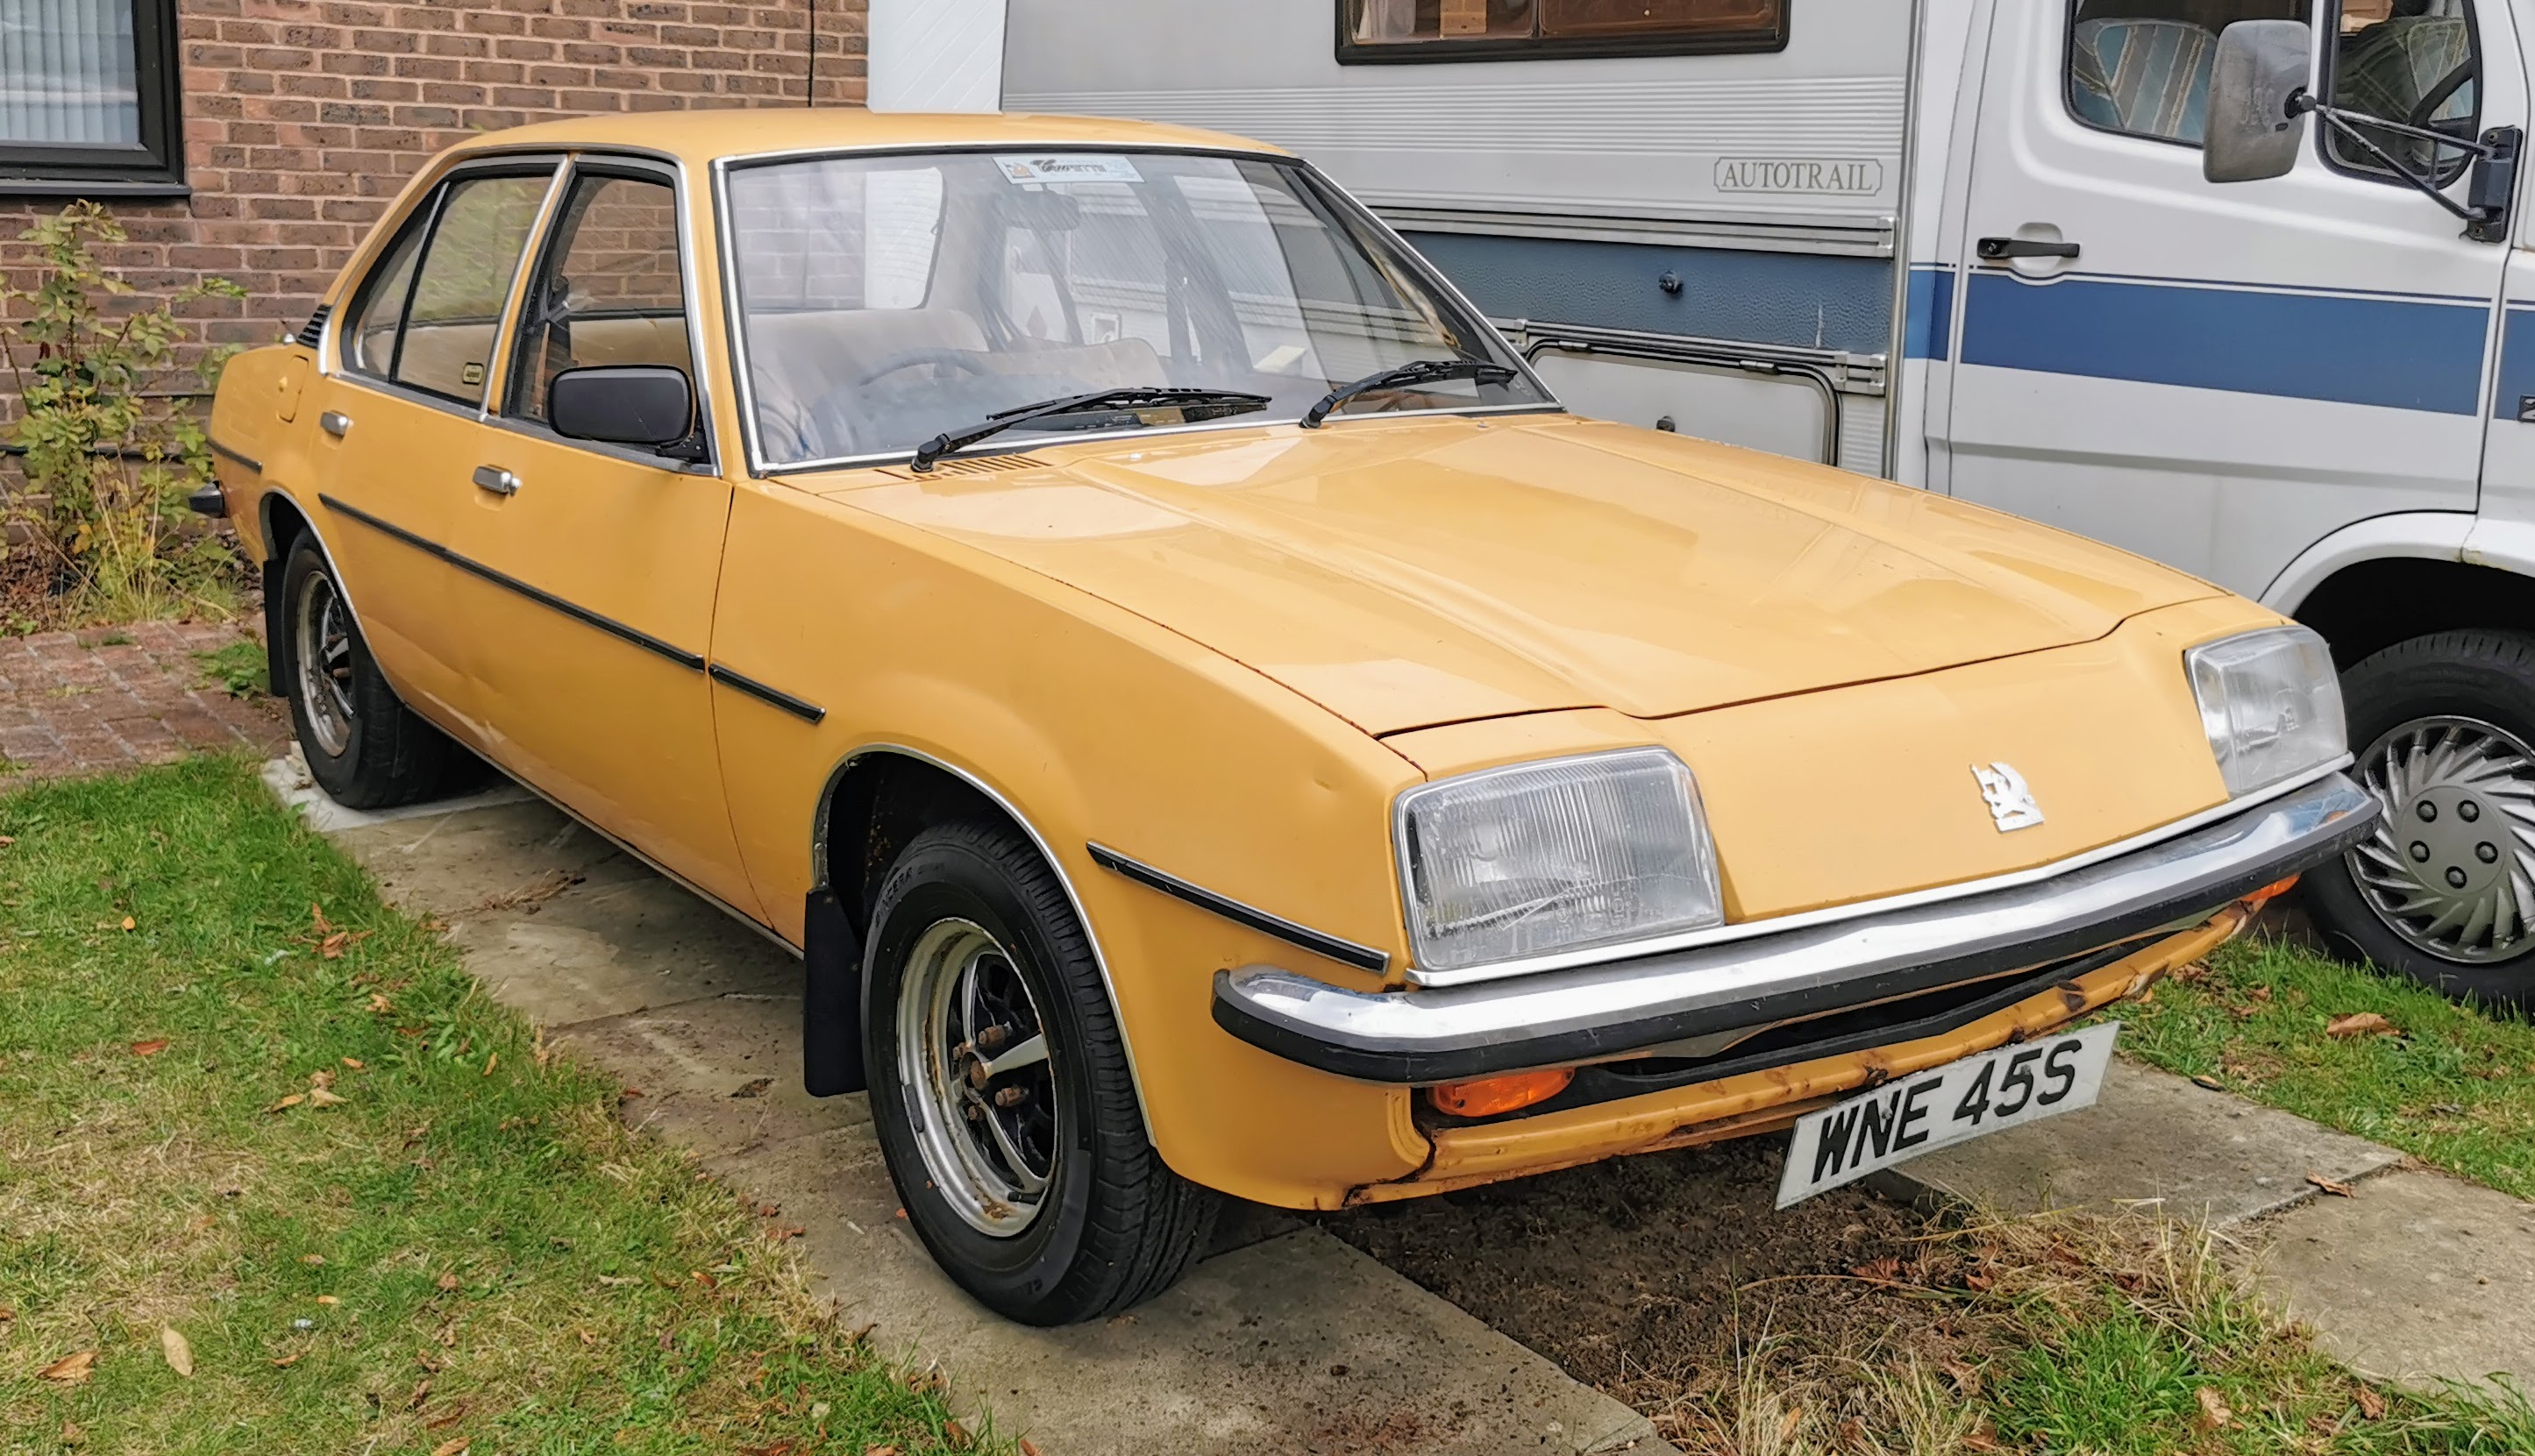
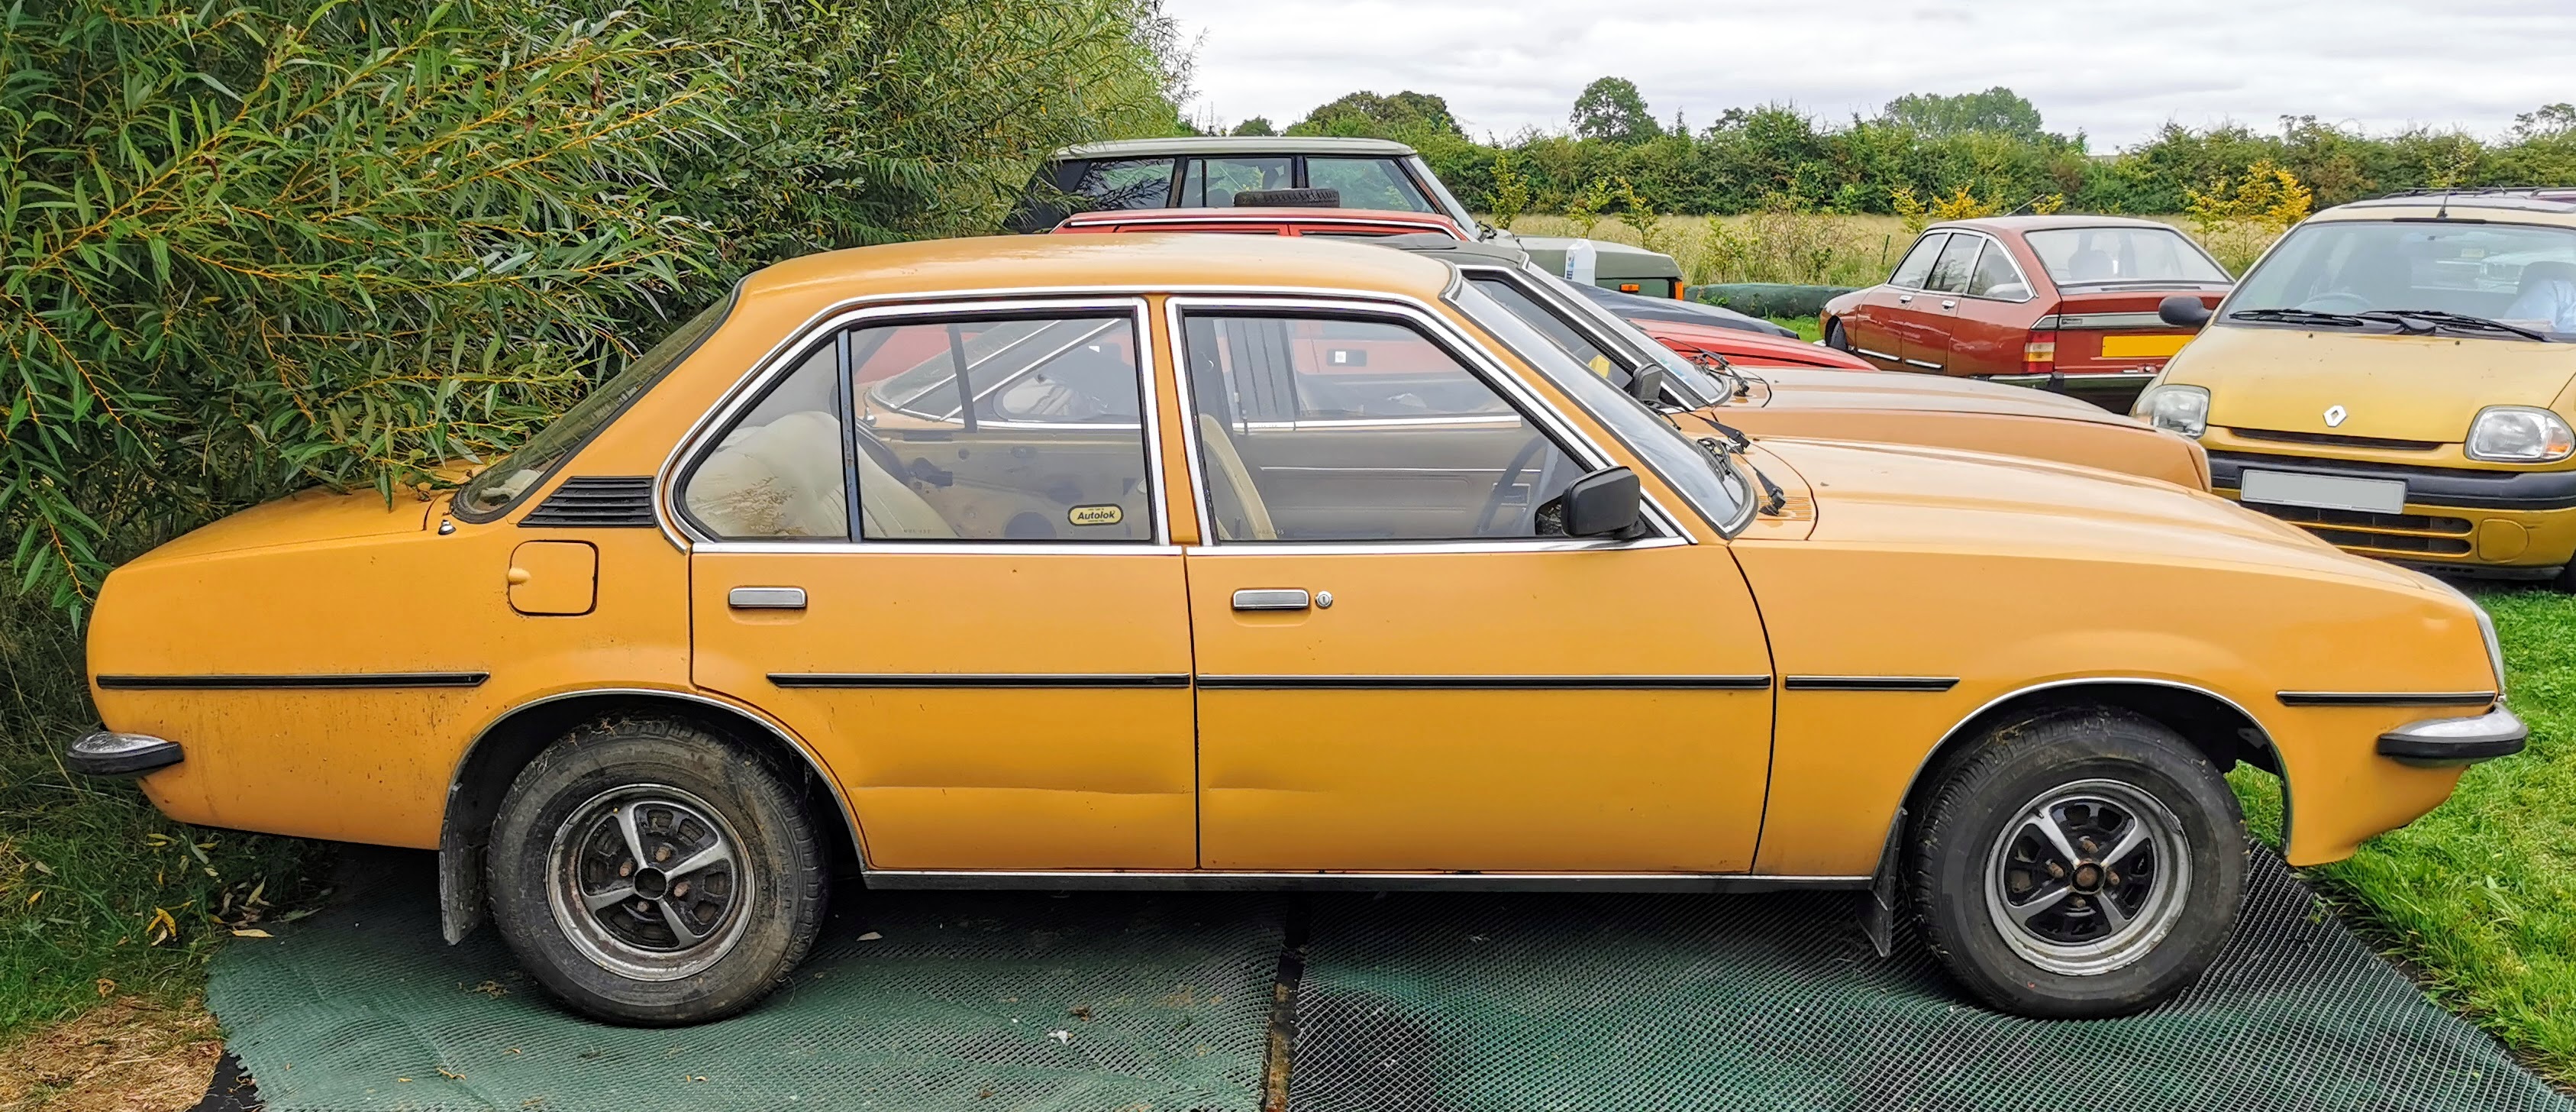
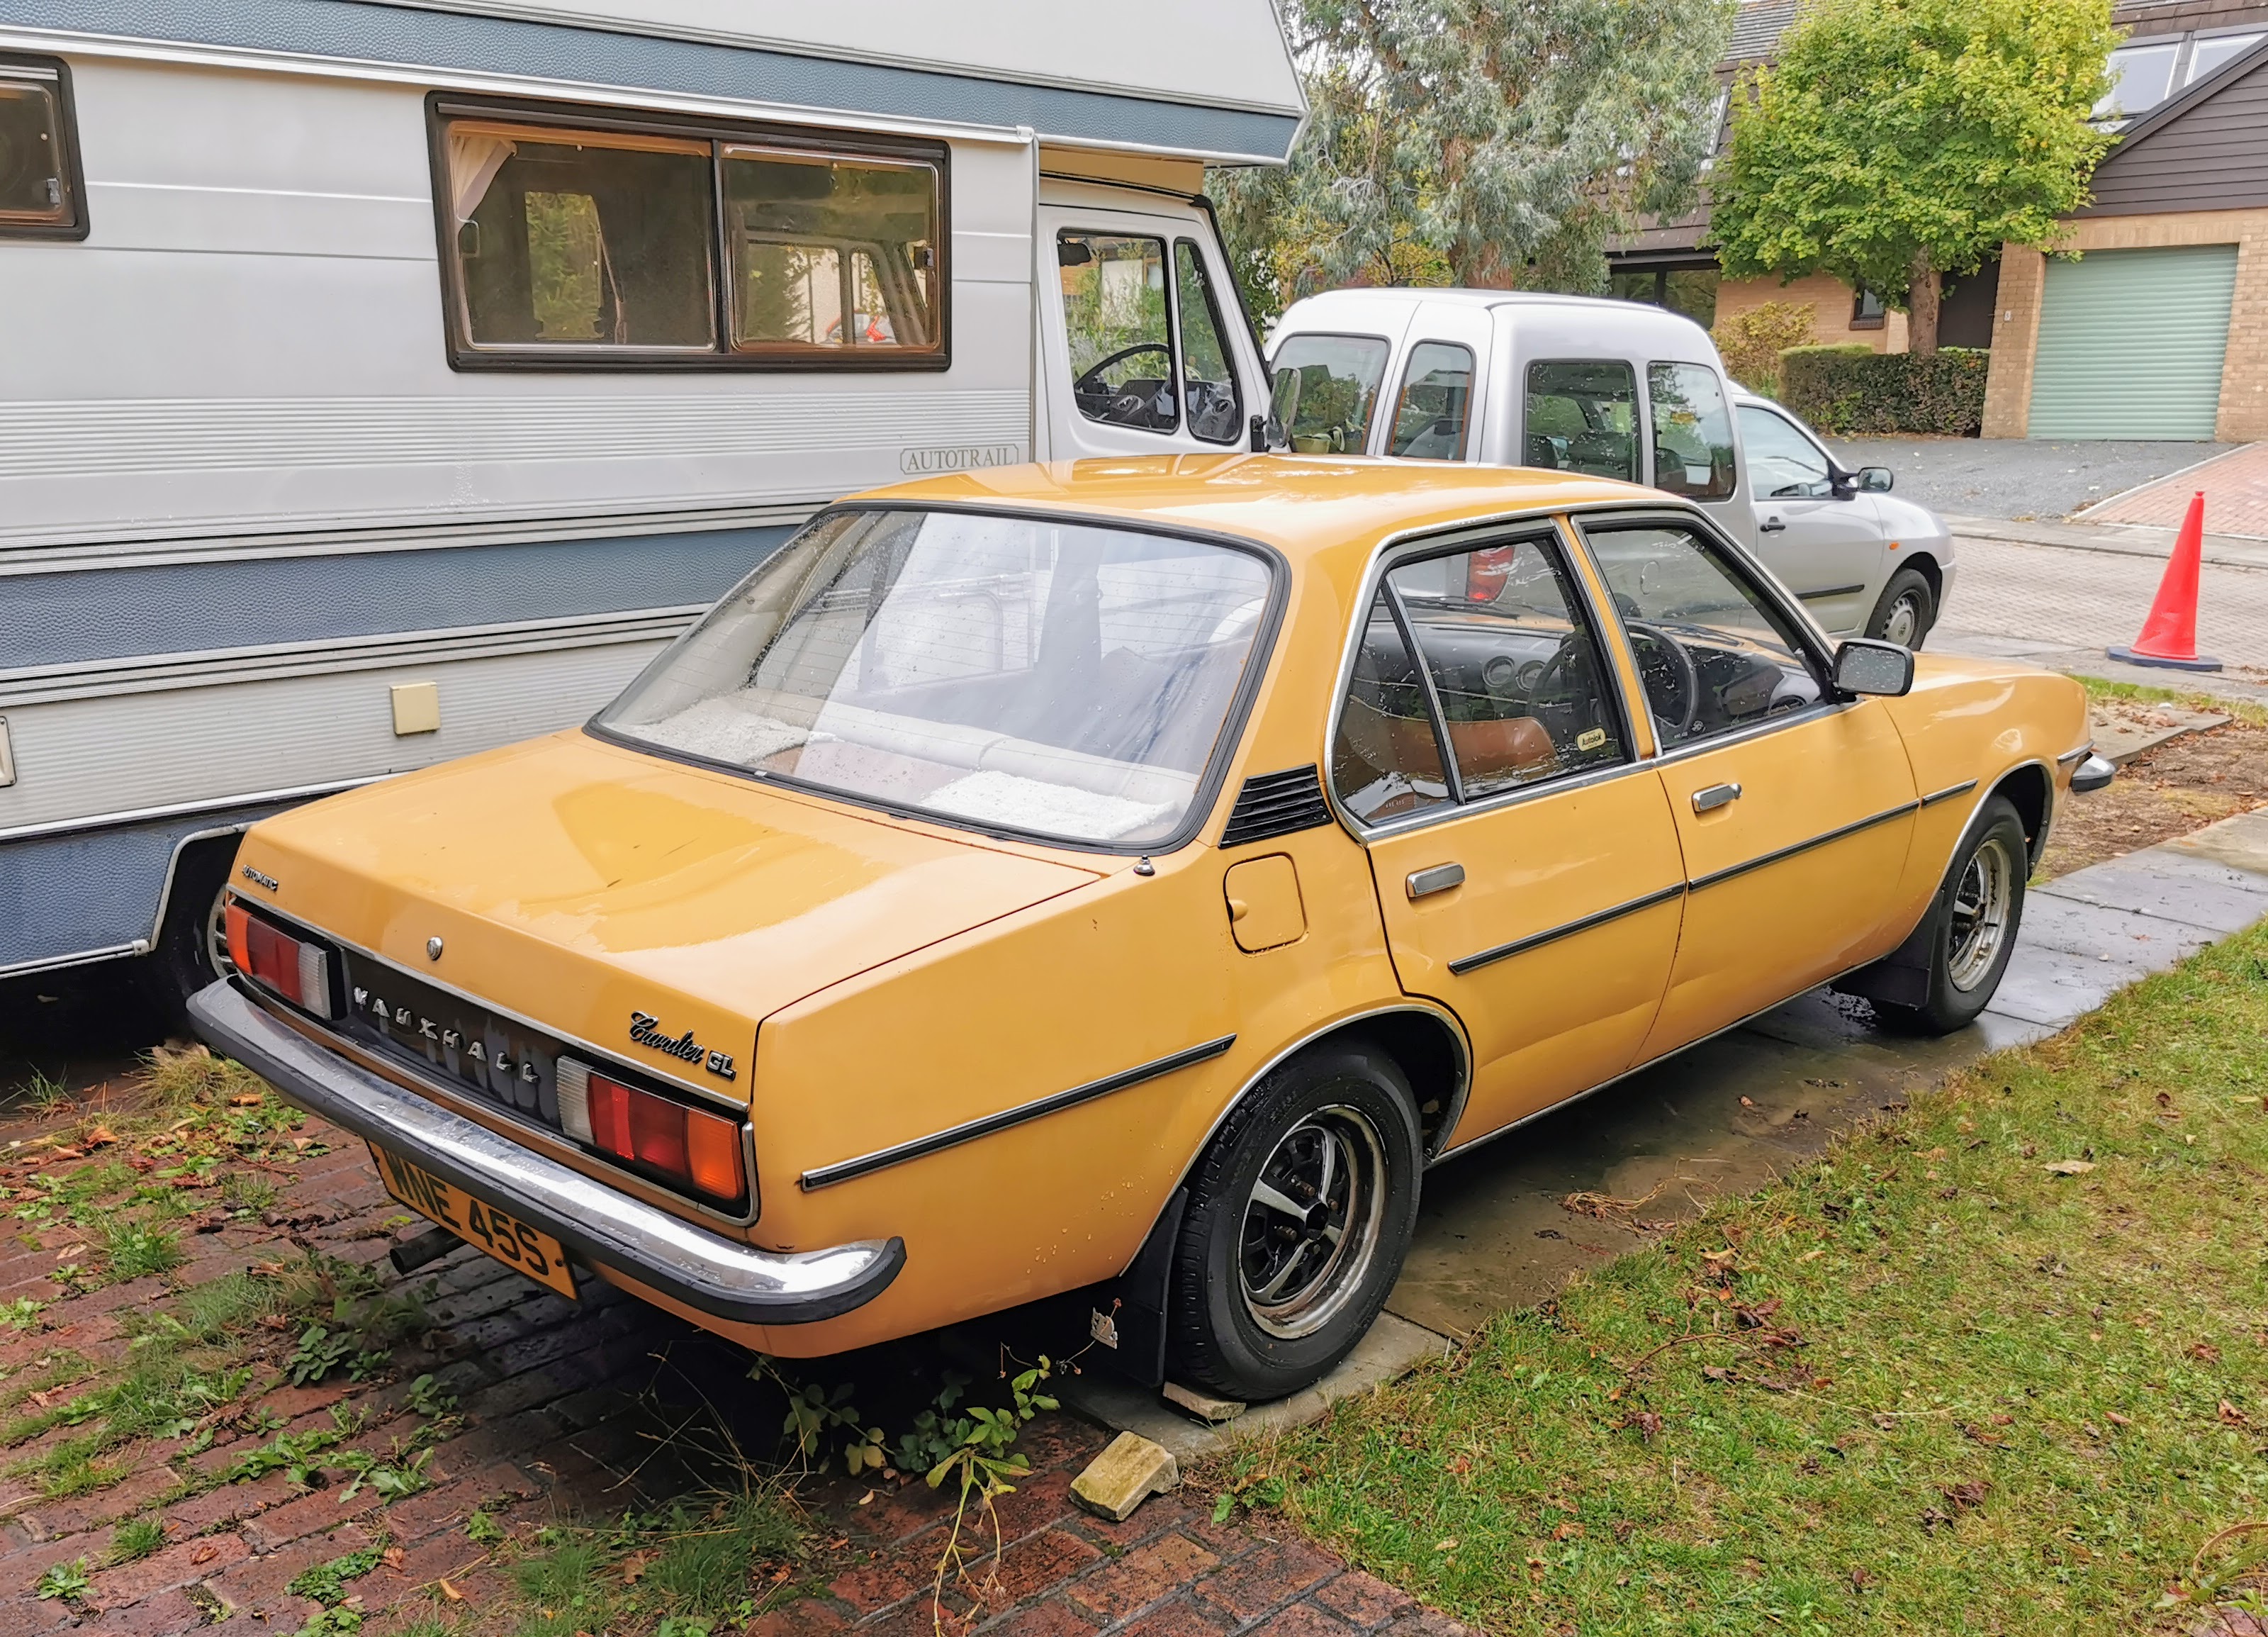
Launched in 1975, heavily based on the second generation Opel Ascona, the first generation of the Vauxhall Cavalier was a very common sight on UK roads throughout the 80s and 90s. The very distinctive styling particularly of the front made them very easy to spot. While they were generally a well liked car, as with many vehicles of the 70s and 80s corrosion resistance wasn't anywhere near on par with what we expect these days, so by the time we got to the year 2000 they were getting thinner on the ground.
It's a car that I've always had a bit of a soft spot for on account of one being the first car I ever drove solo - albeit on a farm and in an example which lacked luxuries such as...a floor, doors...a windscreen. You know, just little details like that. So I've always fancied finding out how a halfway decent example would drive. However by the time I started really realising I'd quite like one around 2010 they had pretty much vanished, and good ones had started to command strong money as they have developed quite a strong following. So I basically stopped looking.
Sometimes when you have a classic car related hobby you go out looking for your next project. Sometimes however you can be actively AVOIDING trying to find one yet it finds you instead. In September 2021 I was absolutely not in the market for another project car. Not even a little bit. In fact when this car turned up at a friend's place I actively avoided even looking at it up close when I was over there because I knew I'd be tempted to ask how much.
Fast forward something like 48 hours, and he formally put it up for sale, at a very reasonable price. So I felt compelled to go and take a proper look at it at least. Given the tendency of these cars to dissolve at a truly frightening rate I was expecting to wind up running away screaming as a huge weldathon absolutely isn't something I have the time or equipment to deal with. I don't mind the odd repair here and there, but major fabrication is a no go at the moment. These were very much mass market cars at the time, with a design lifespan of somewhere between 10 and 15 years - and this one still being with us after 43 years and not already having been subject to a restoration as far as I was aware meant I wasn't expecting miracles.
So what did I find?
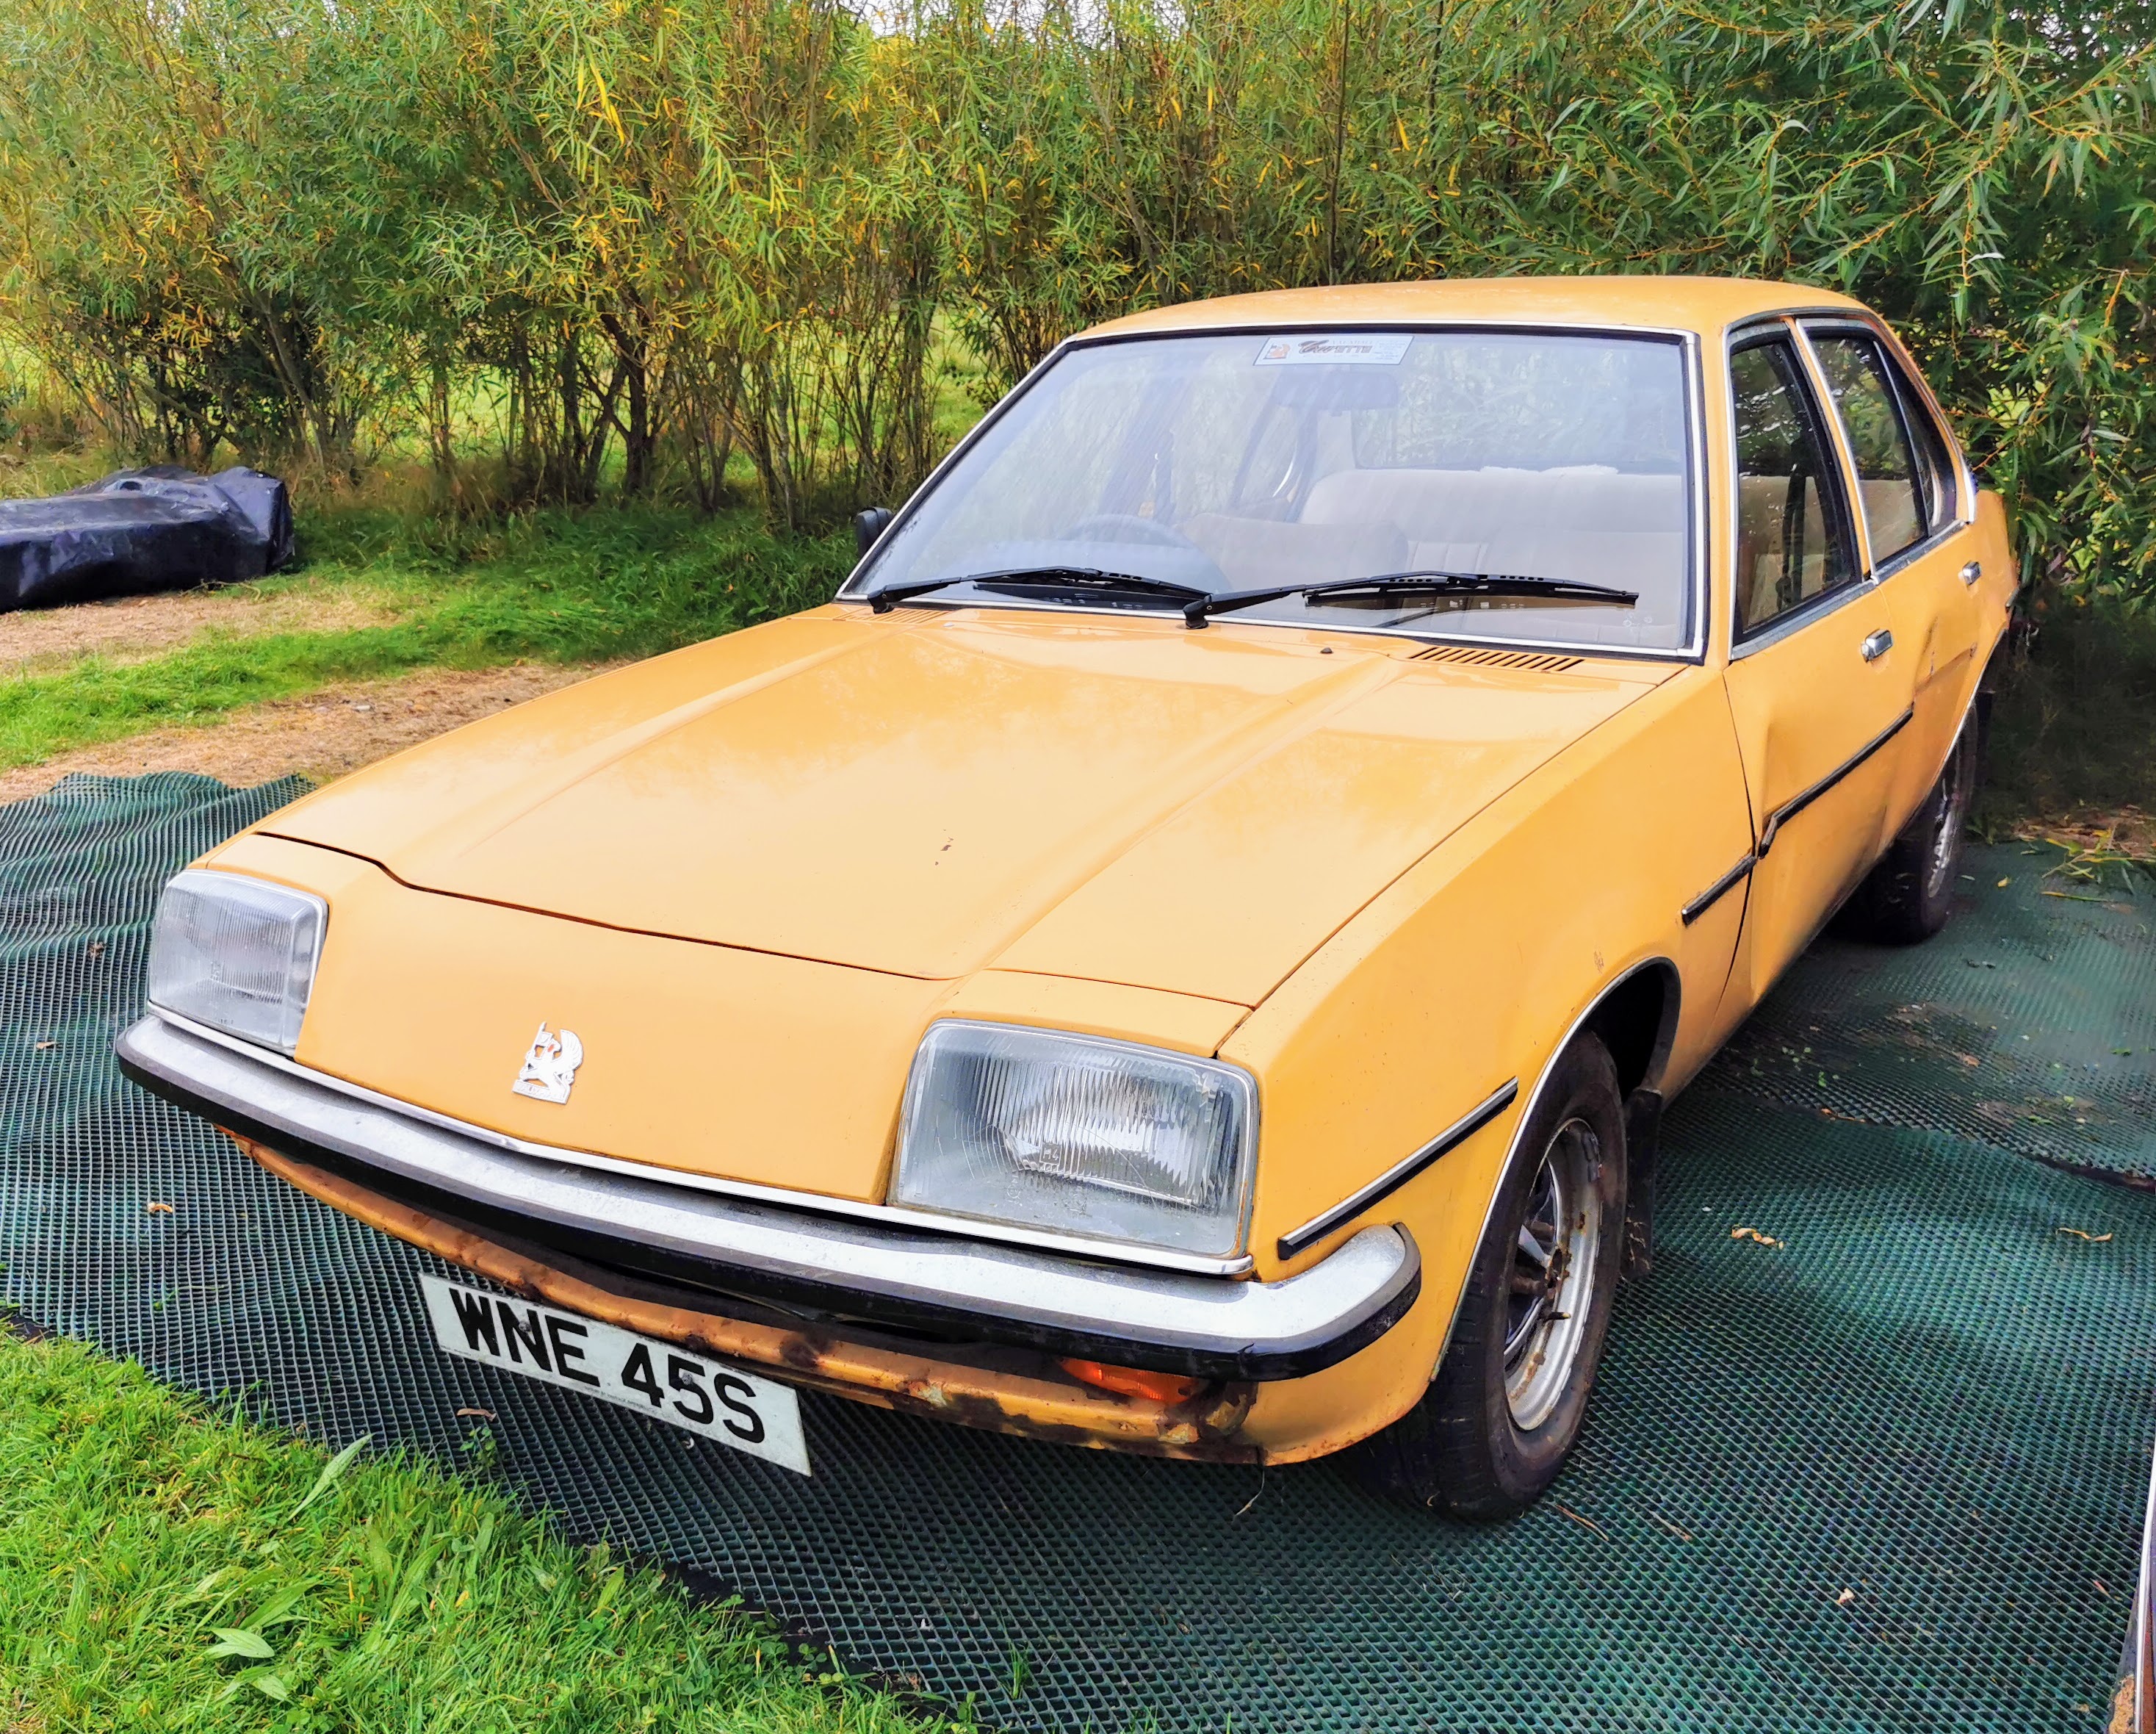
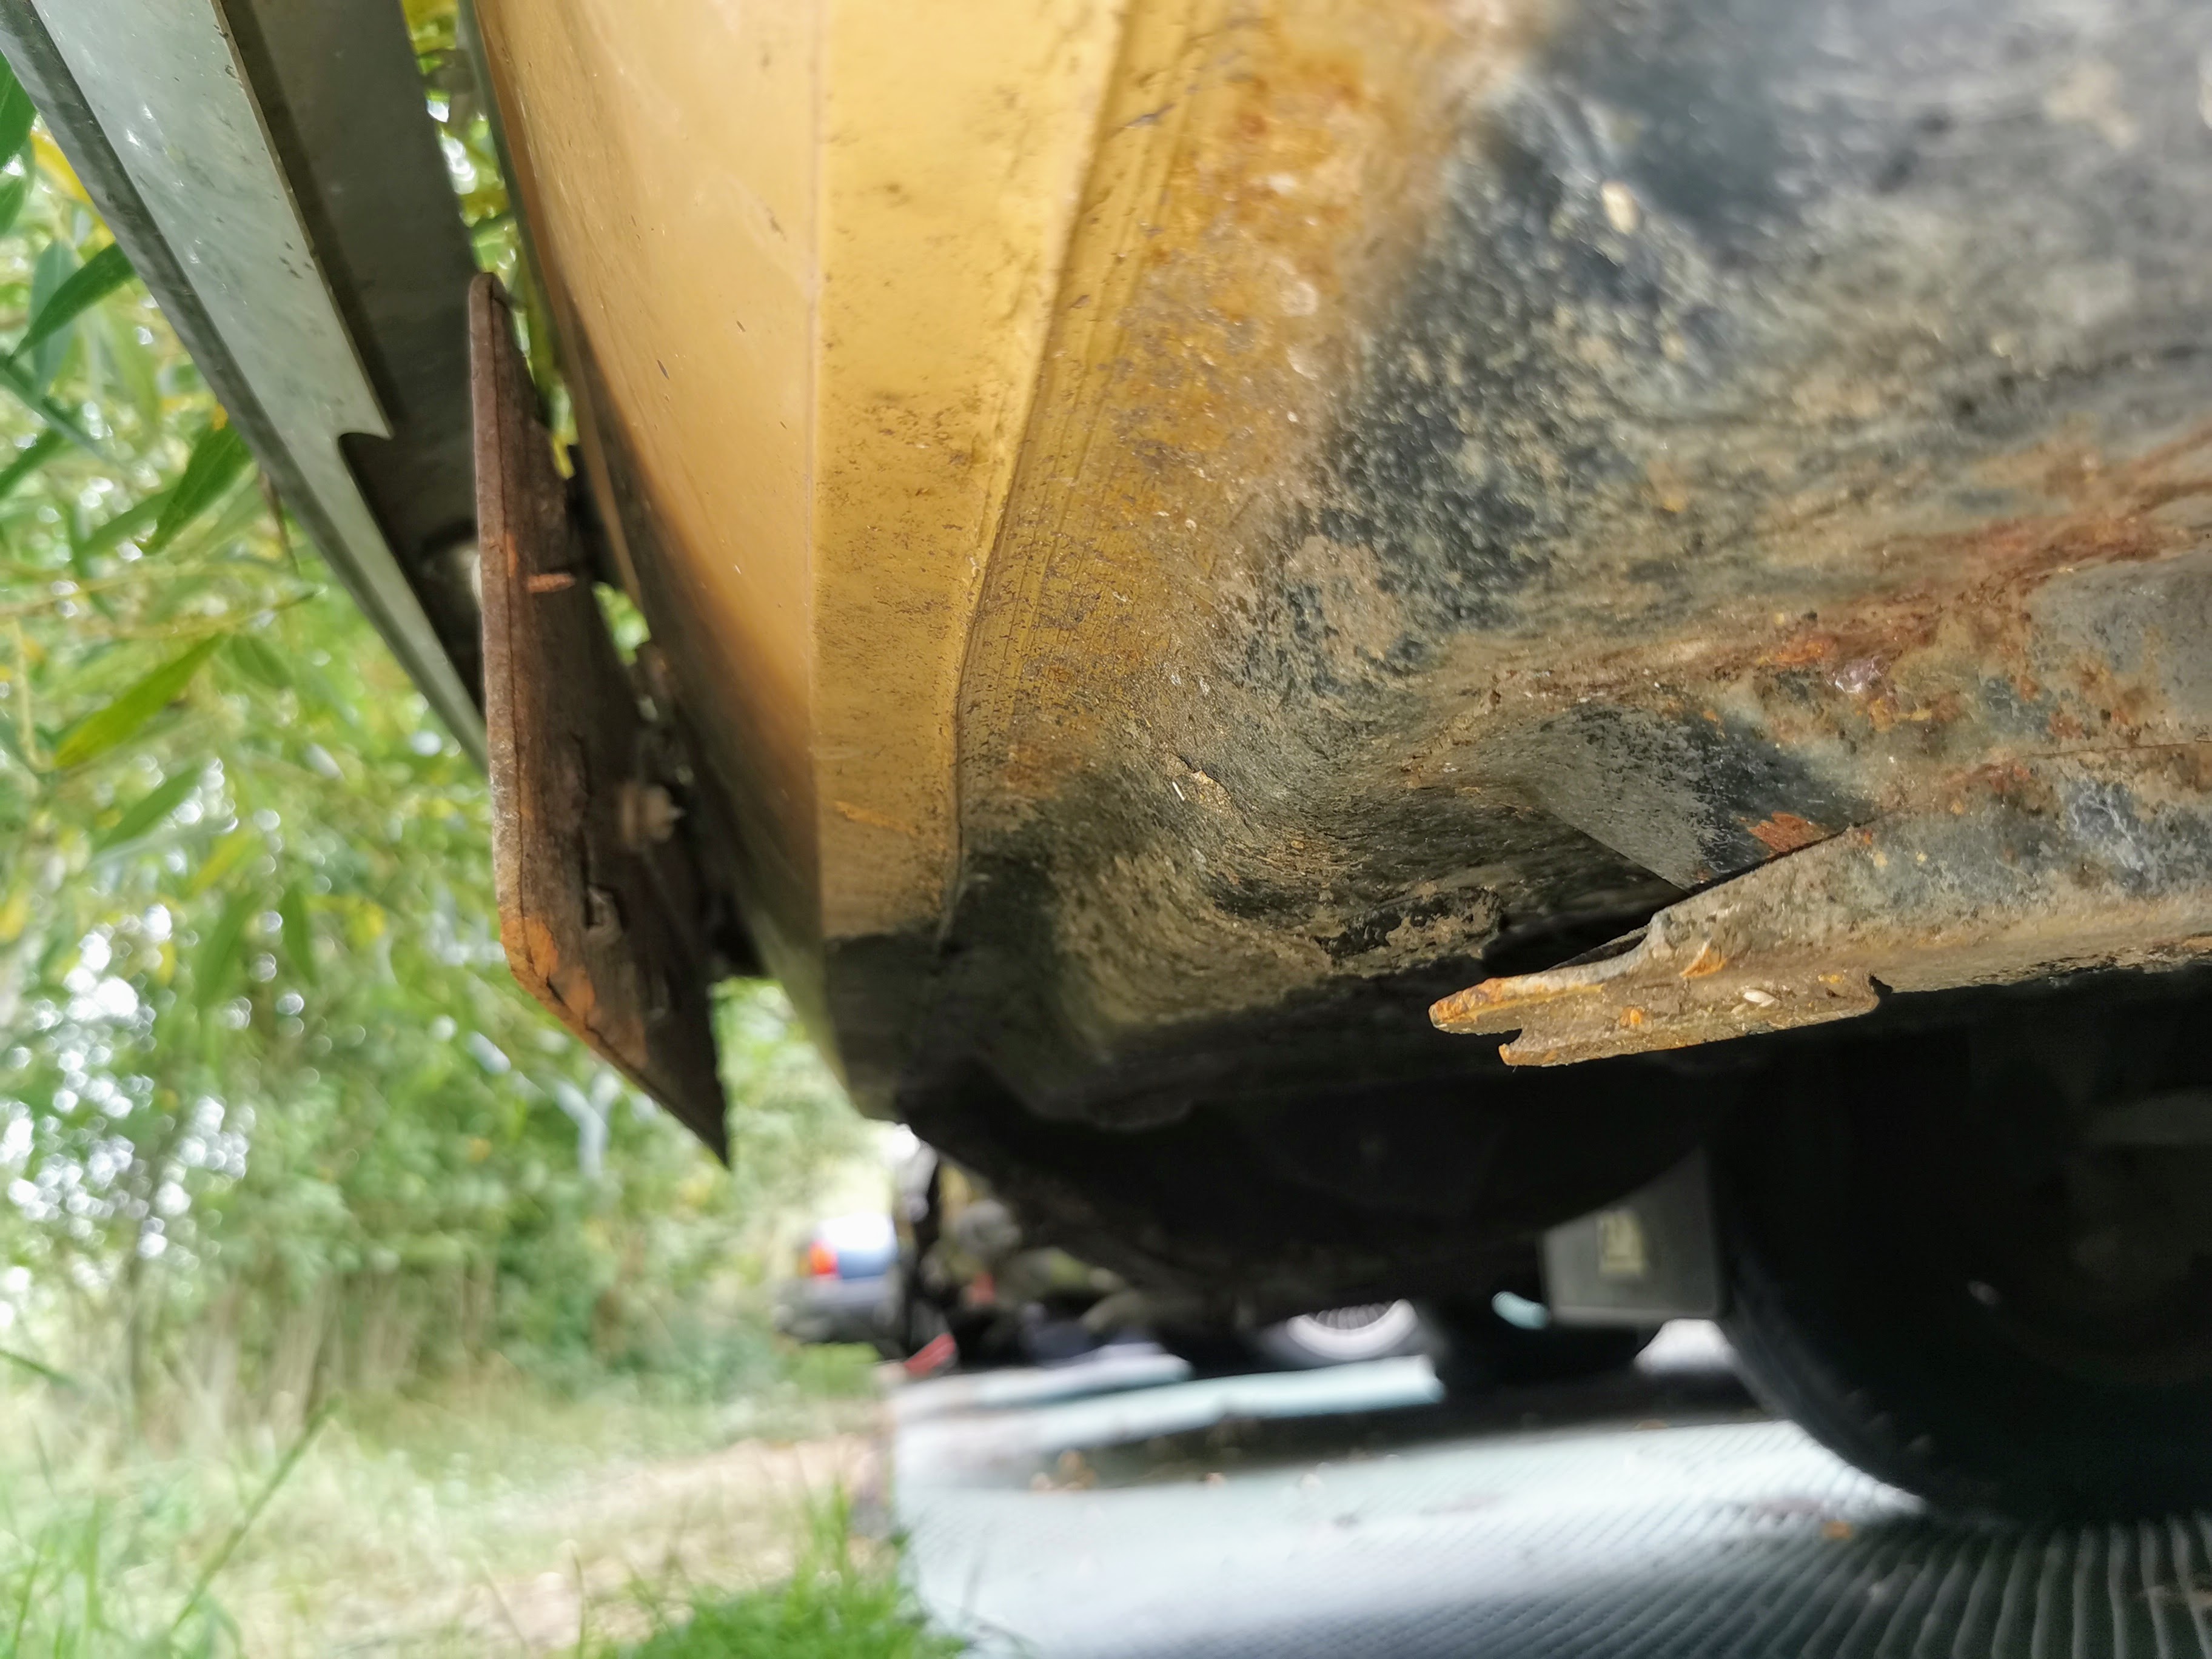
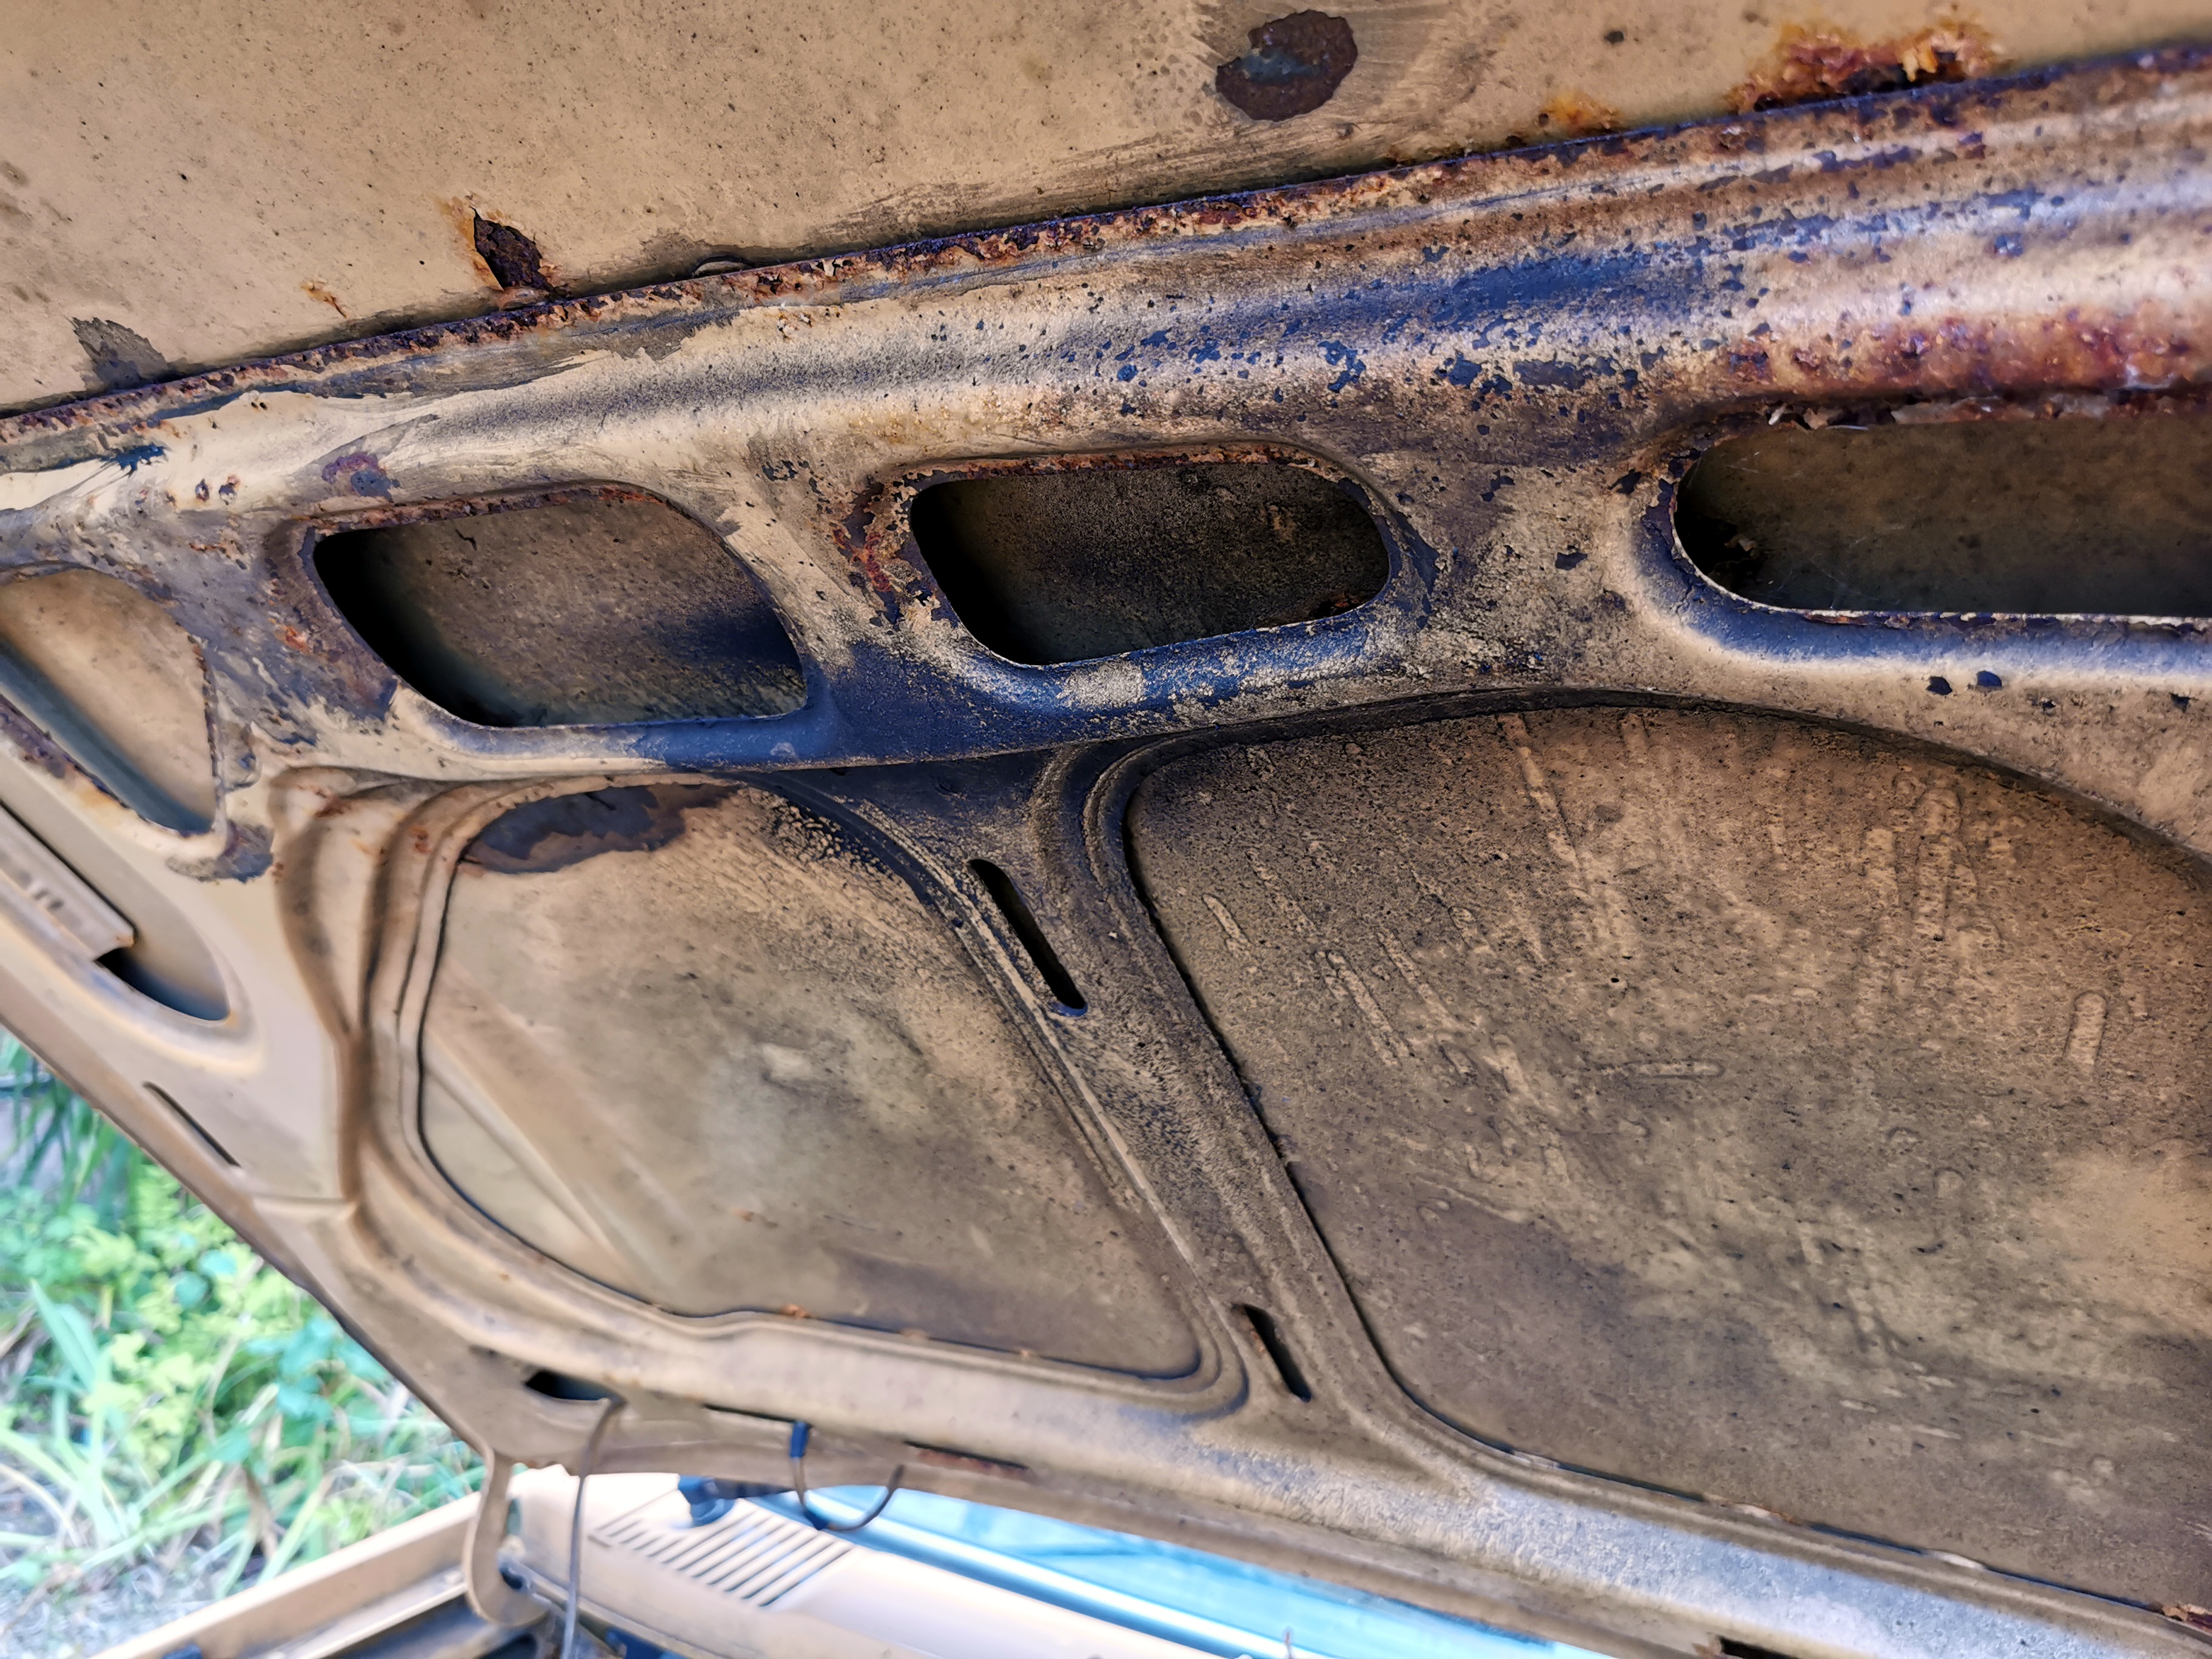
Immediate observation was that aside from some obvious surface crustiness in the front valance and obvious damage to the nearside doors from having been moved around on a telehandler it looked astonishingly solid for one of these cars. The underside I expected to be a very different picture though. So I started at the front on the driver's side. The "swan neck" portion at the front where the chassis rails (yes, I know it's a unibody car, but you know what I mean) kick up at the front have a really bad reputation for rusting out. I've since learned that the main reason for this is that the box section is actually wide open behind the bumper so any moisture thrown at the front of the car will to some extent end up inside that cavity. There are drain holes, but they're tiny...and even when they're not clogged still aren't going to keep all moisture out.
That's a lot cleaner than I had expected. Couple of bits of surface rust, but nothing which was in the slightest bit bothered by being poked with a screwdriver.
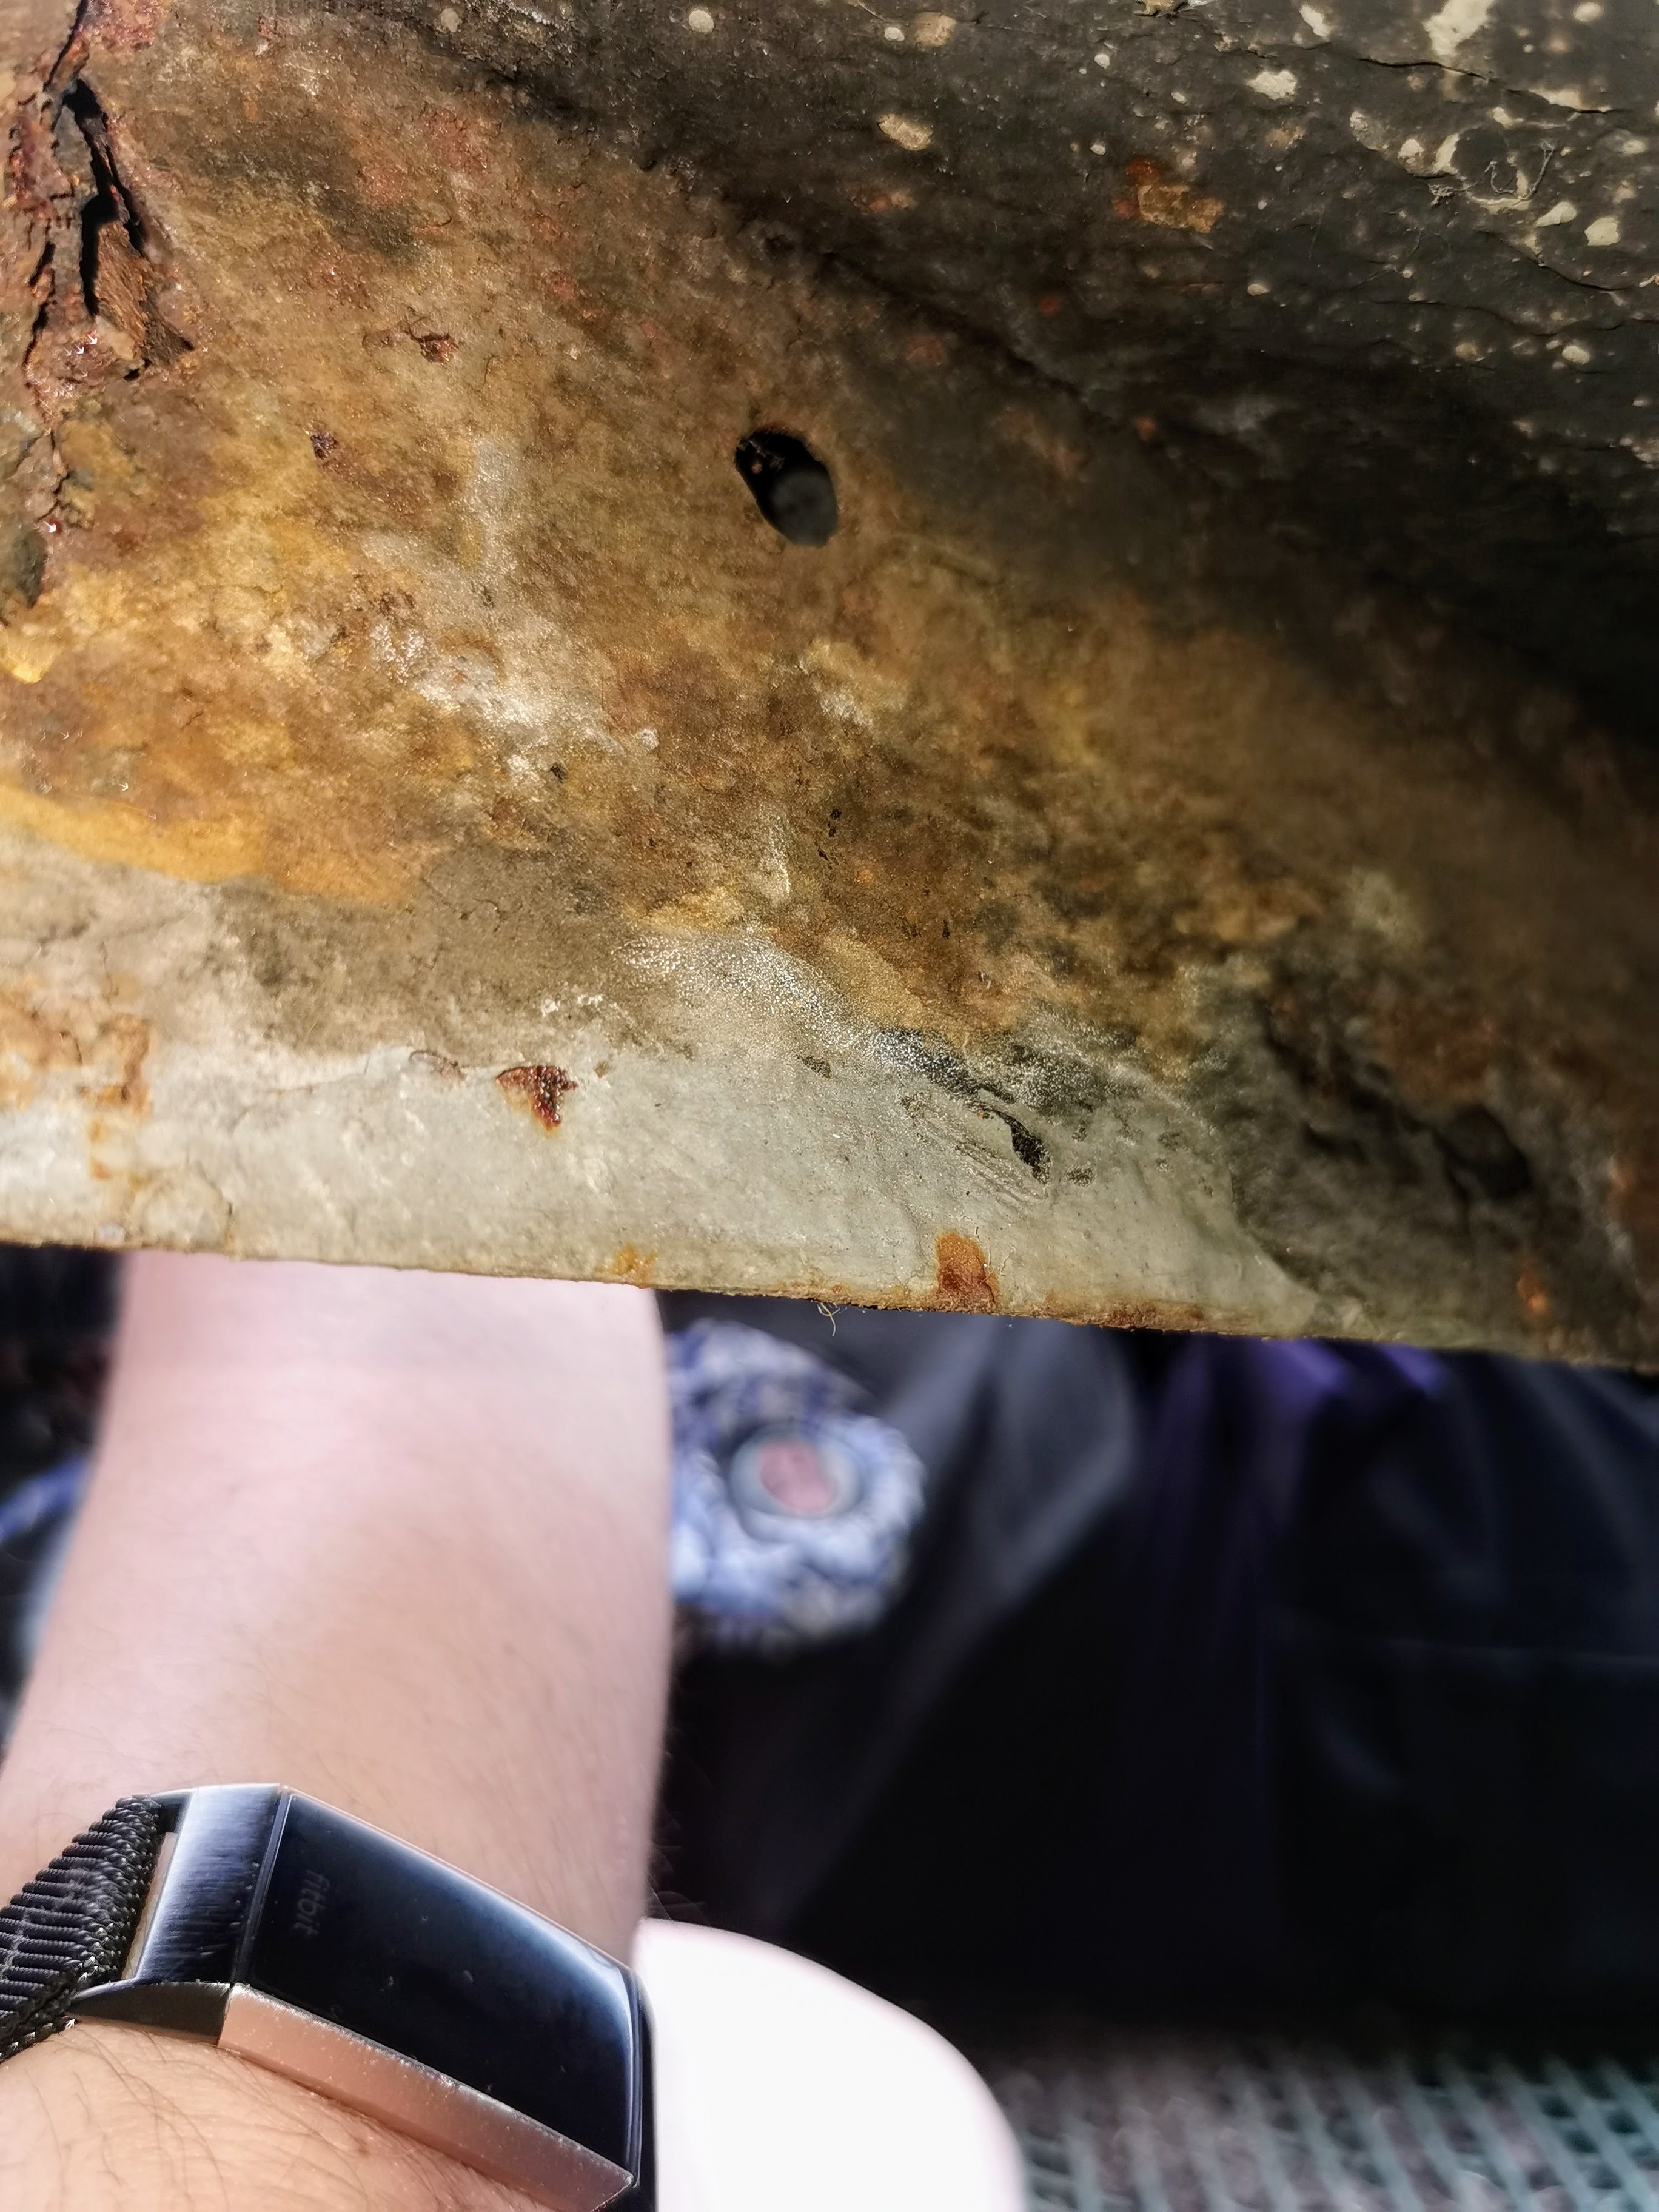
Moving back to the front jacking point. Apologies for the utterly horrific photograph.
Absolutely nothing of concern there.
Generally looking backwards along the sill from the front. This gives a general view of the condition of the underside of the vehicle as a whole.

Overall astonishingly sound, with no obvious signs I could see of any previous repairs either.
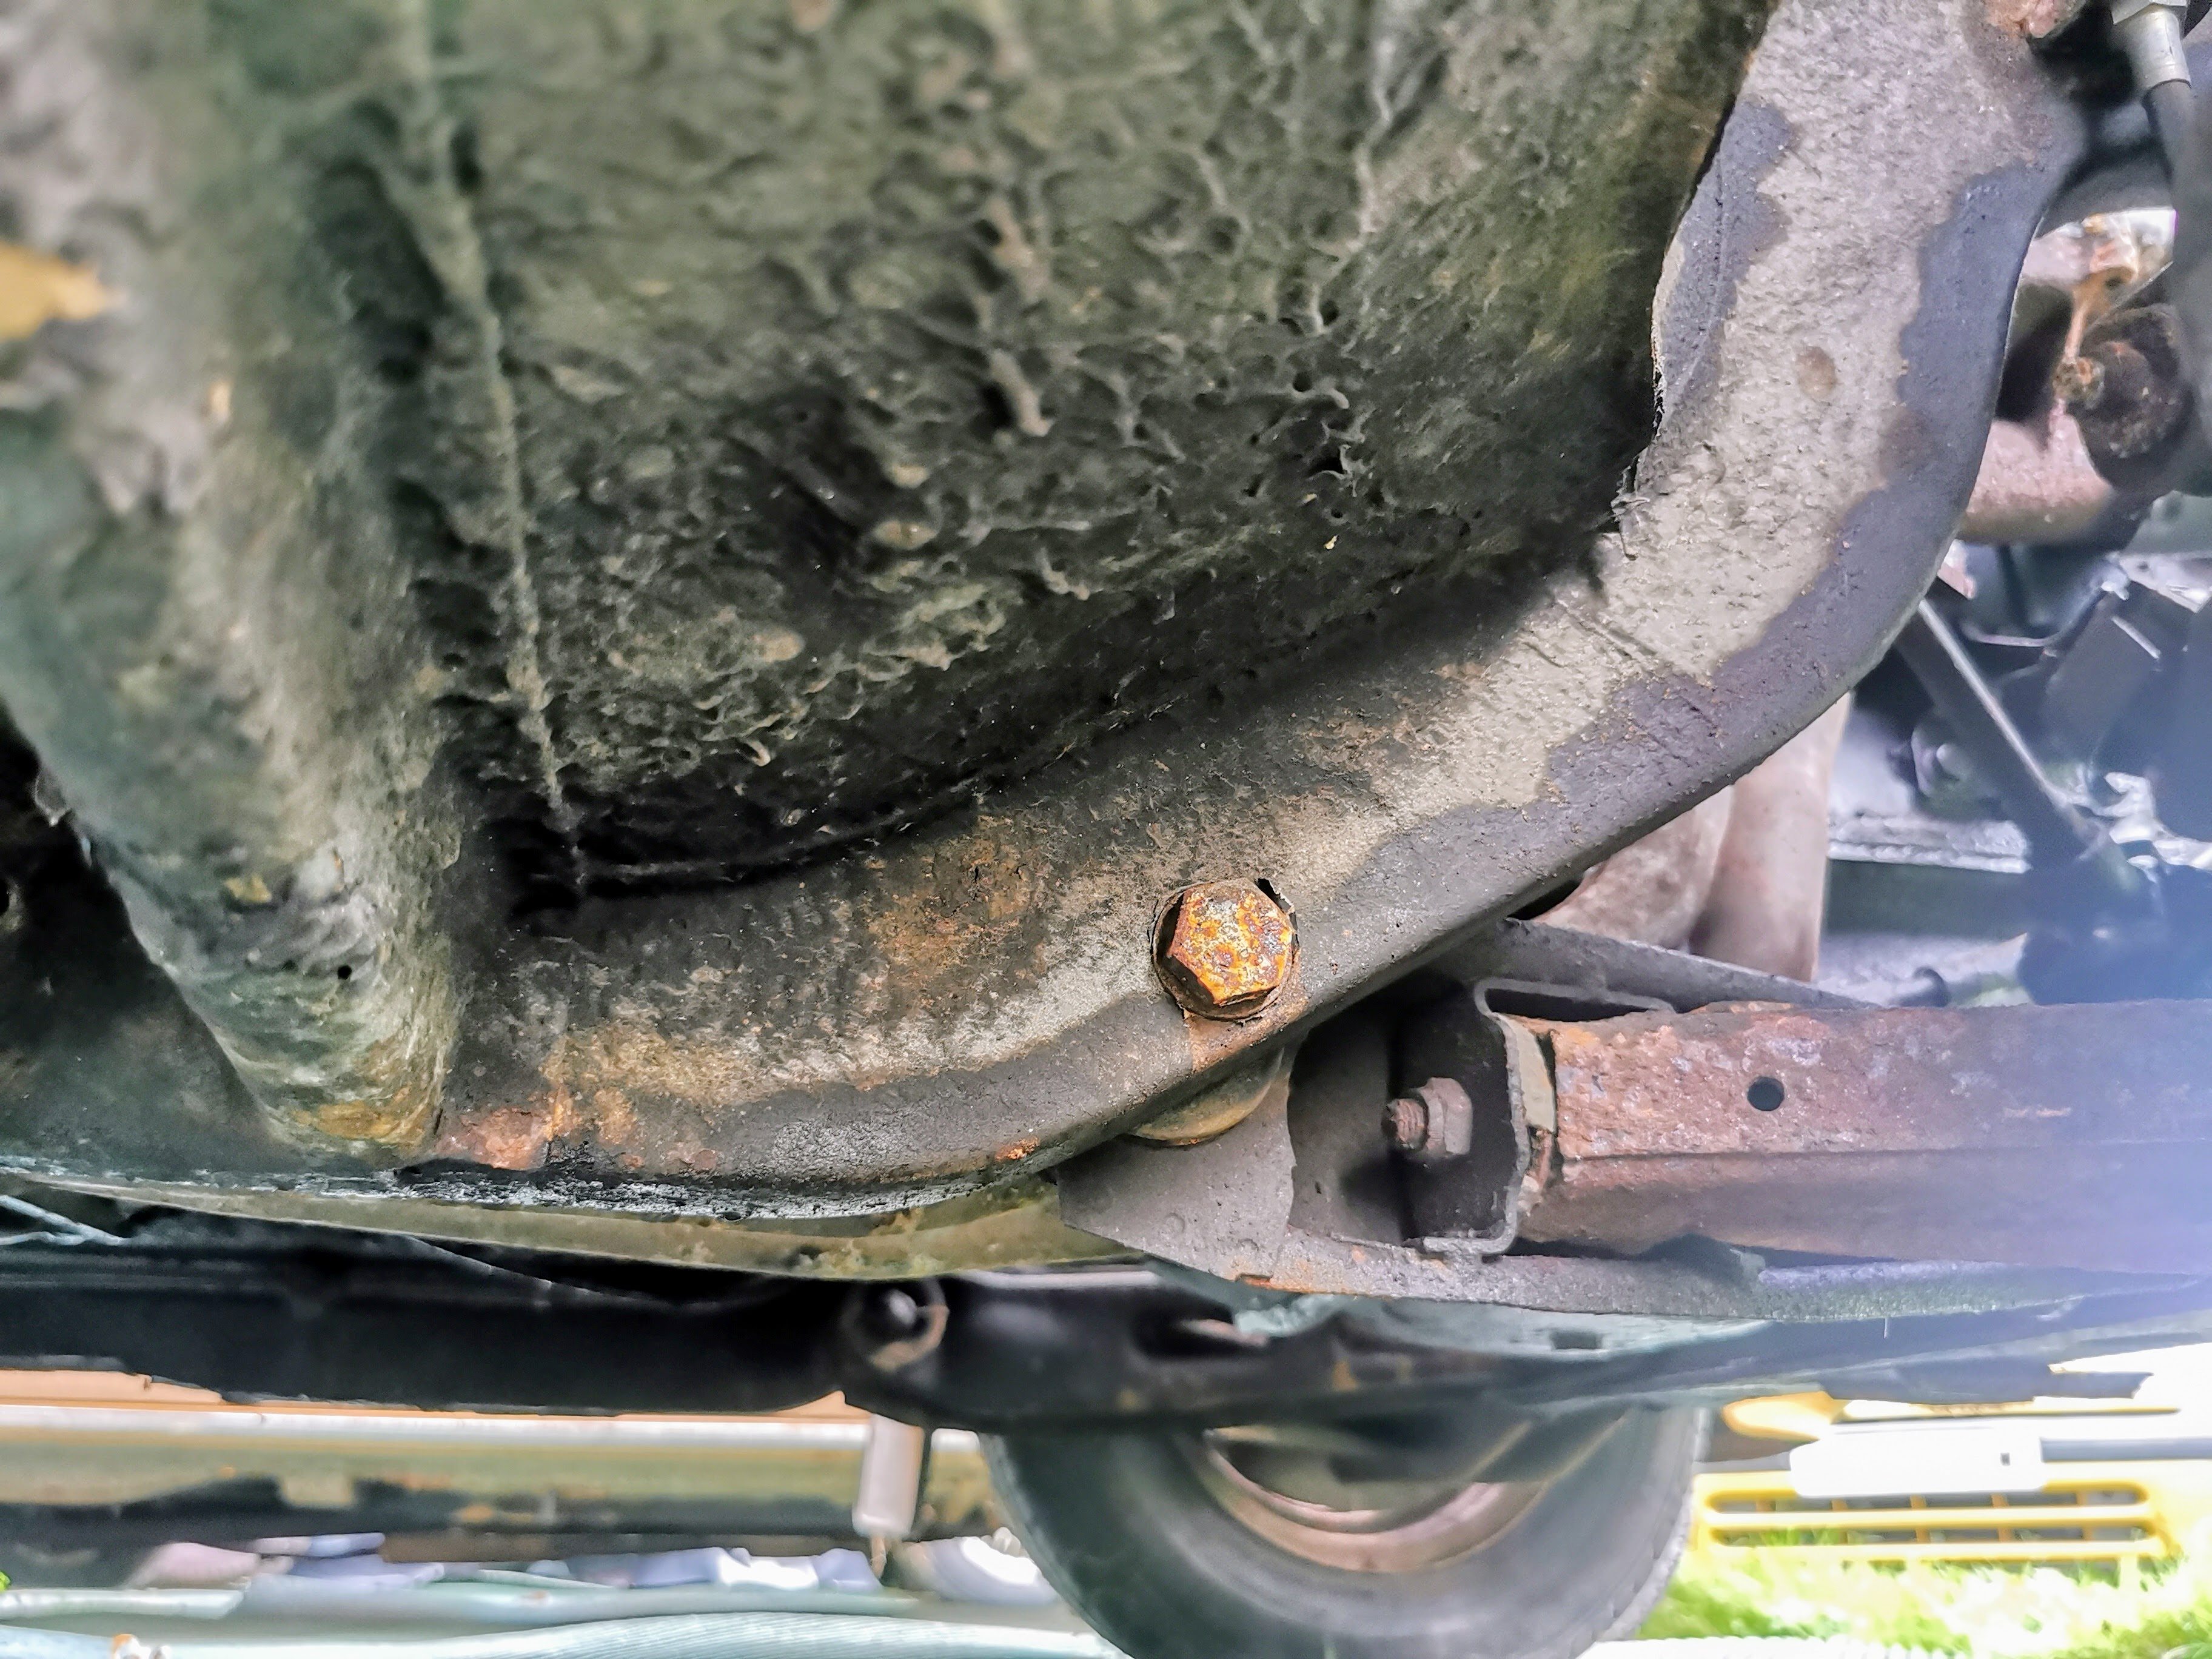
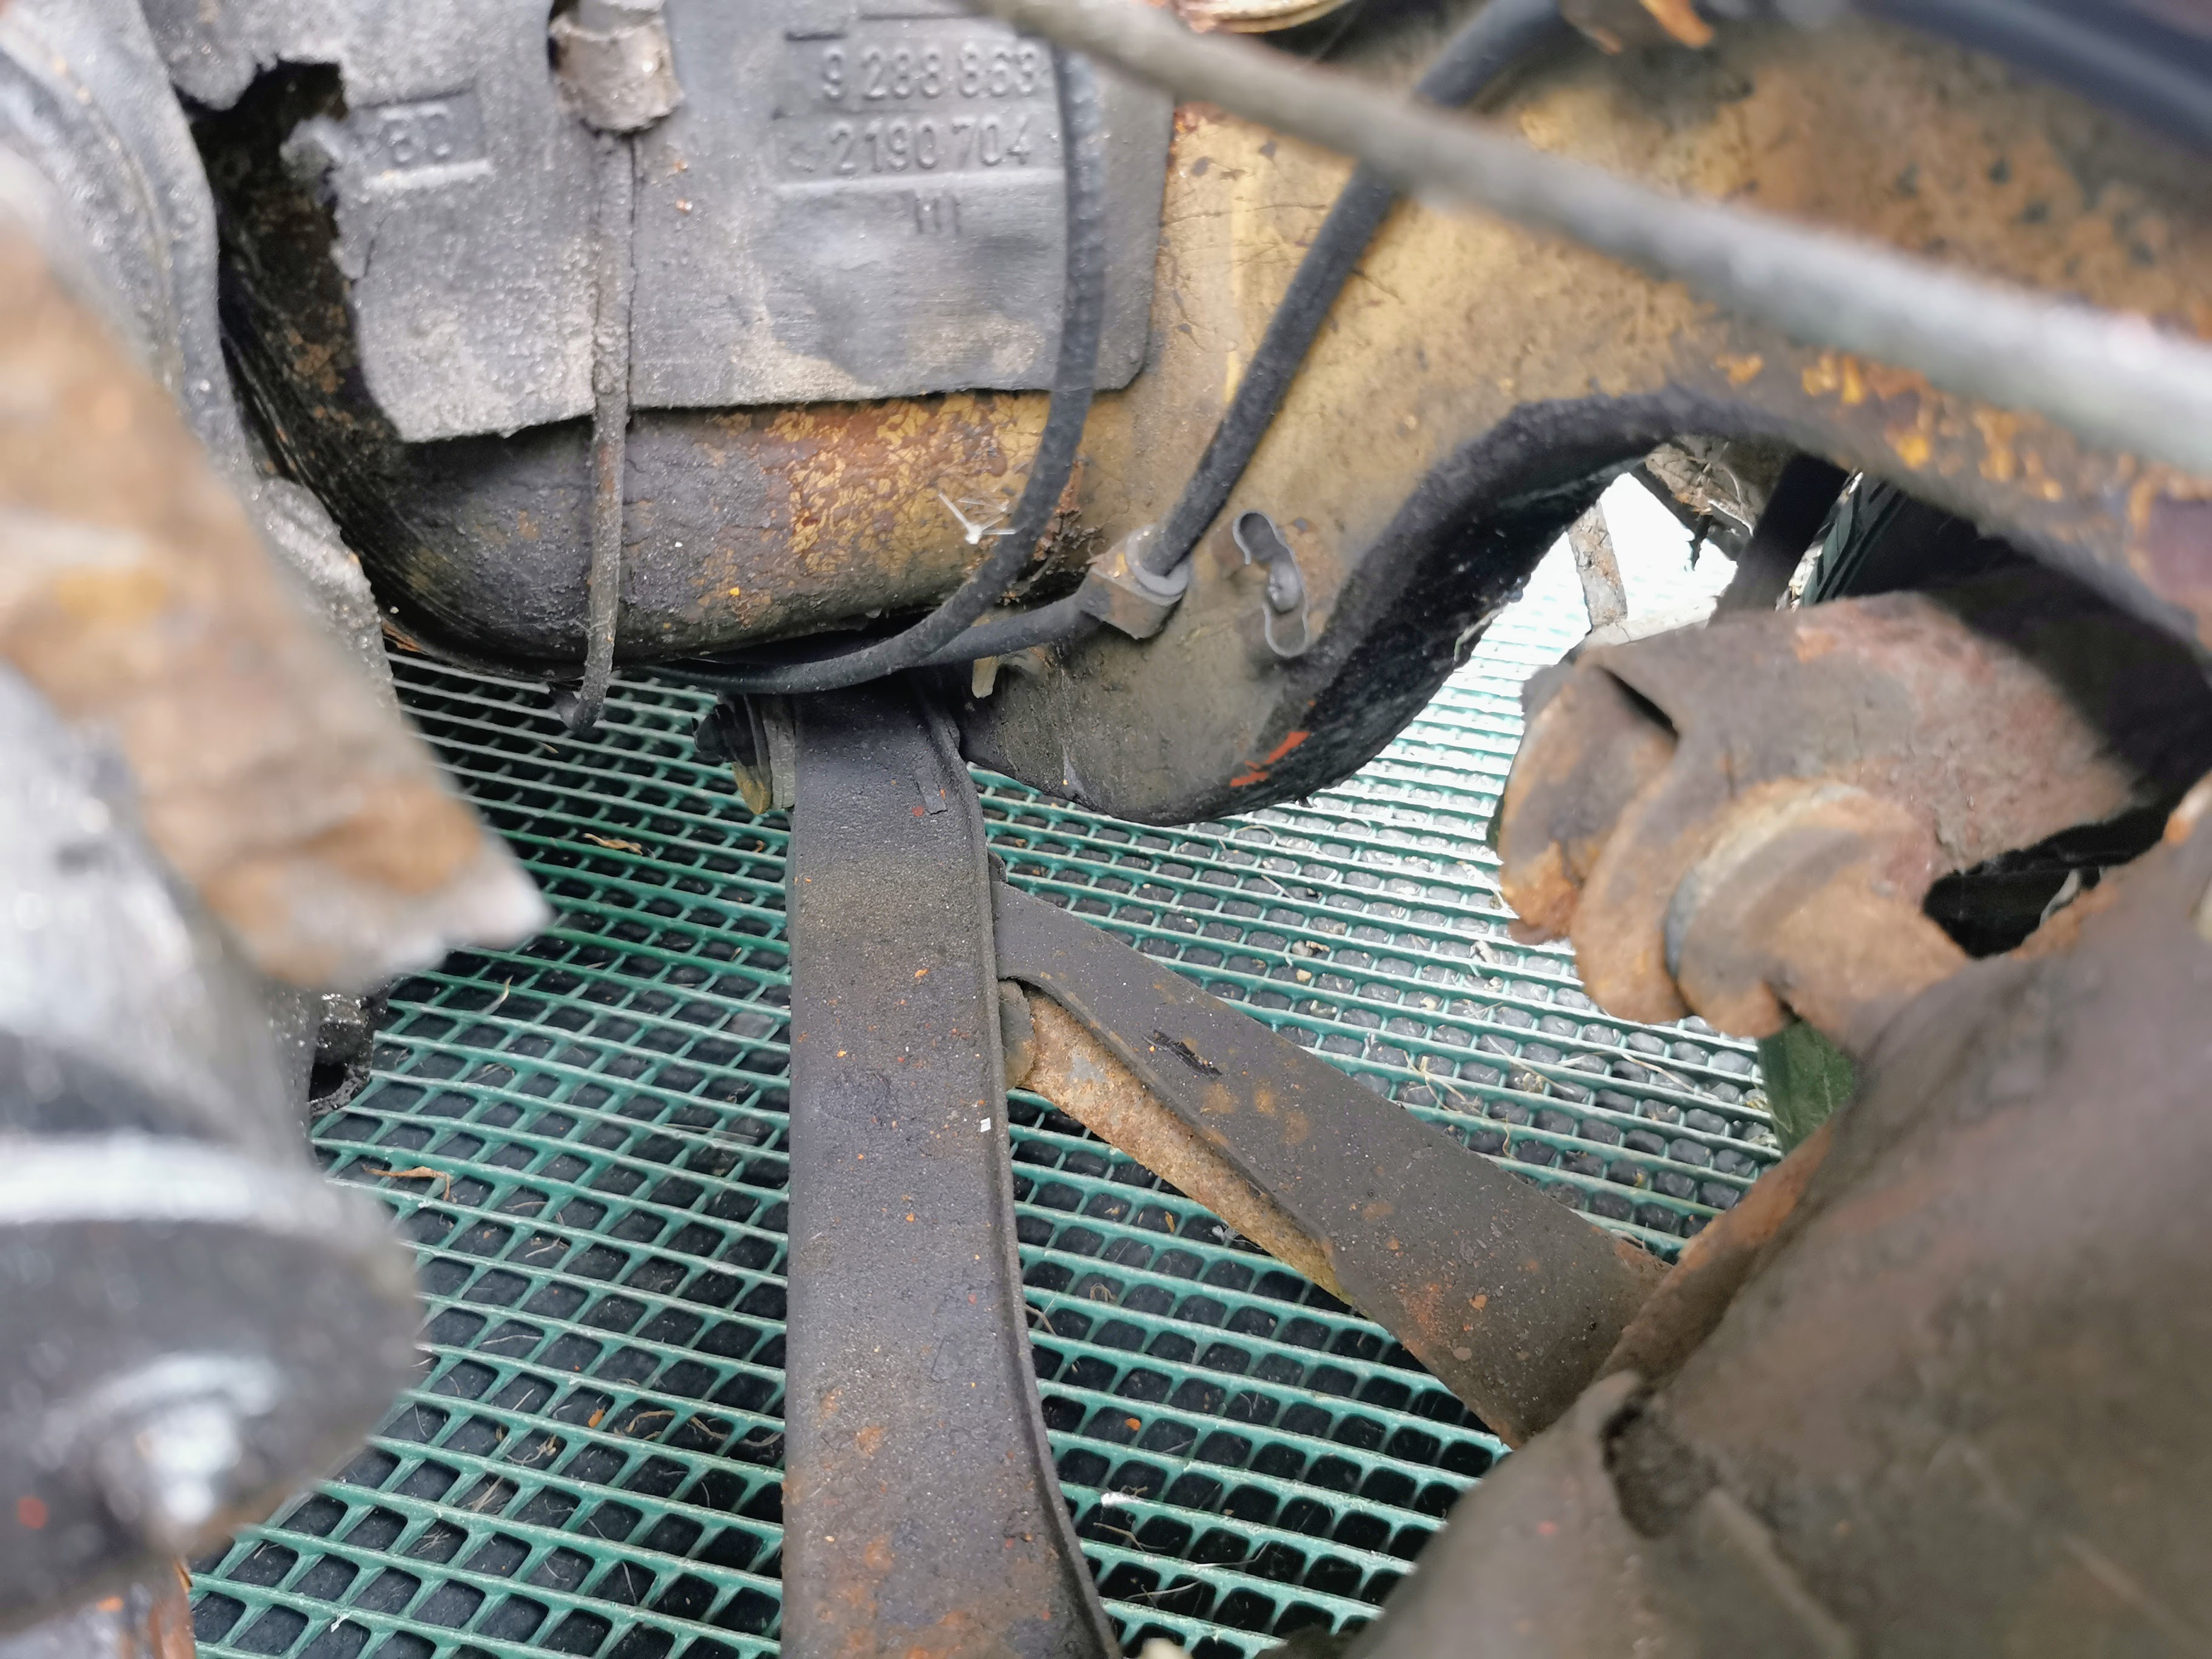
Rear suspension link mounts looked absolutely fine.
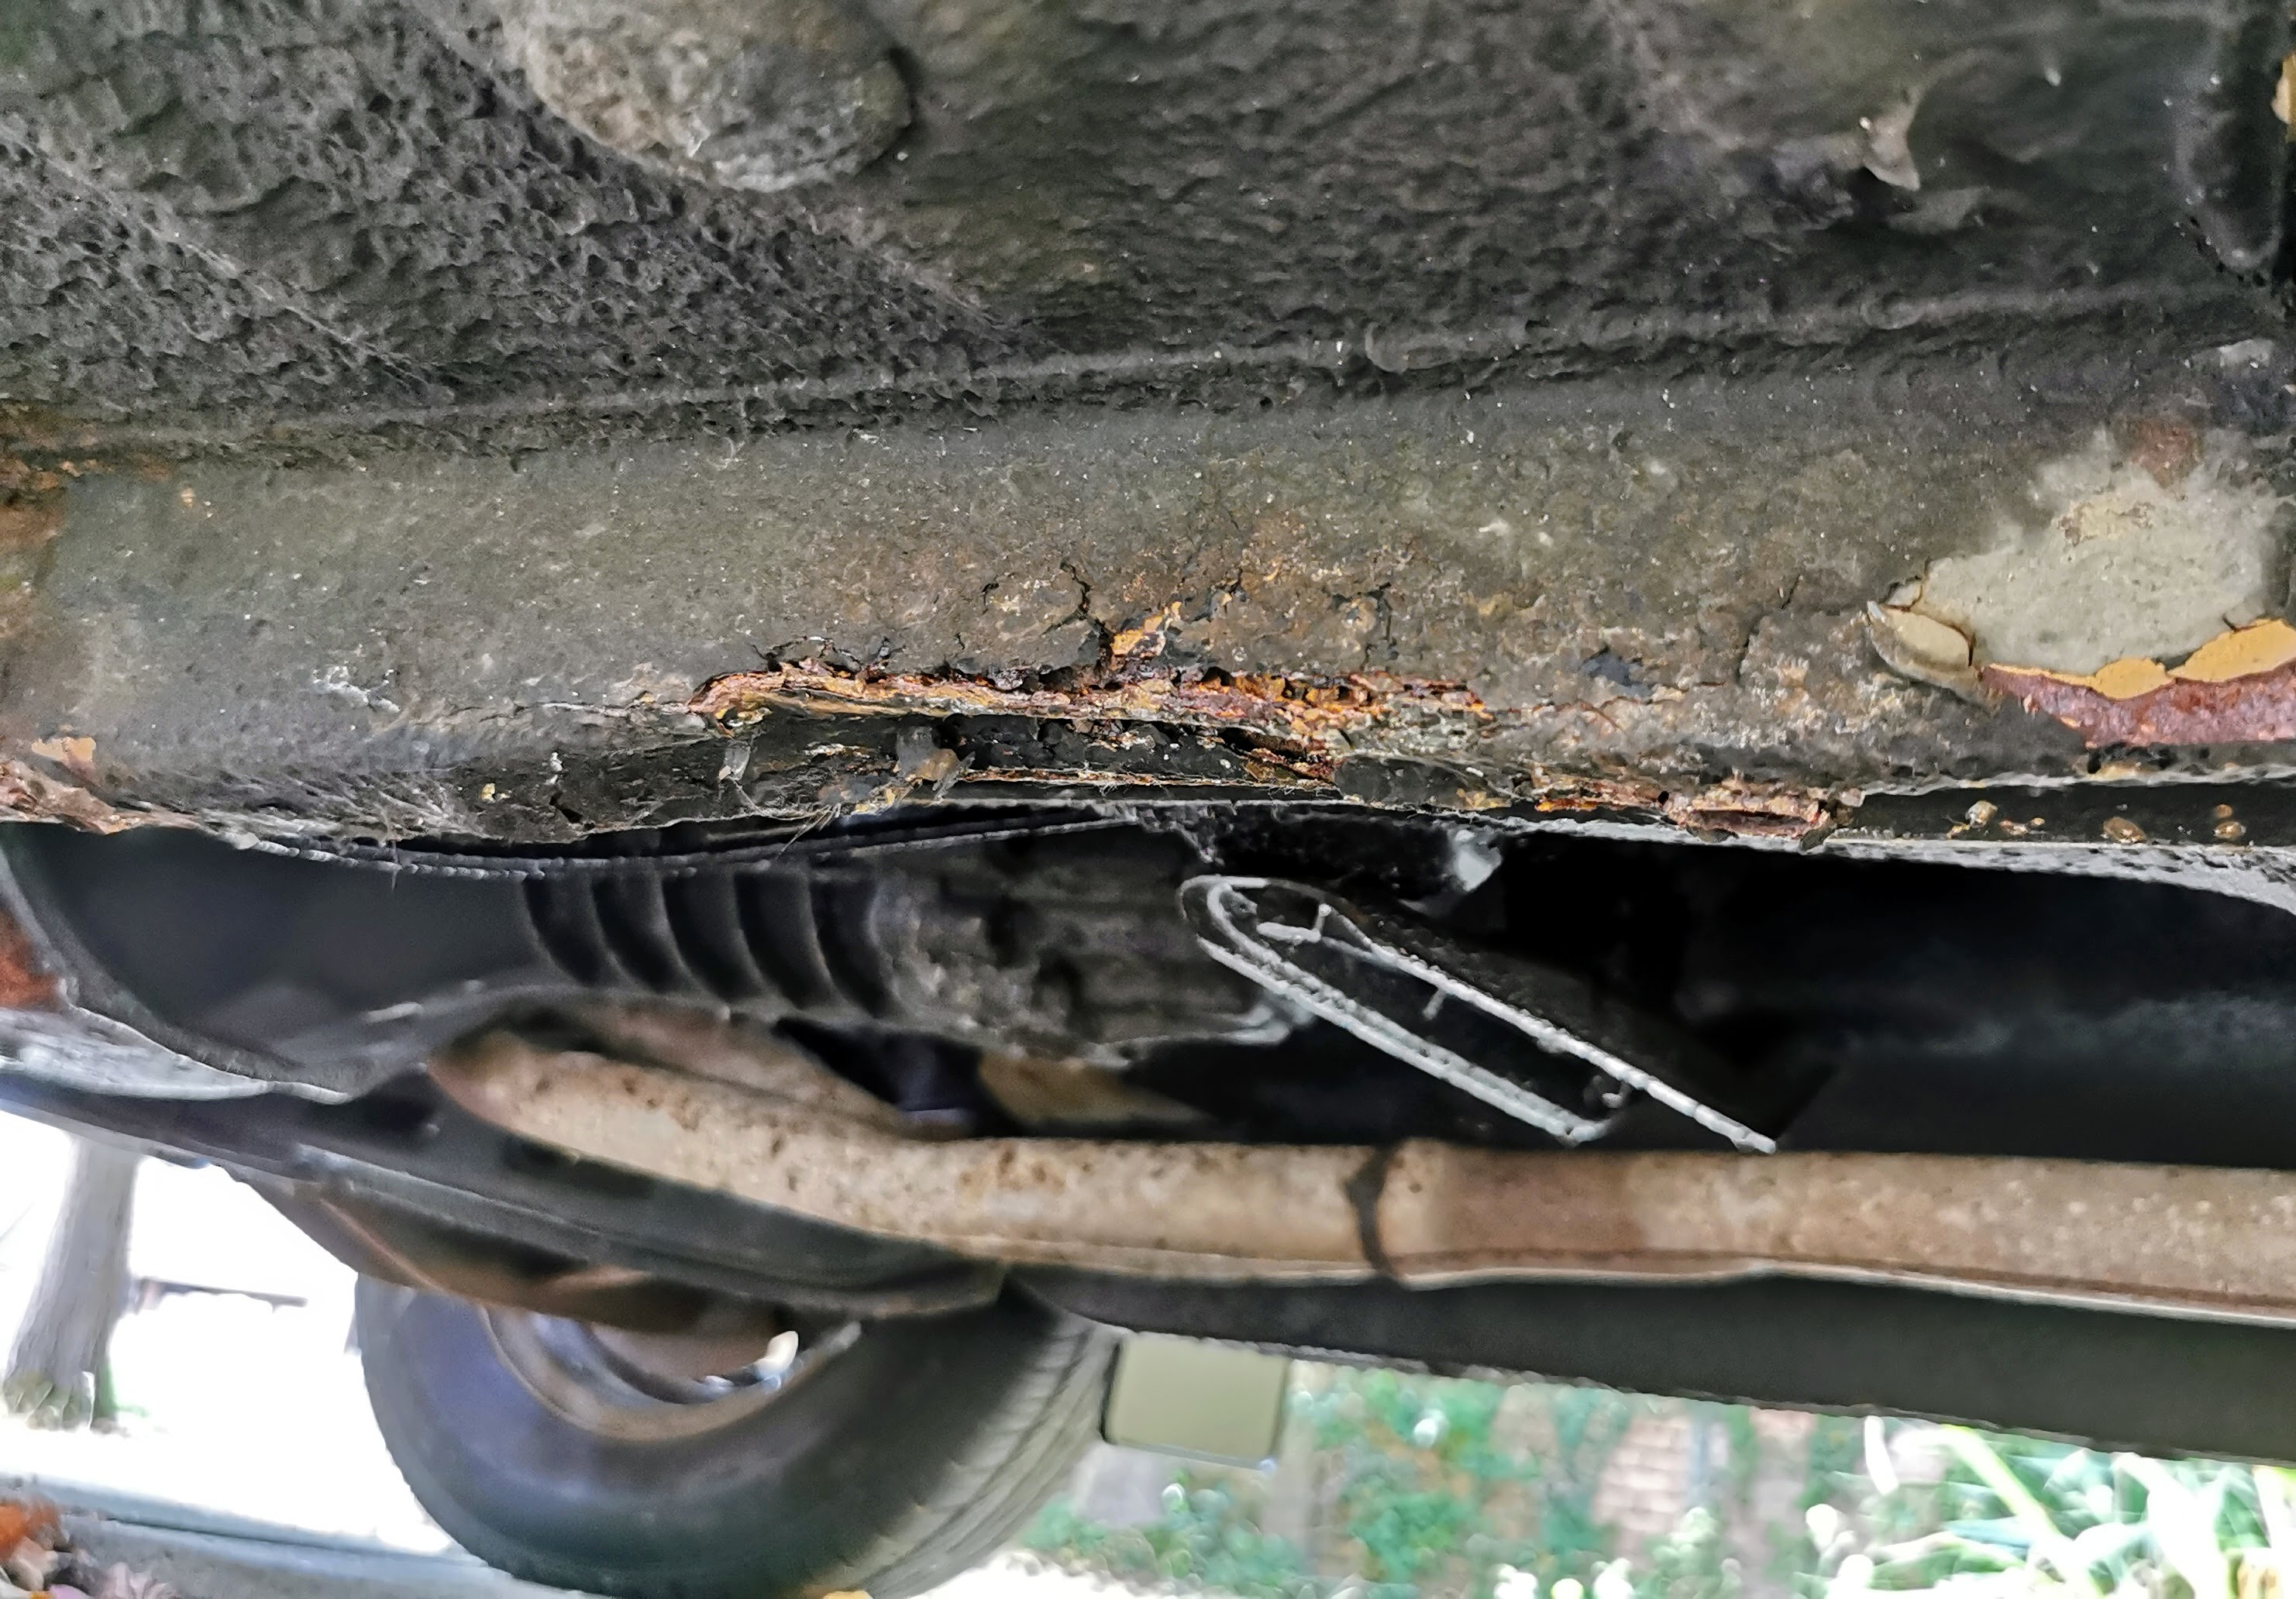
Rear of the sill didn't look quite so healthy - and obviously I can't see what's hiding behind those nice shiny stainless steel covers.
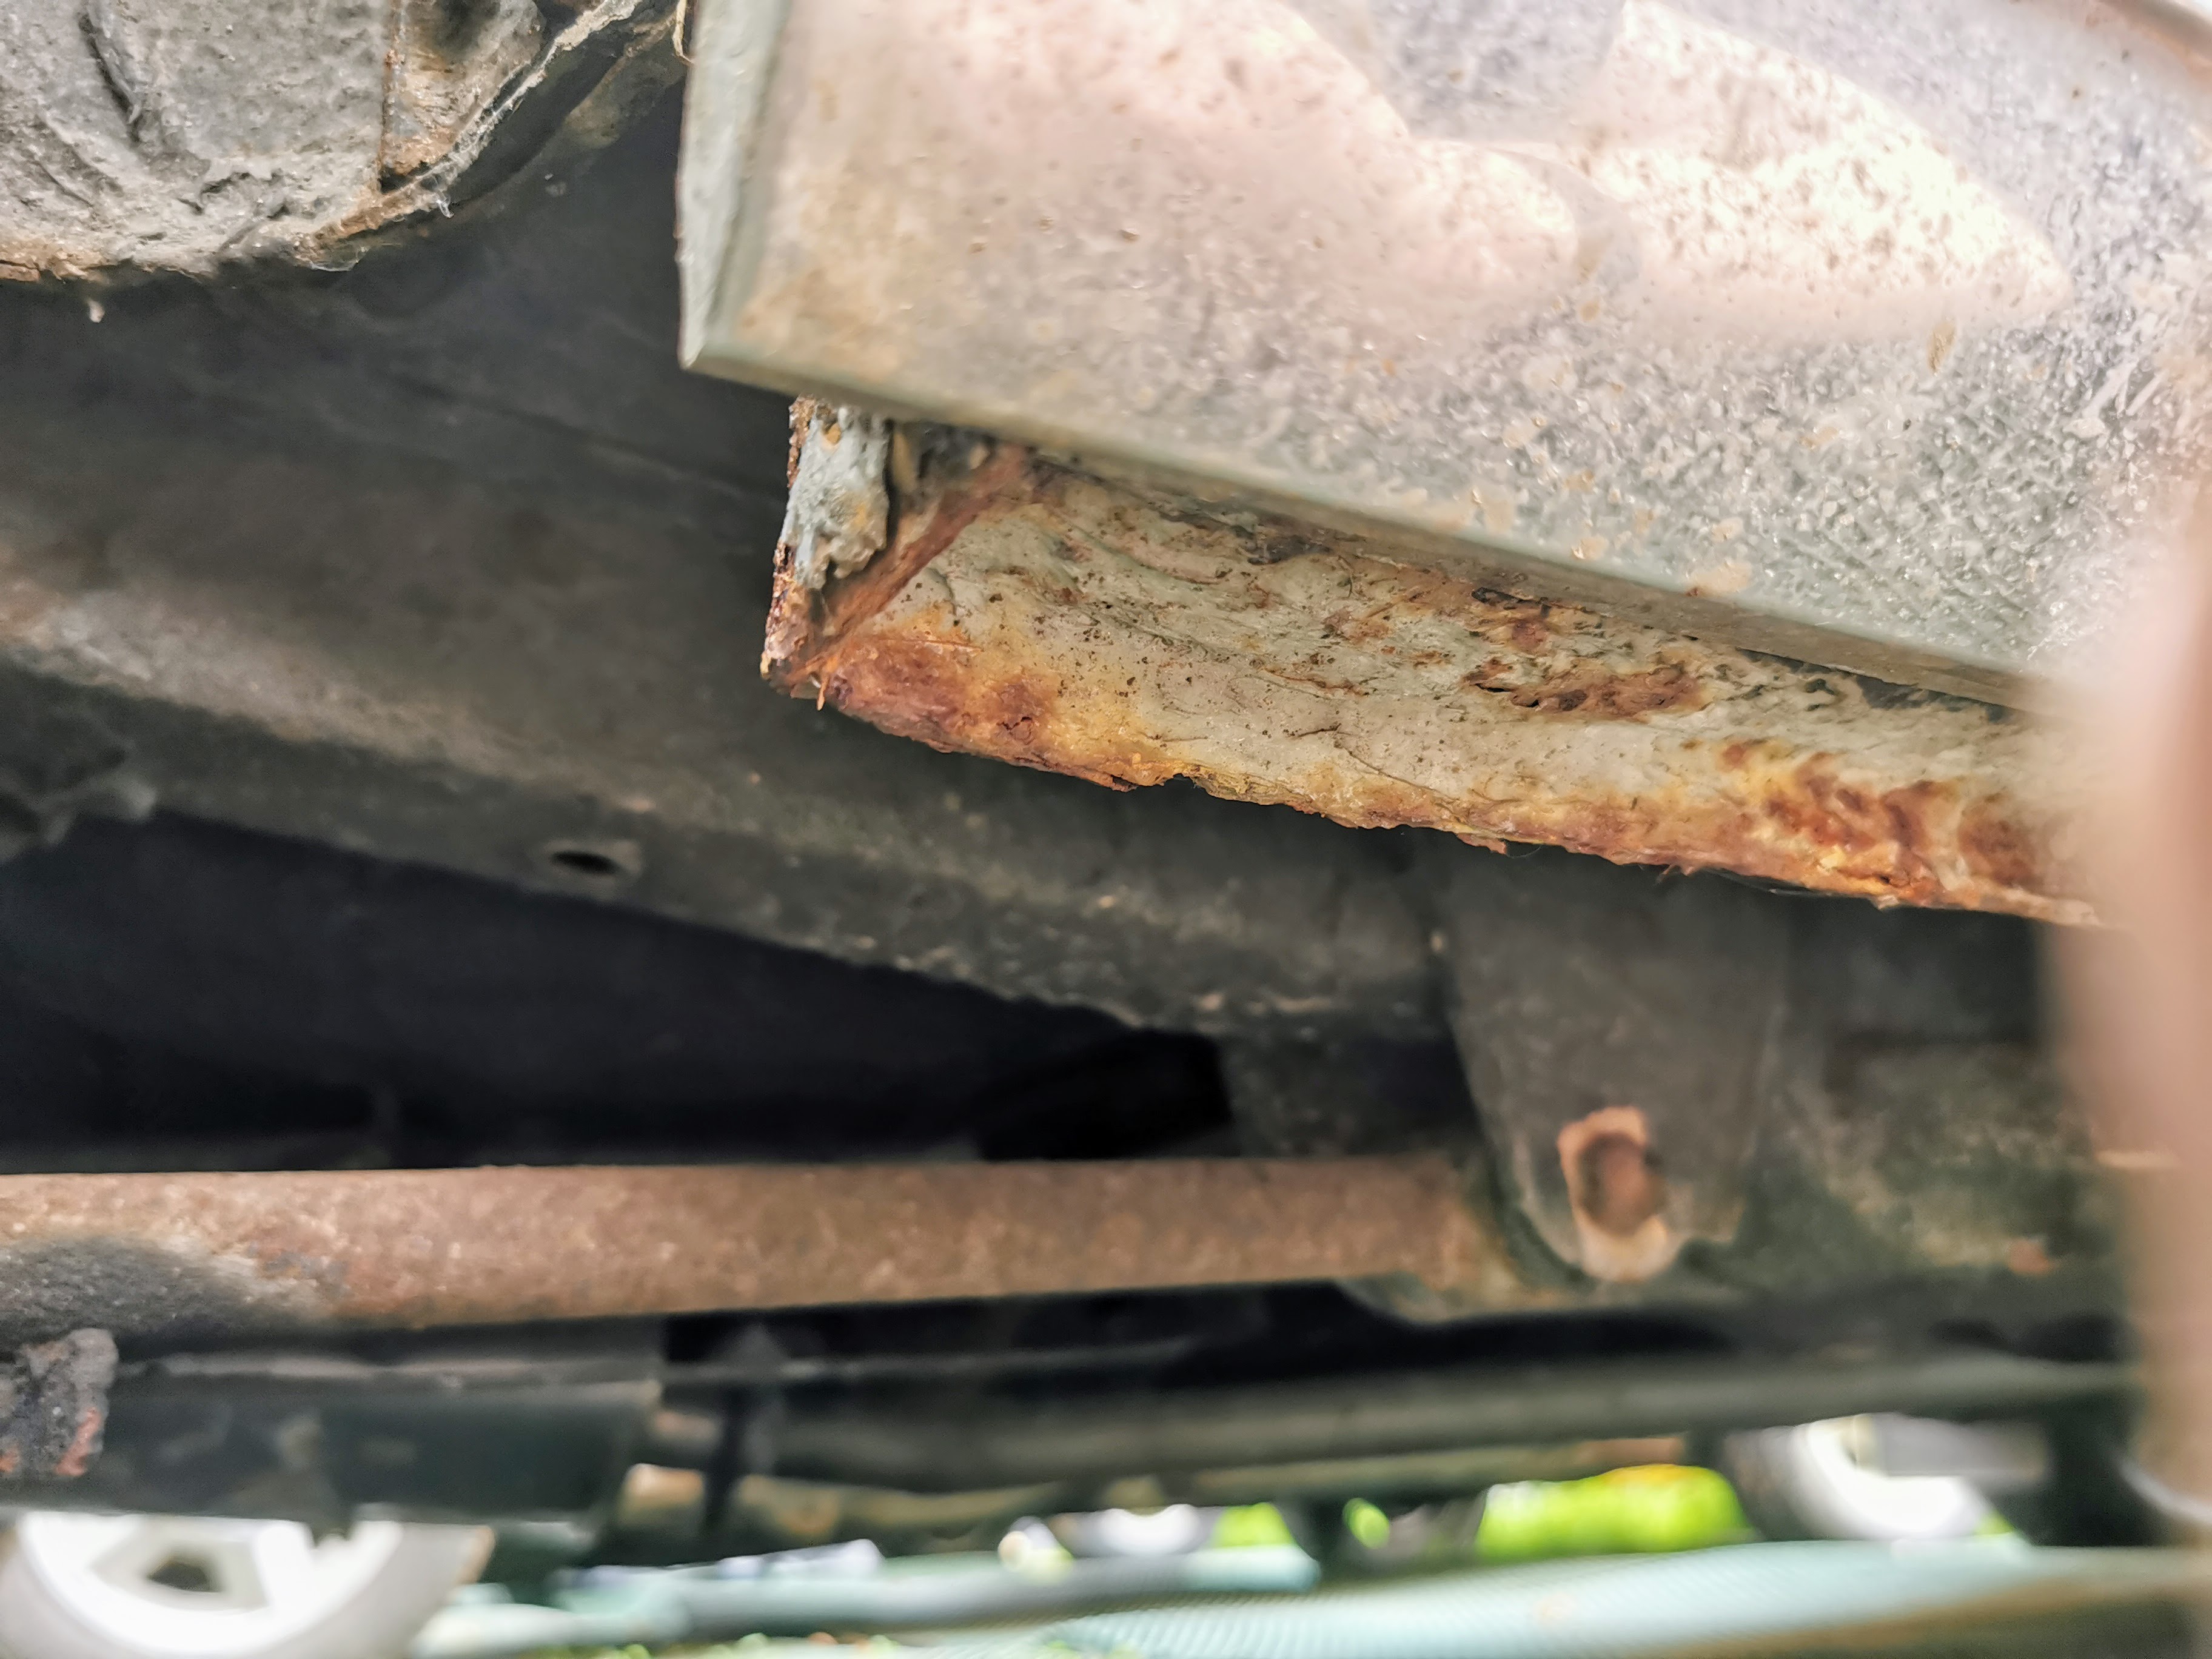
Crawling a bit further underneath so I could get a look at the back of this area unsurprisingly found a hole.

Not what you want to find, but in the grand scheme of things not the worst repair to do. Obviously it will be somewhat unnerving going after this with the grinder to see how far we need to cut back to find good metal though.
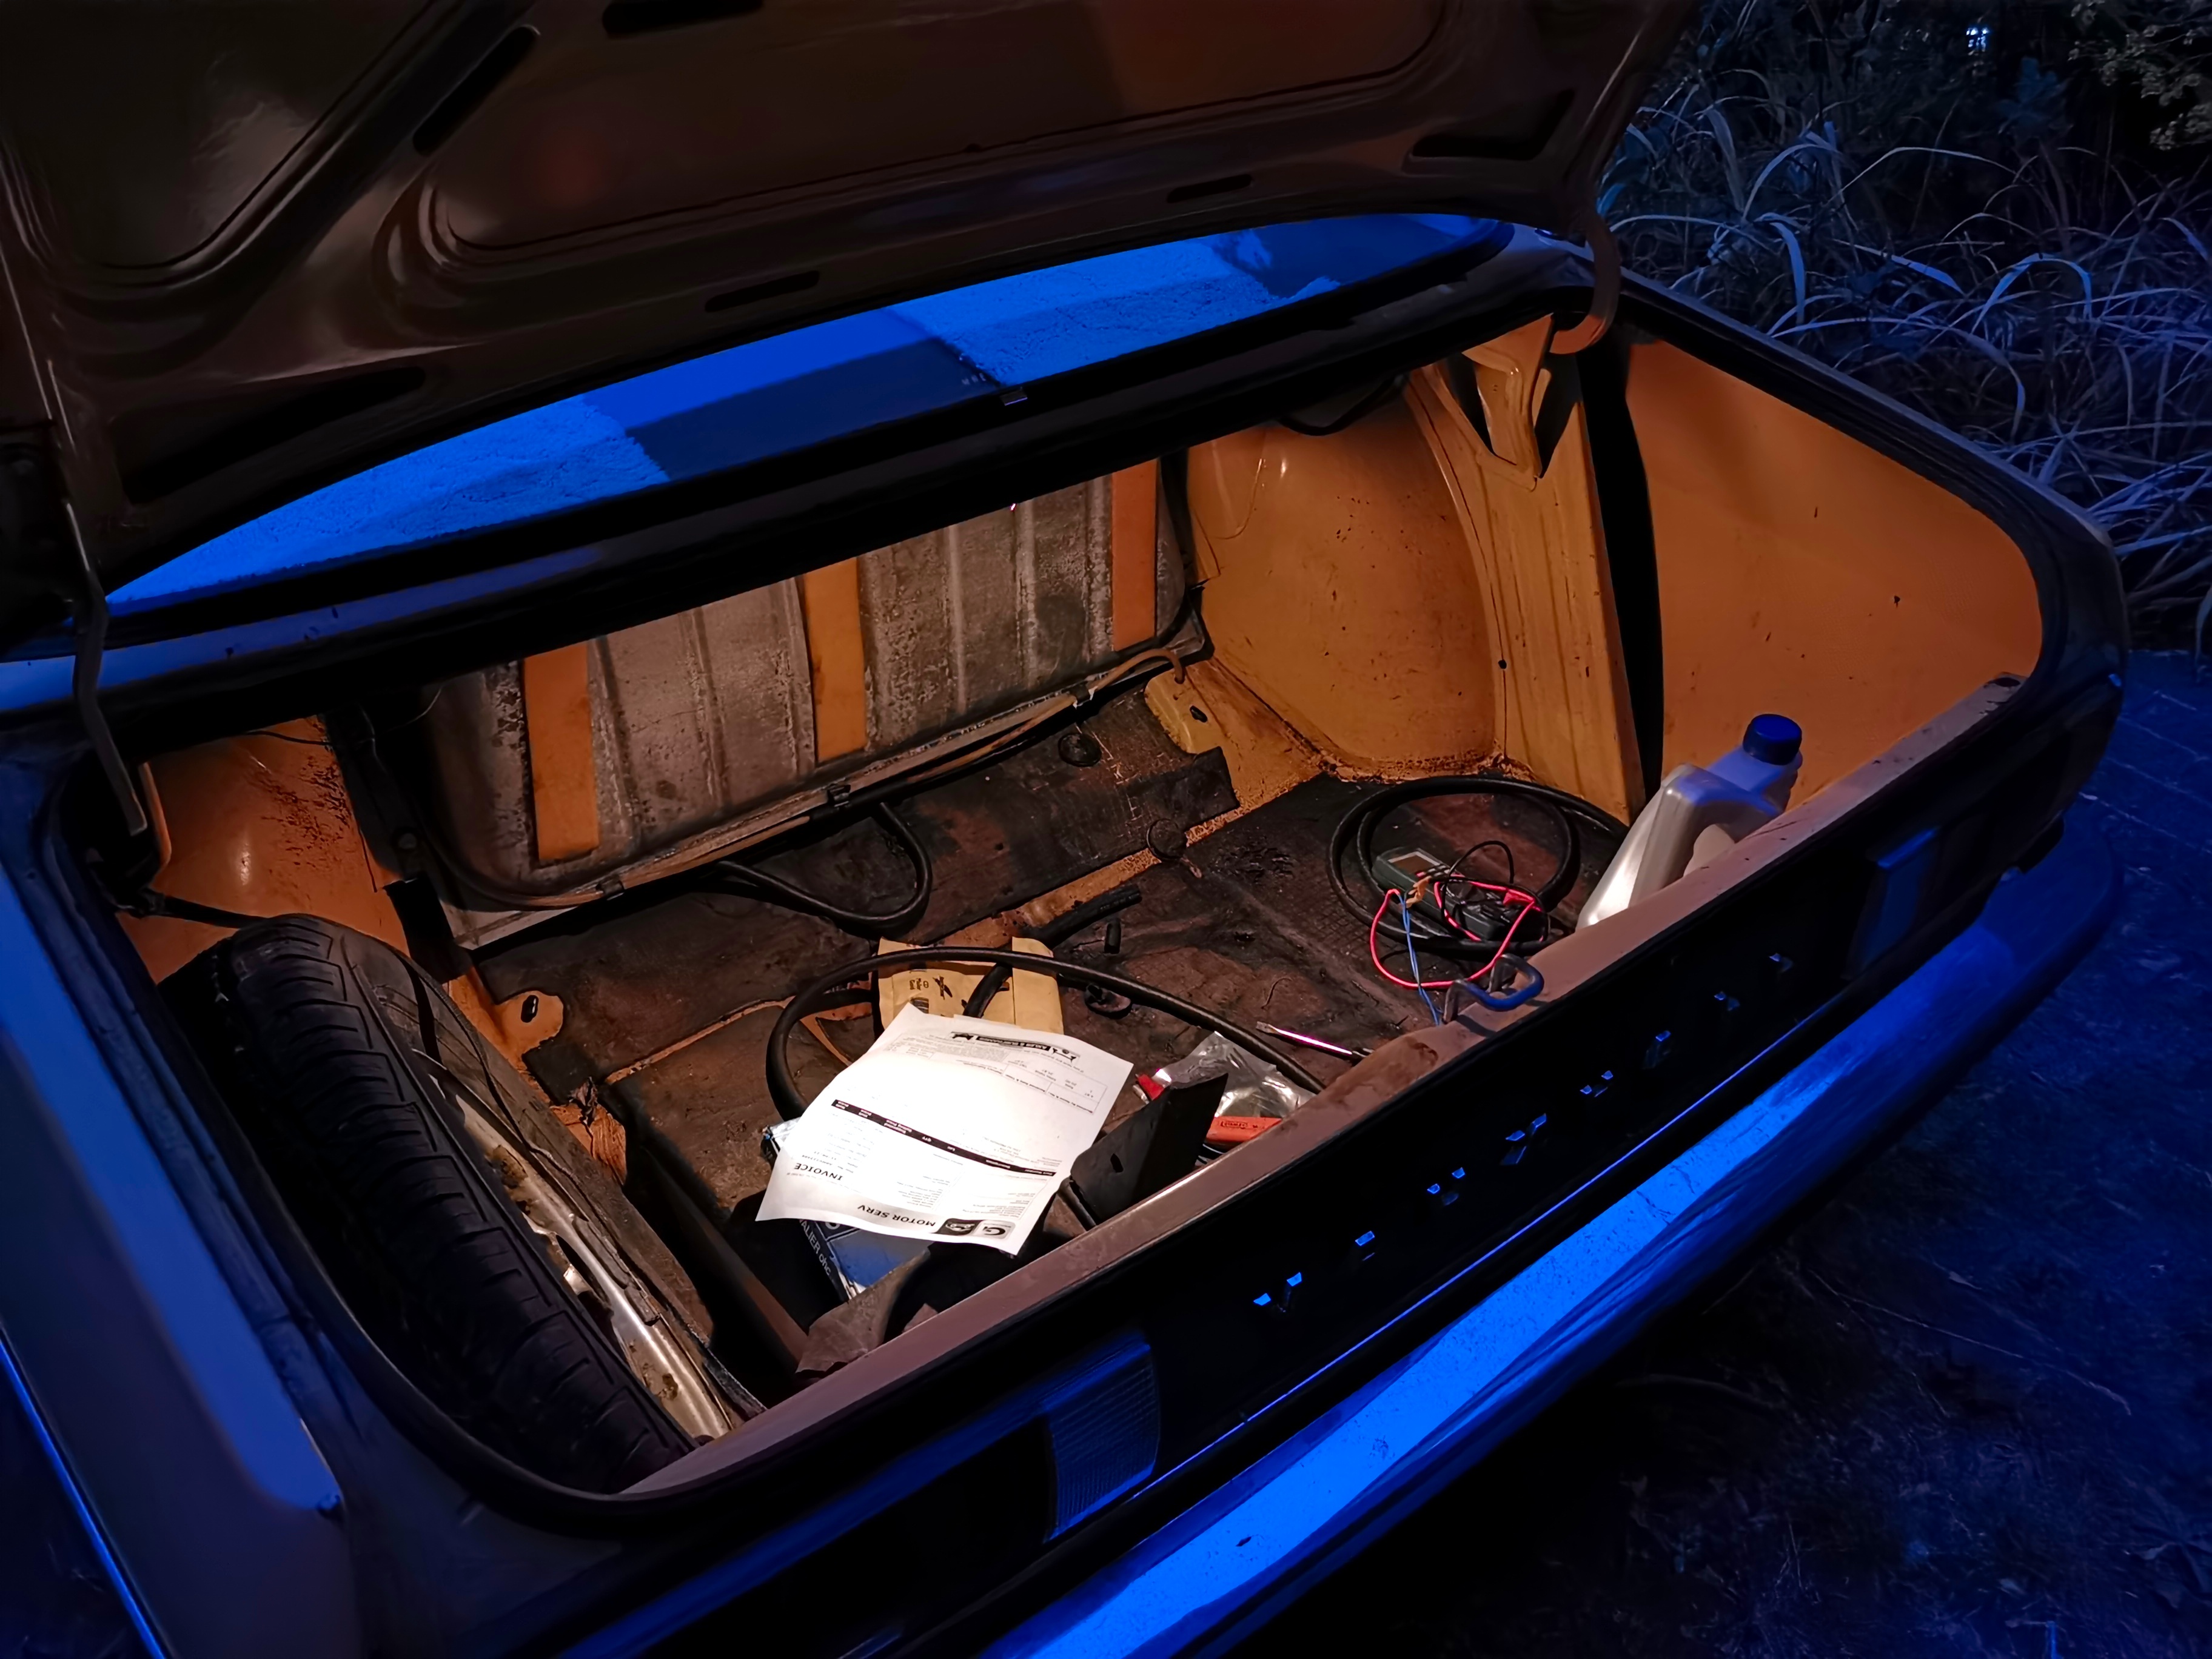
Boot floor looked in really good shape compared to my expectations - though we are rather obviously missing the rear exhaust silencer.
No signs of it blowing out along the rear body to floor join.
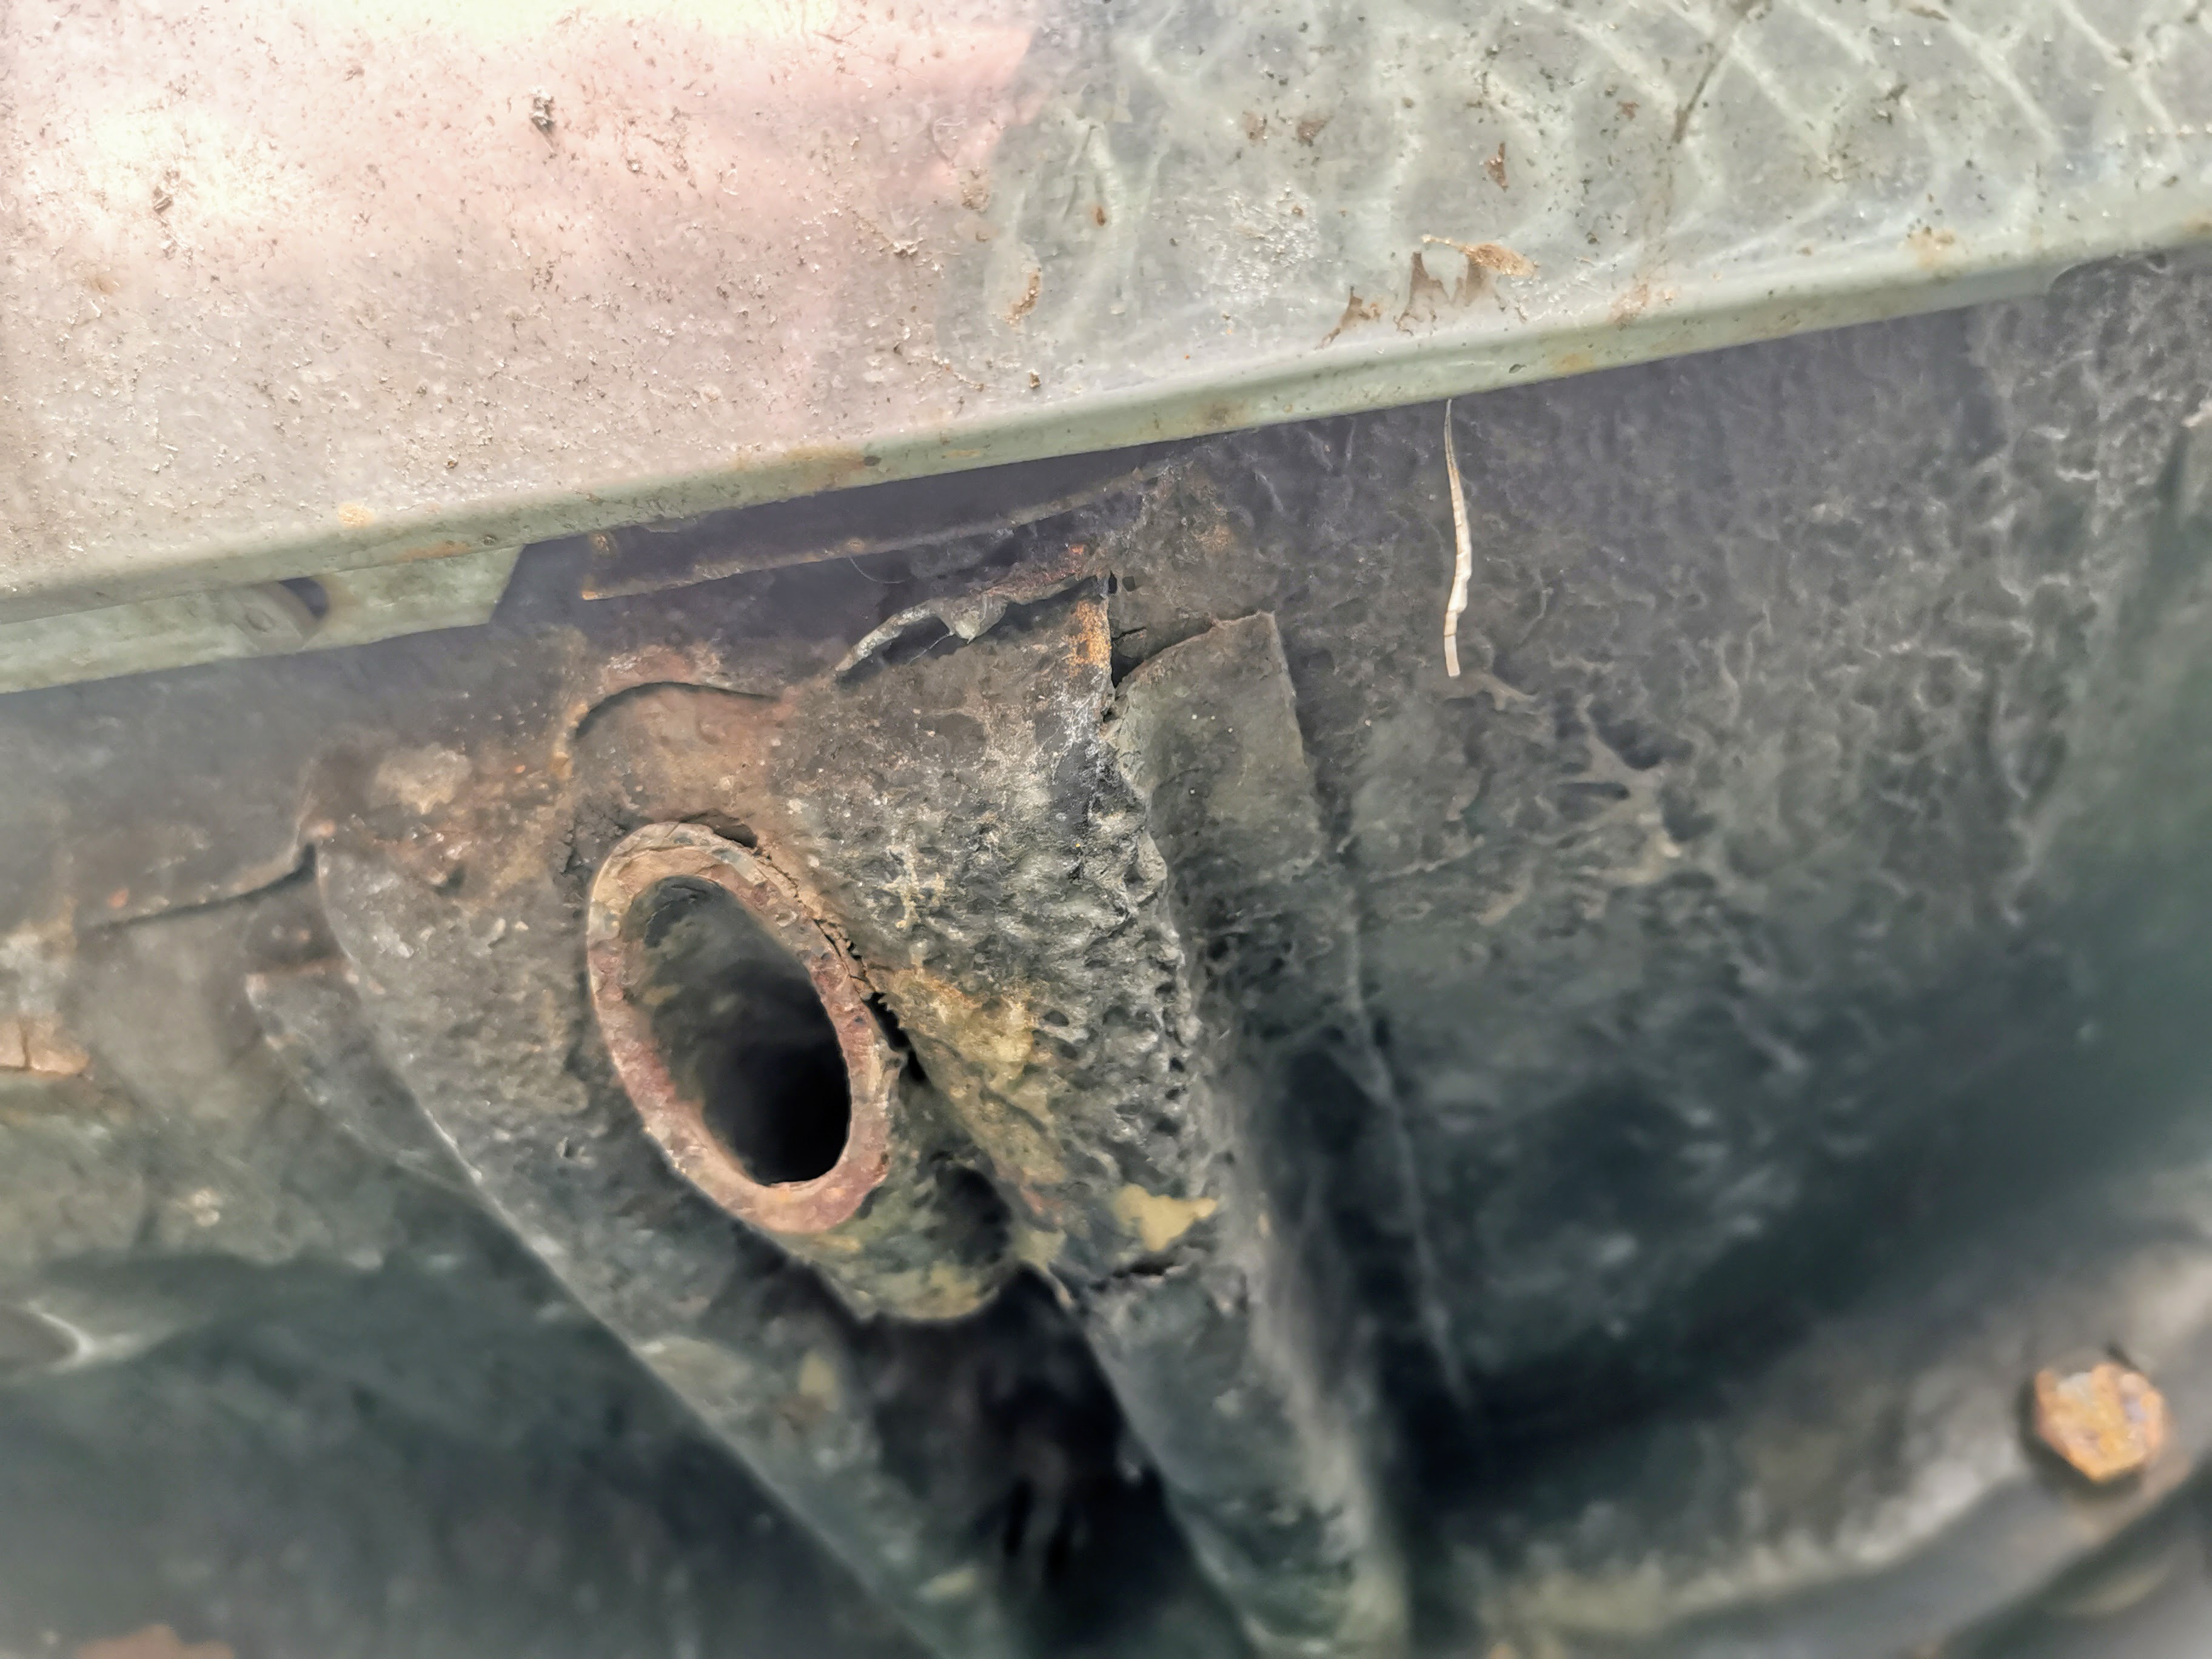
The nearside rear end of the inner sill looks in a lot better shape than on the offside, though the wheel tub itself is a bit worse.
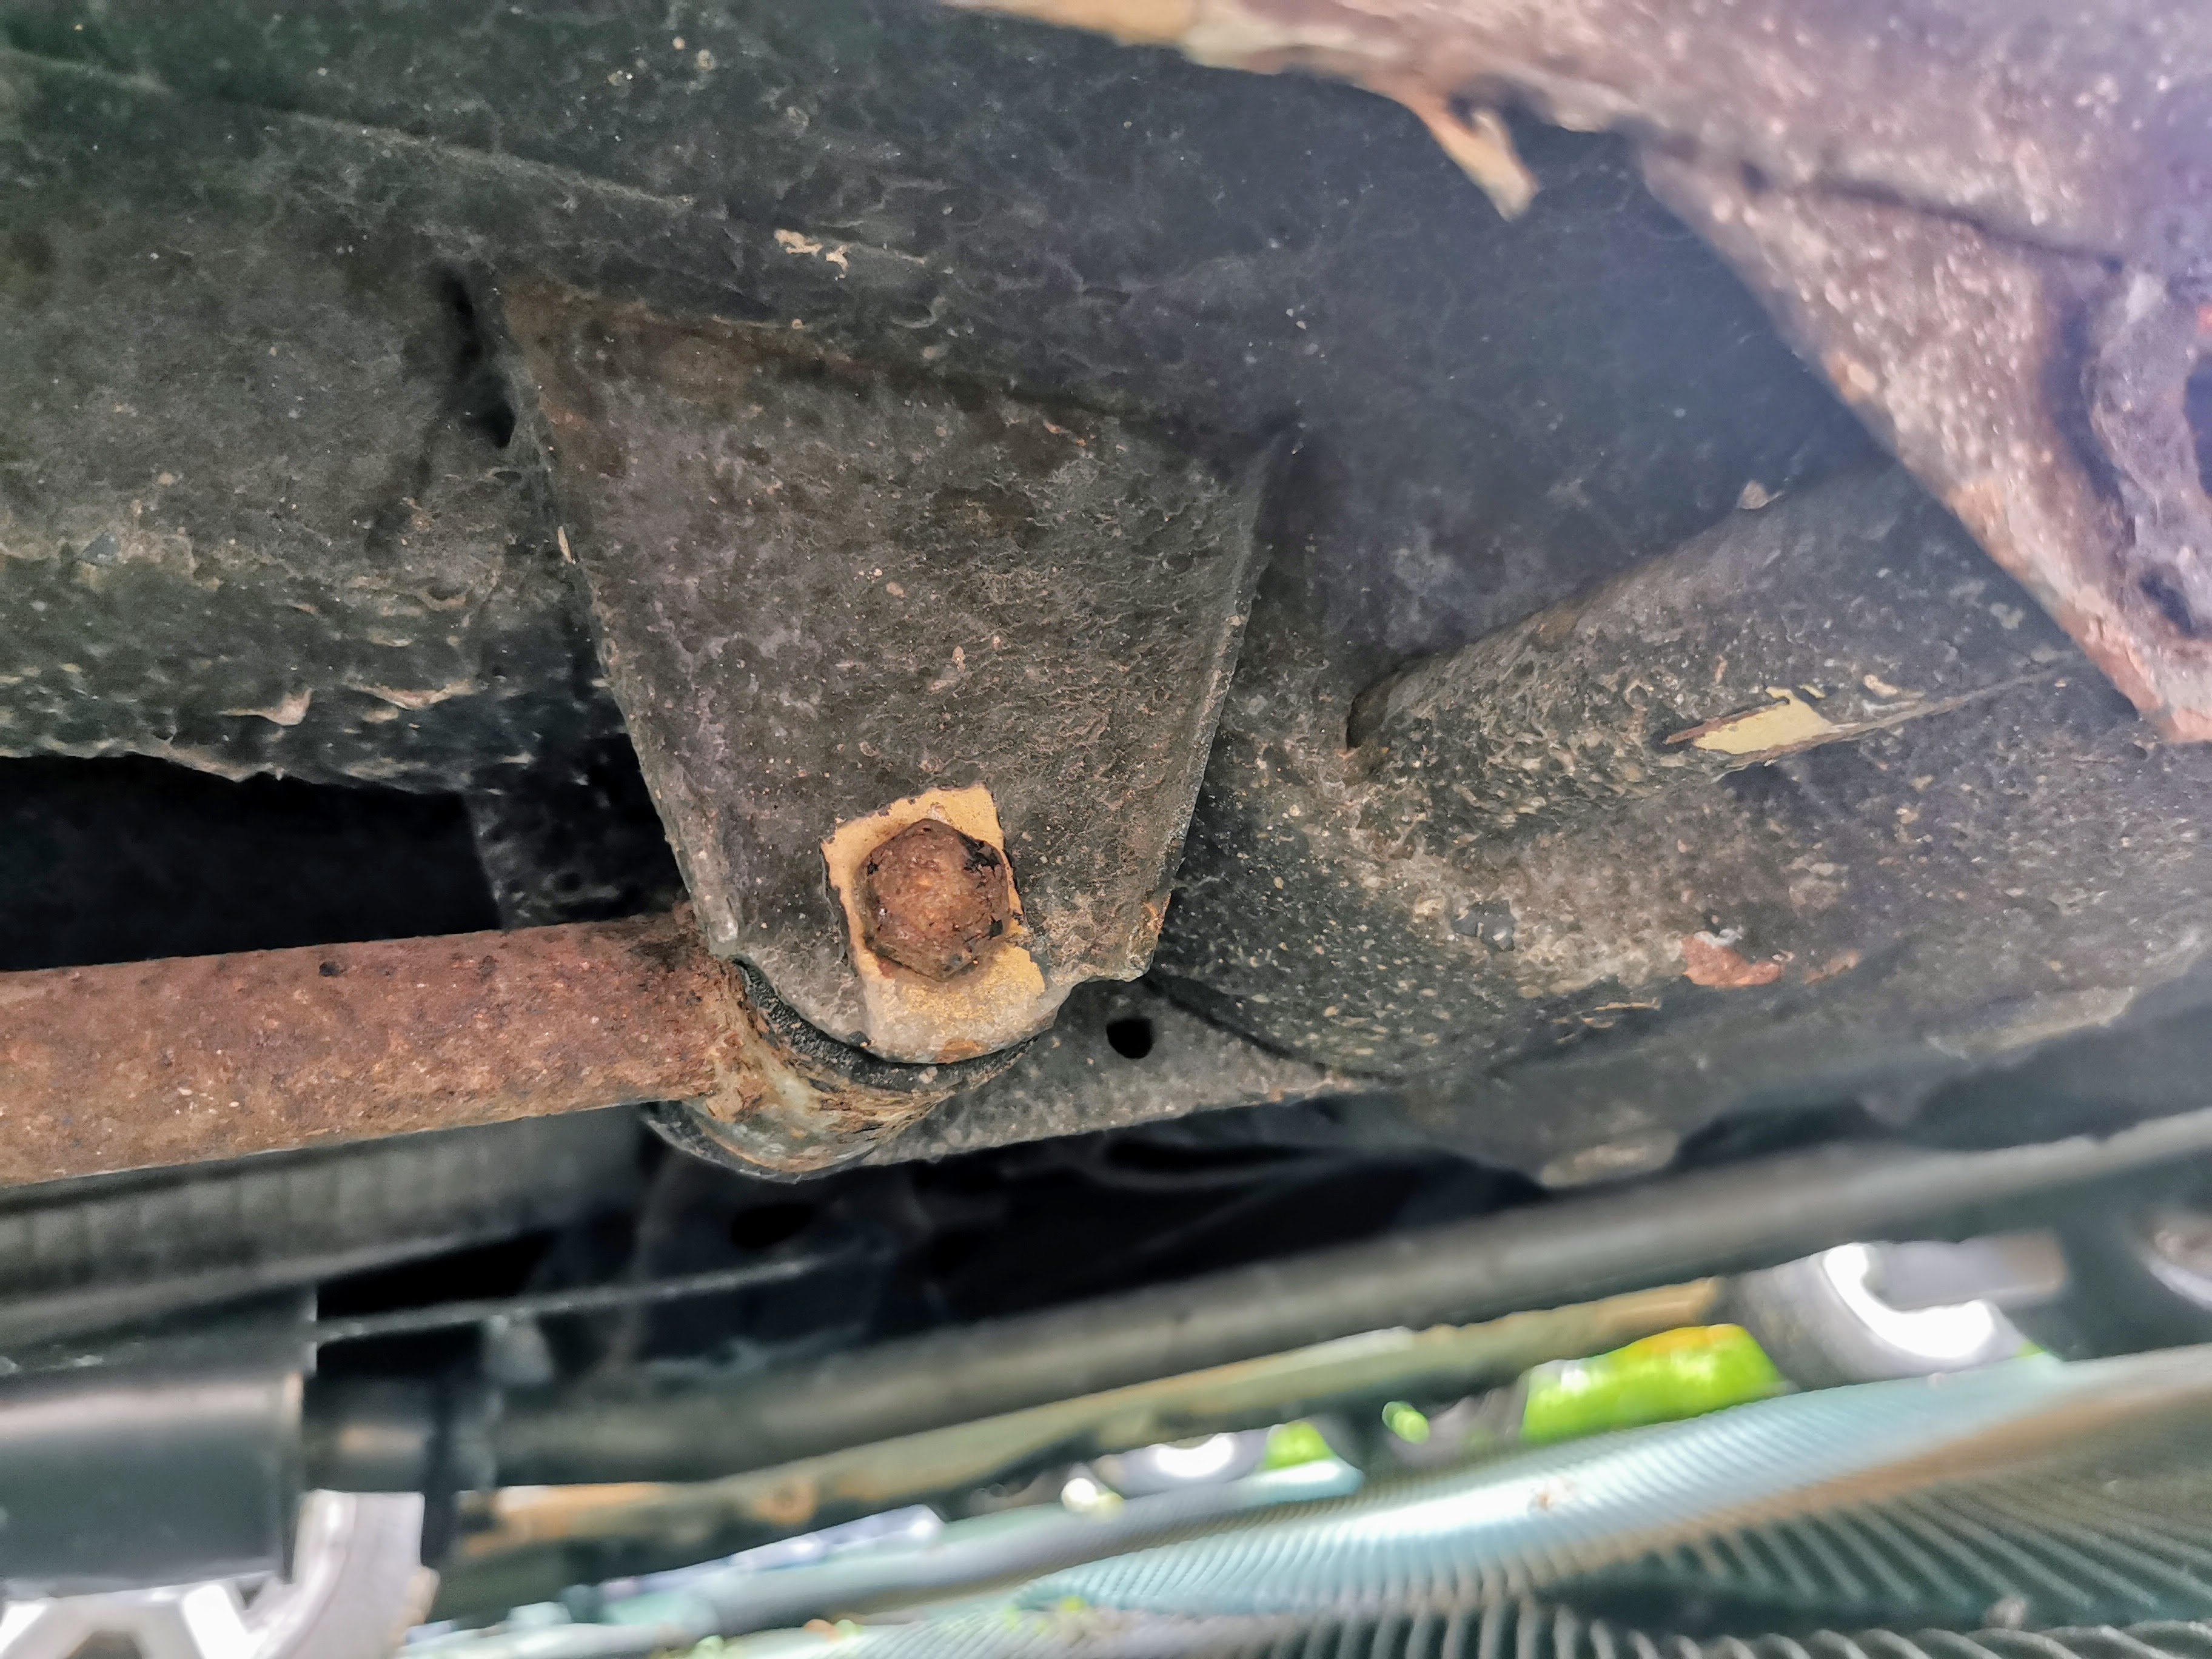
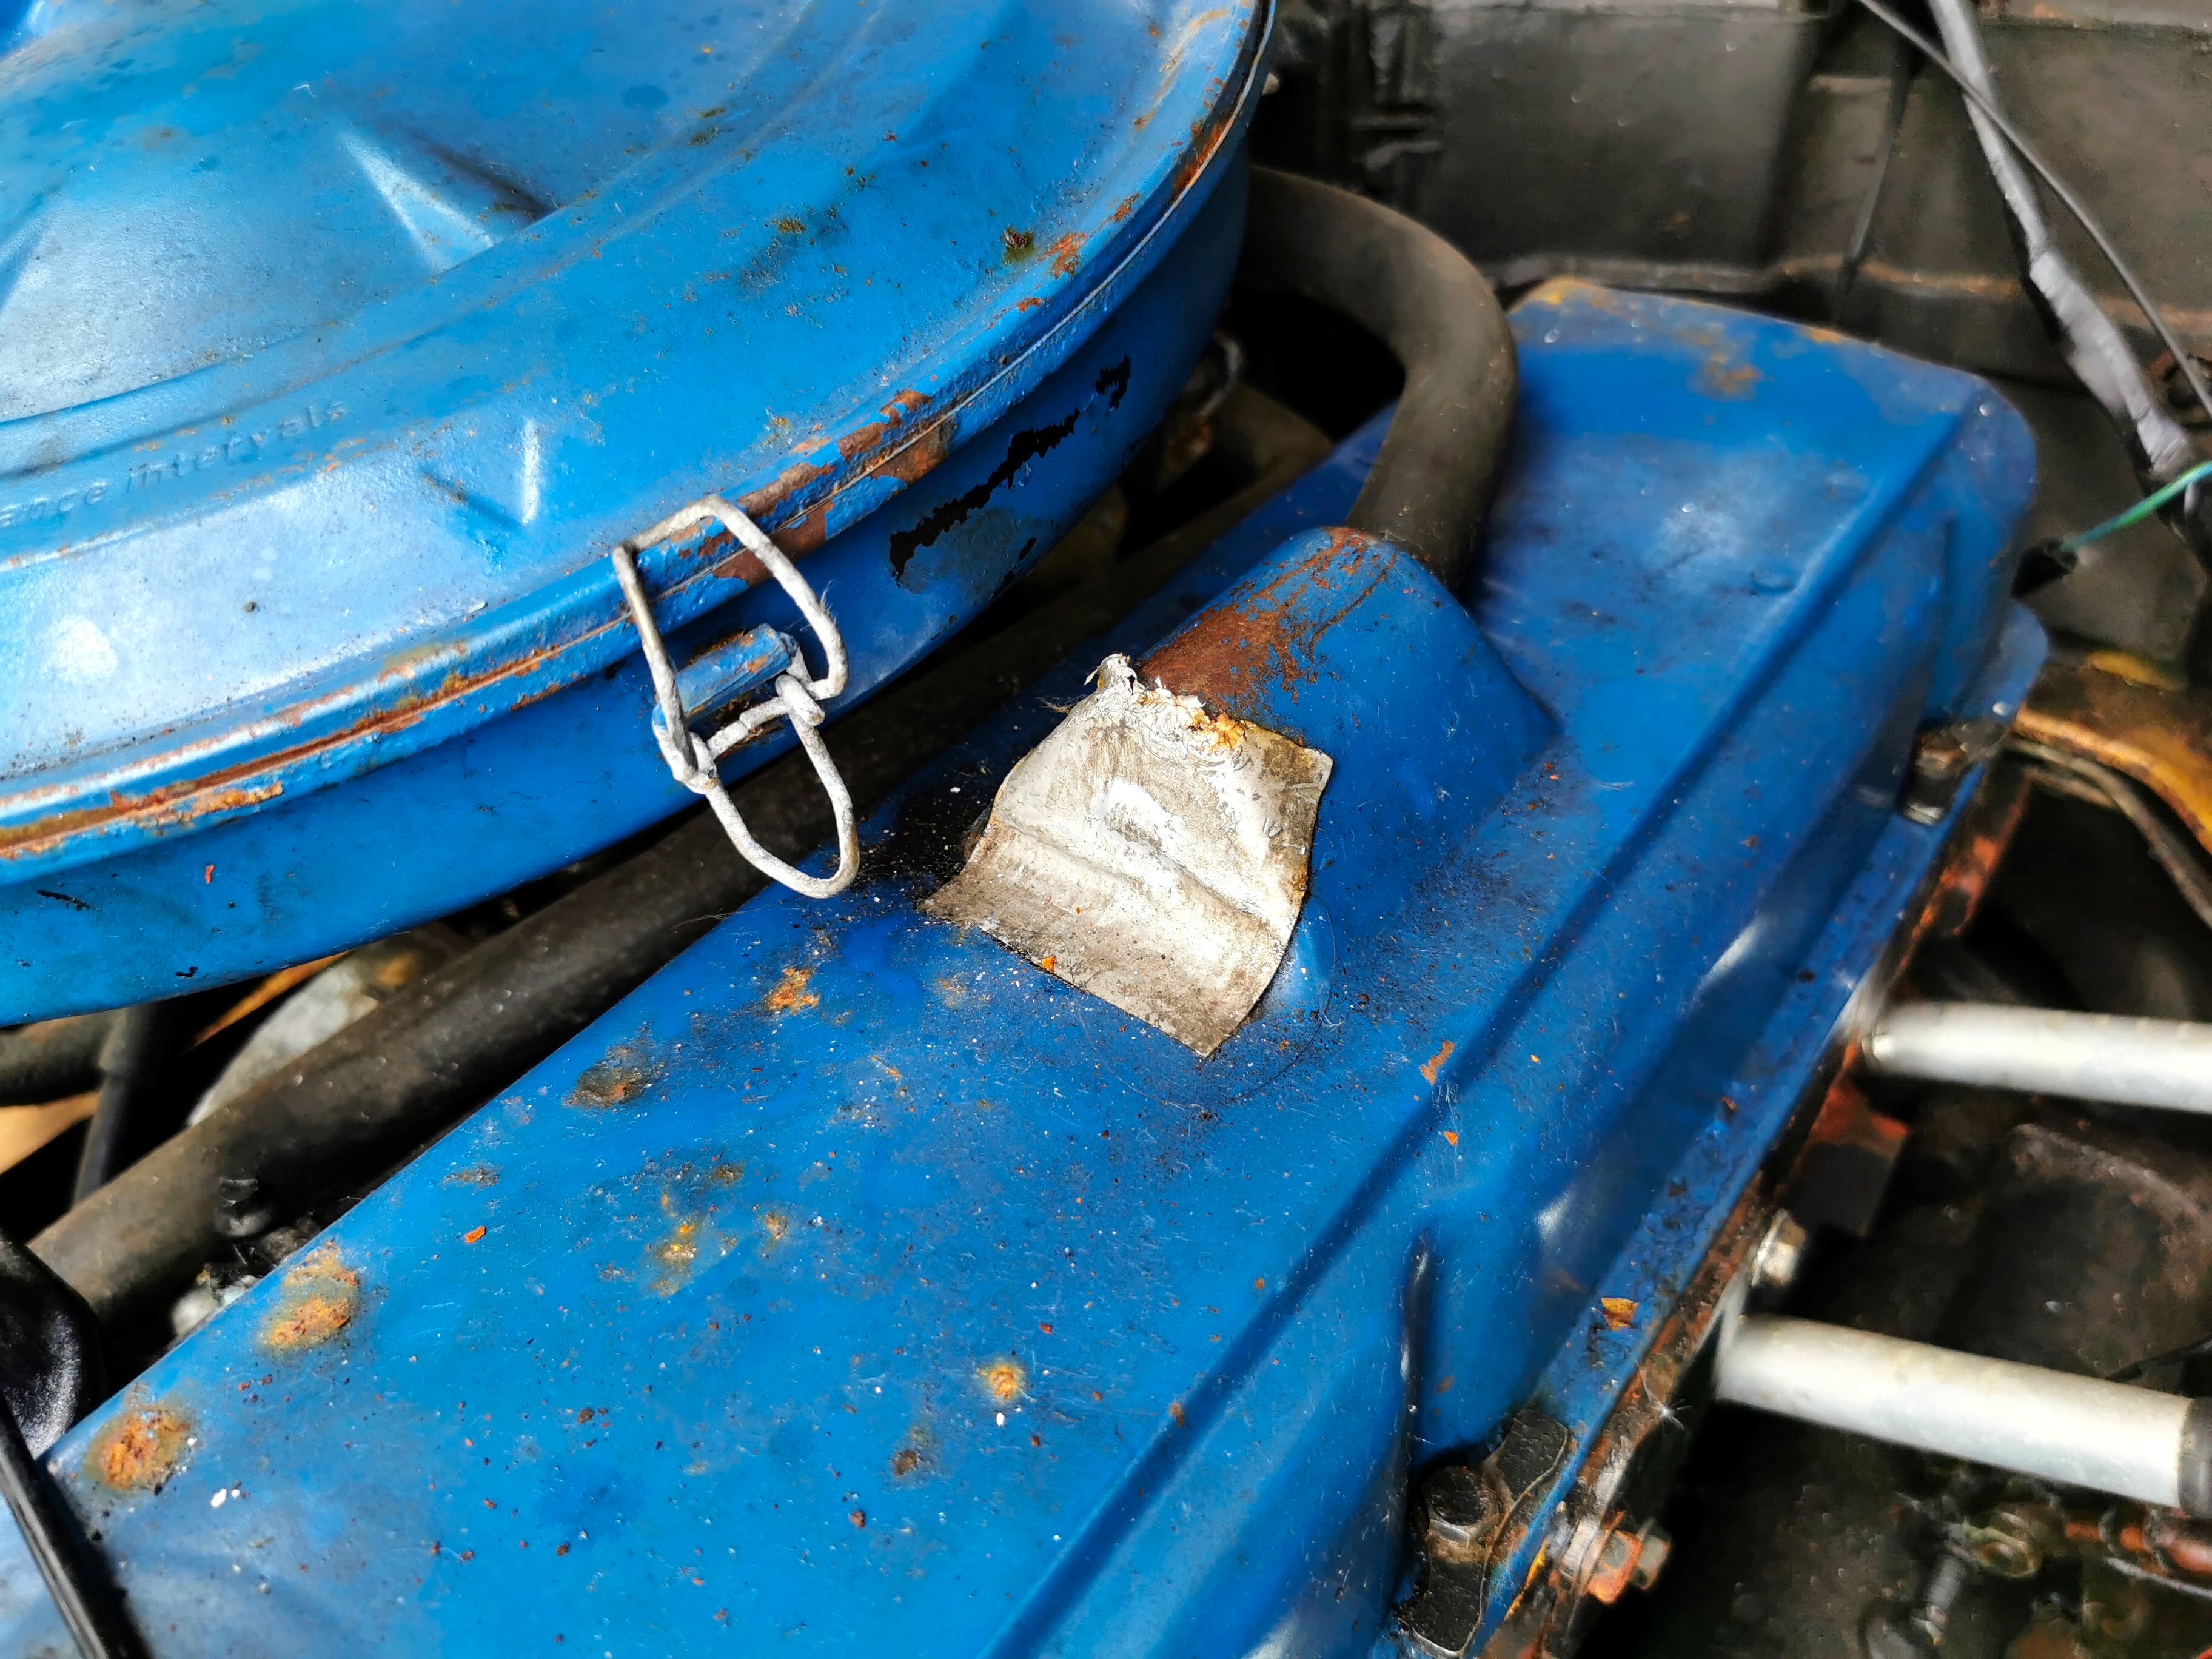
Now we move on to the most concerning bit of corrosion on the car - on the nearside front chassis swan neck. This area has had the only prior bodywork repair I can see on the car, and it appears that this original repair has blown out along the seam.
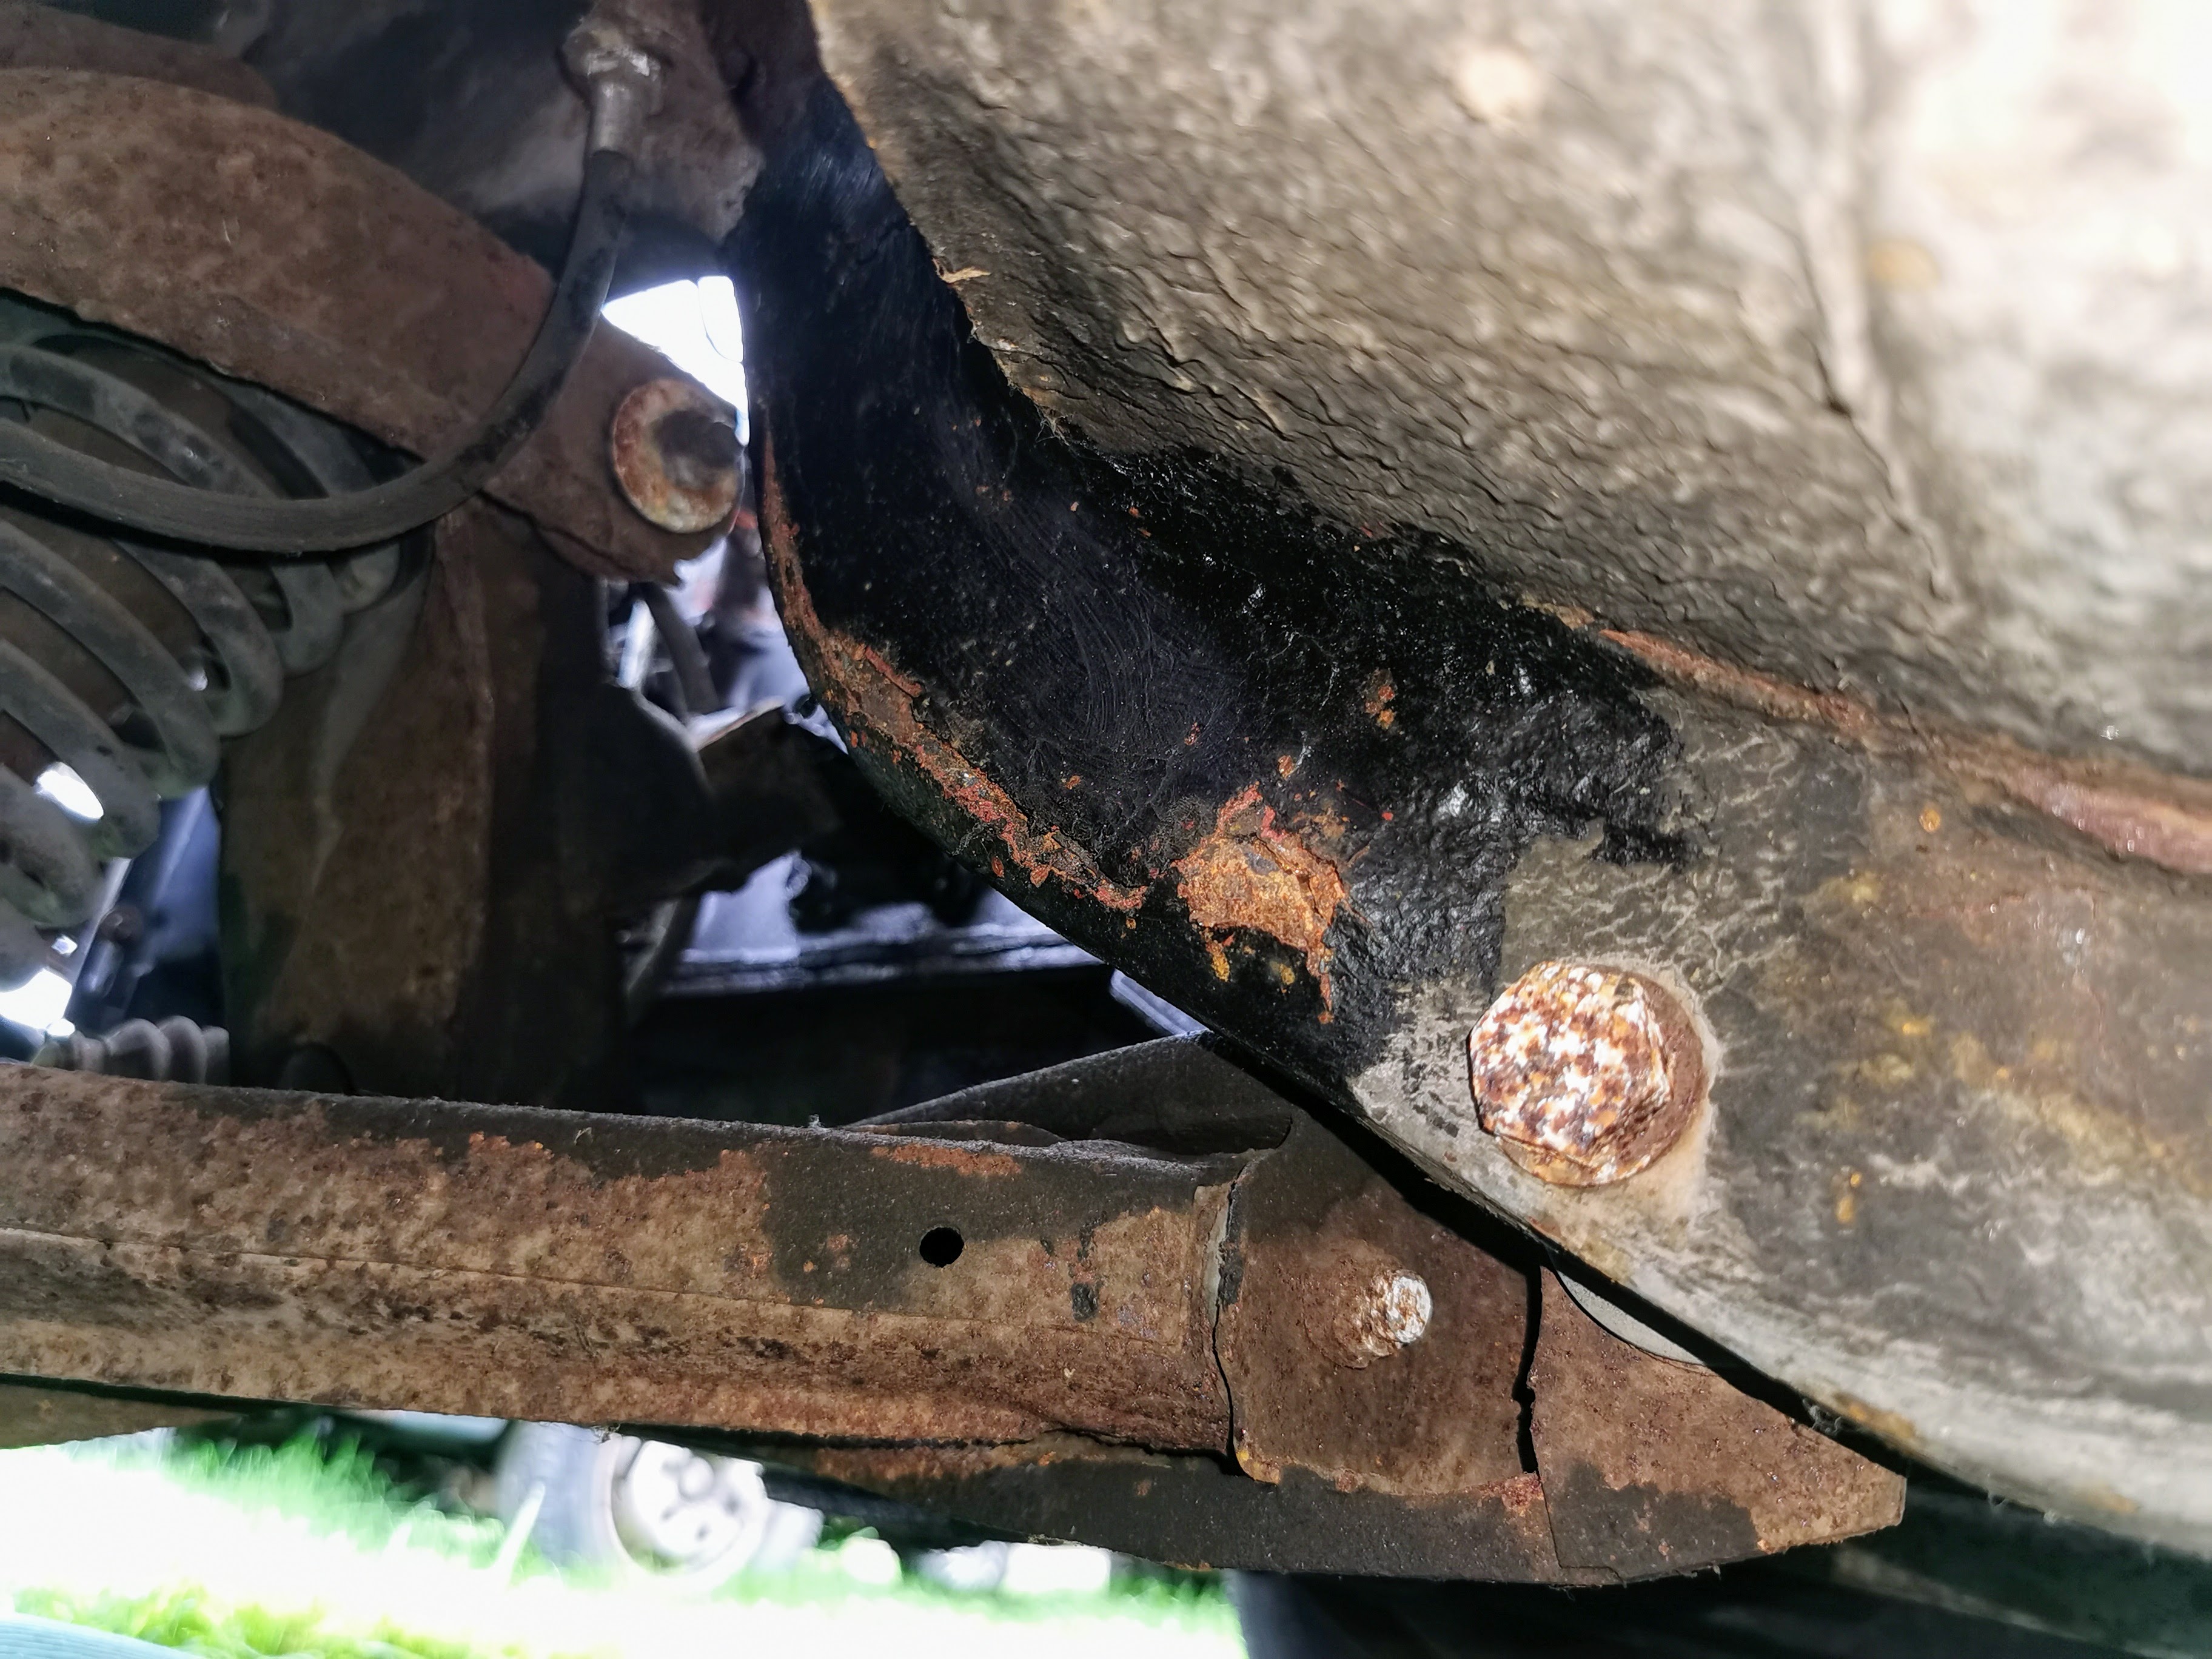
This is obviously of particular concern given the proximity of the front suspension mounting bolt.
The damage does seem relatively localised though, so I'm hoping this won't be a hugely involved job to sort. At least access is really easy for this one as it's right in front of you if you take the front wheel off.

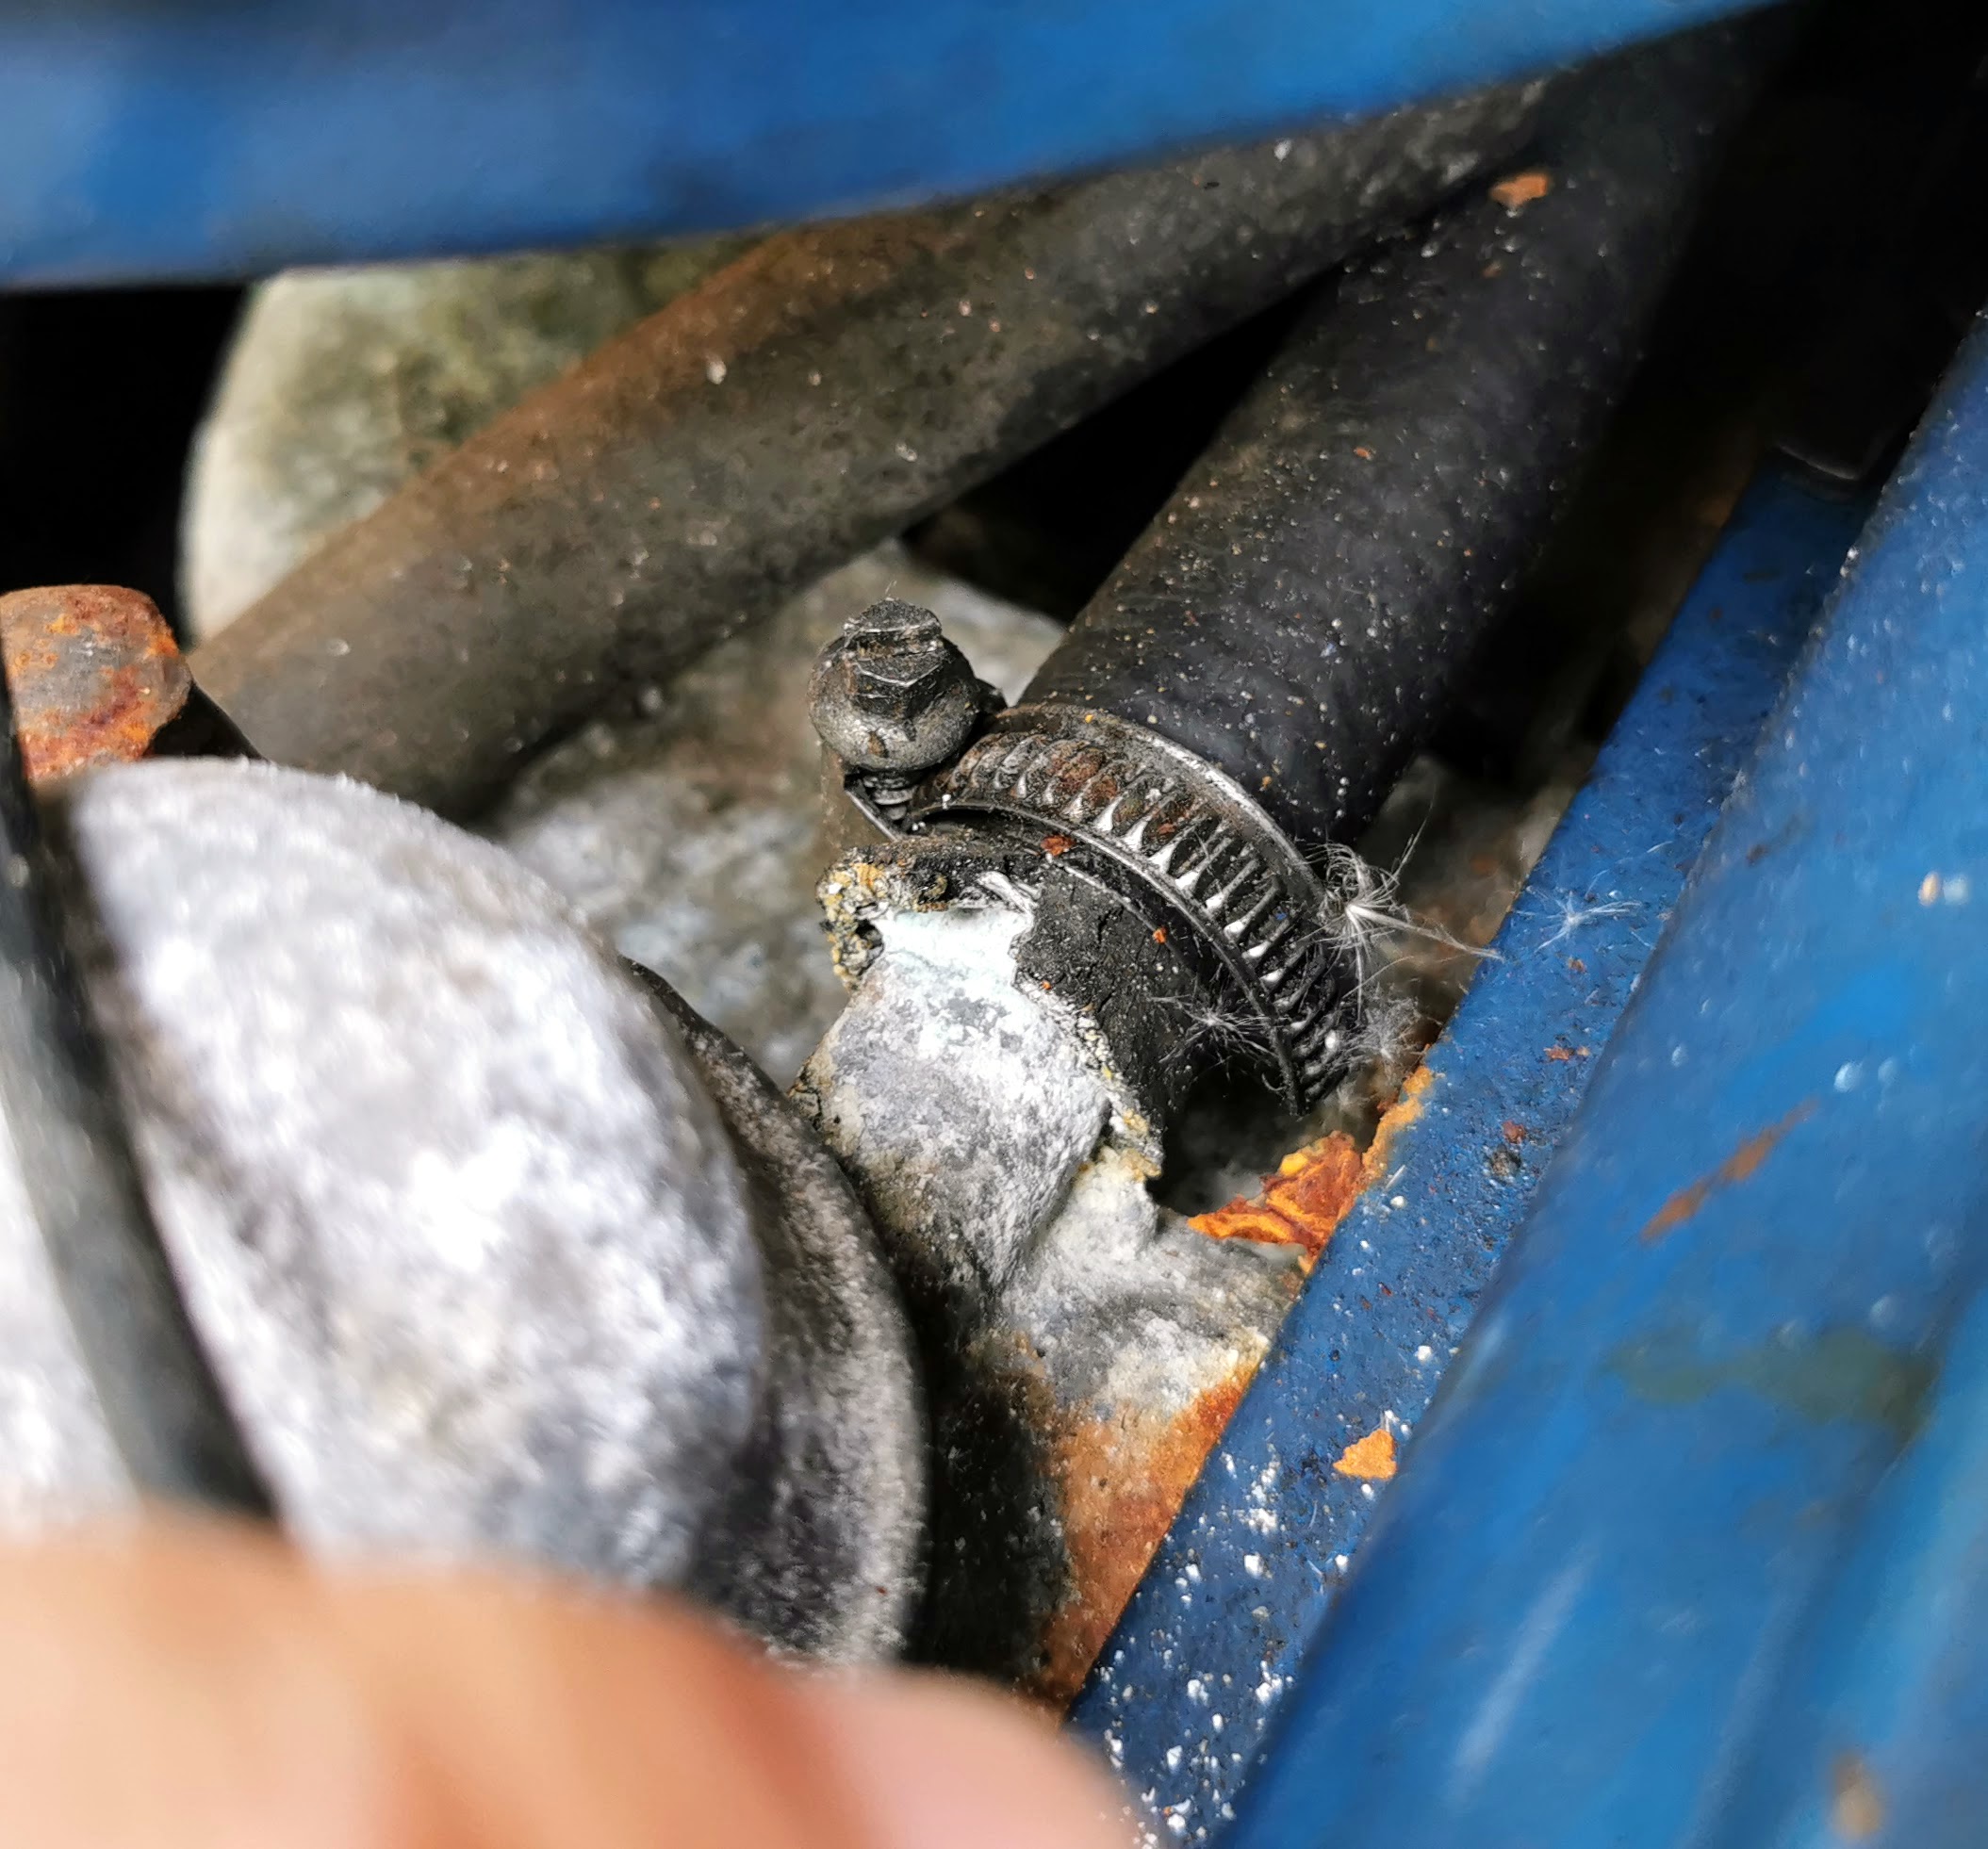
Just a couple of fuel lines to unclip and tuck out of the way behind it at least.
Good access to things seems to be something of a trademark for this car - take a look at how much space there is in the engine bay!

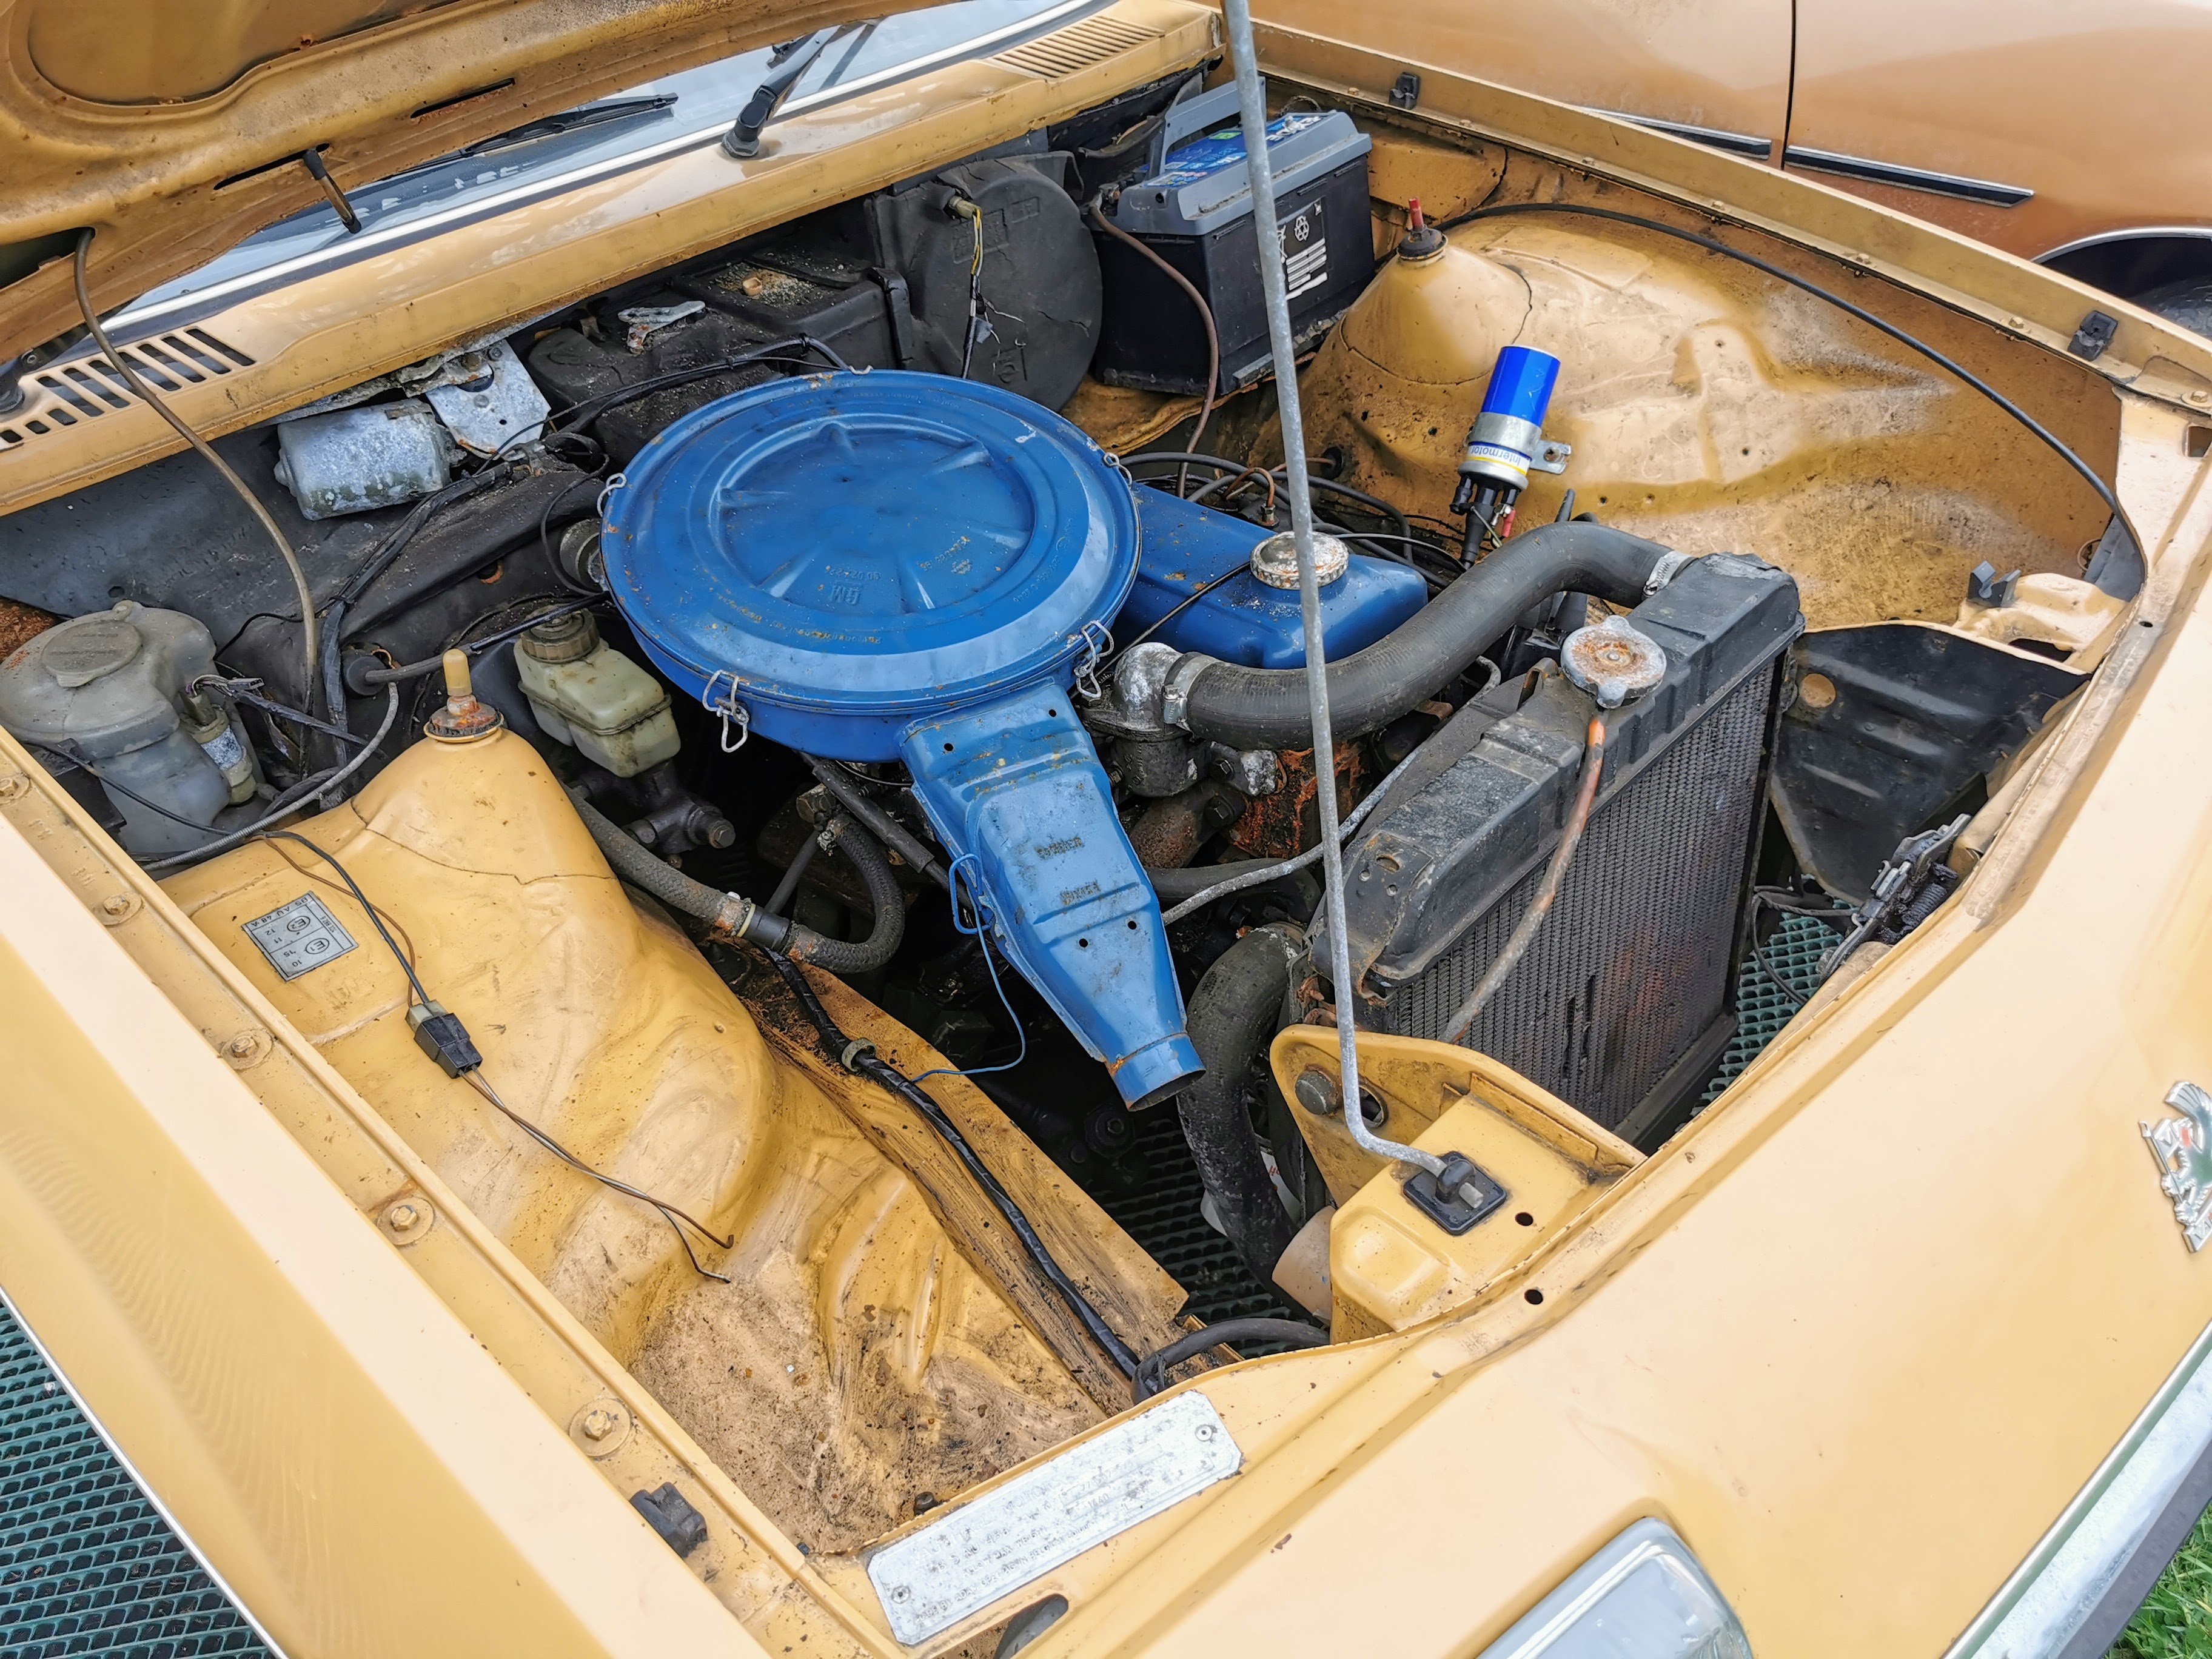
I did note when dropping the battery in (I know that doesn't fit - it's one I just had to hand for testing purposes) that the battery tray is looking quite sorry for itself with a couple of pinholes through to the interior - but it's entirely saveable and even with my abilities isn't a difficult repair to make.
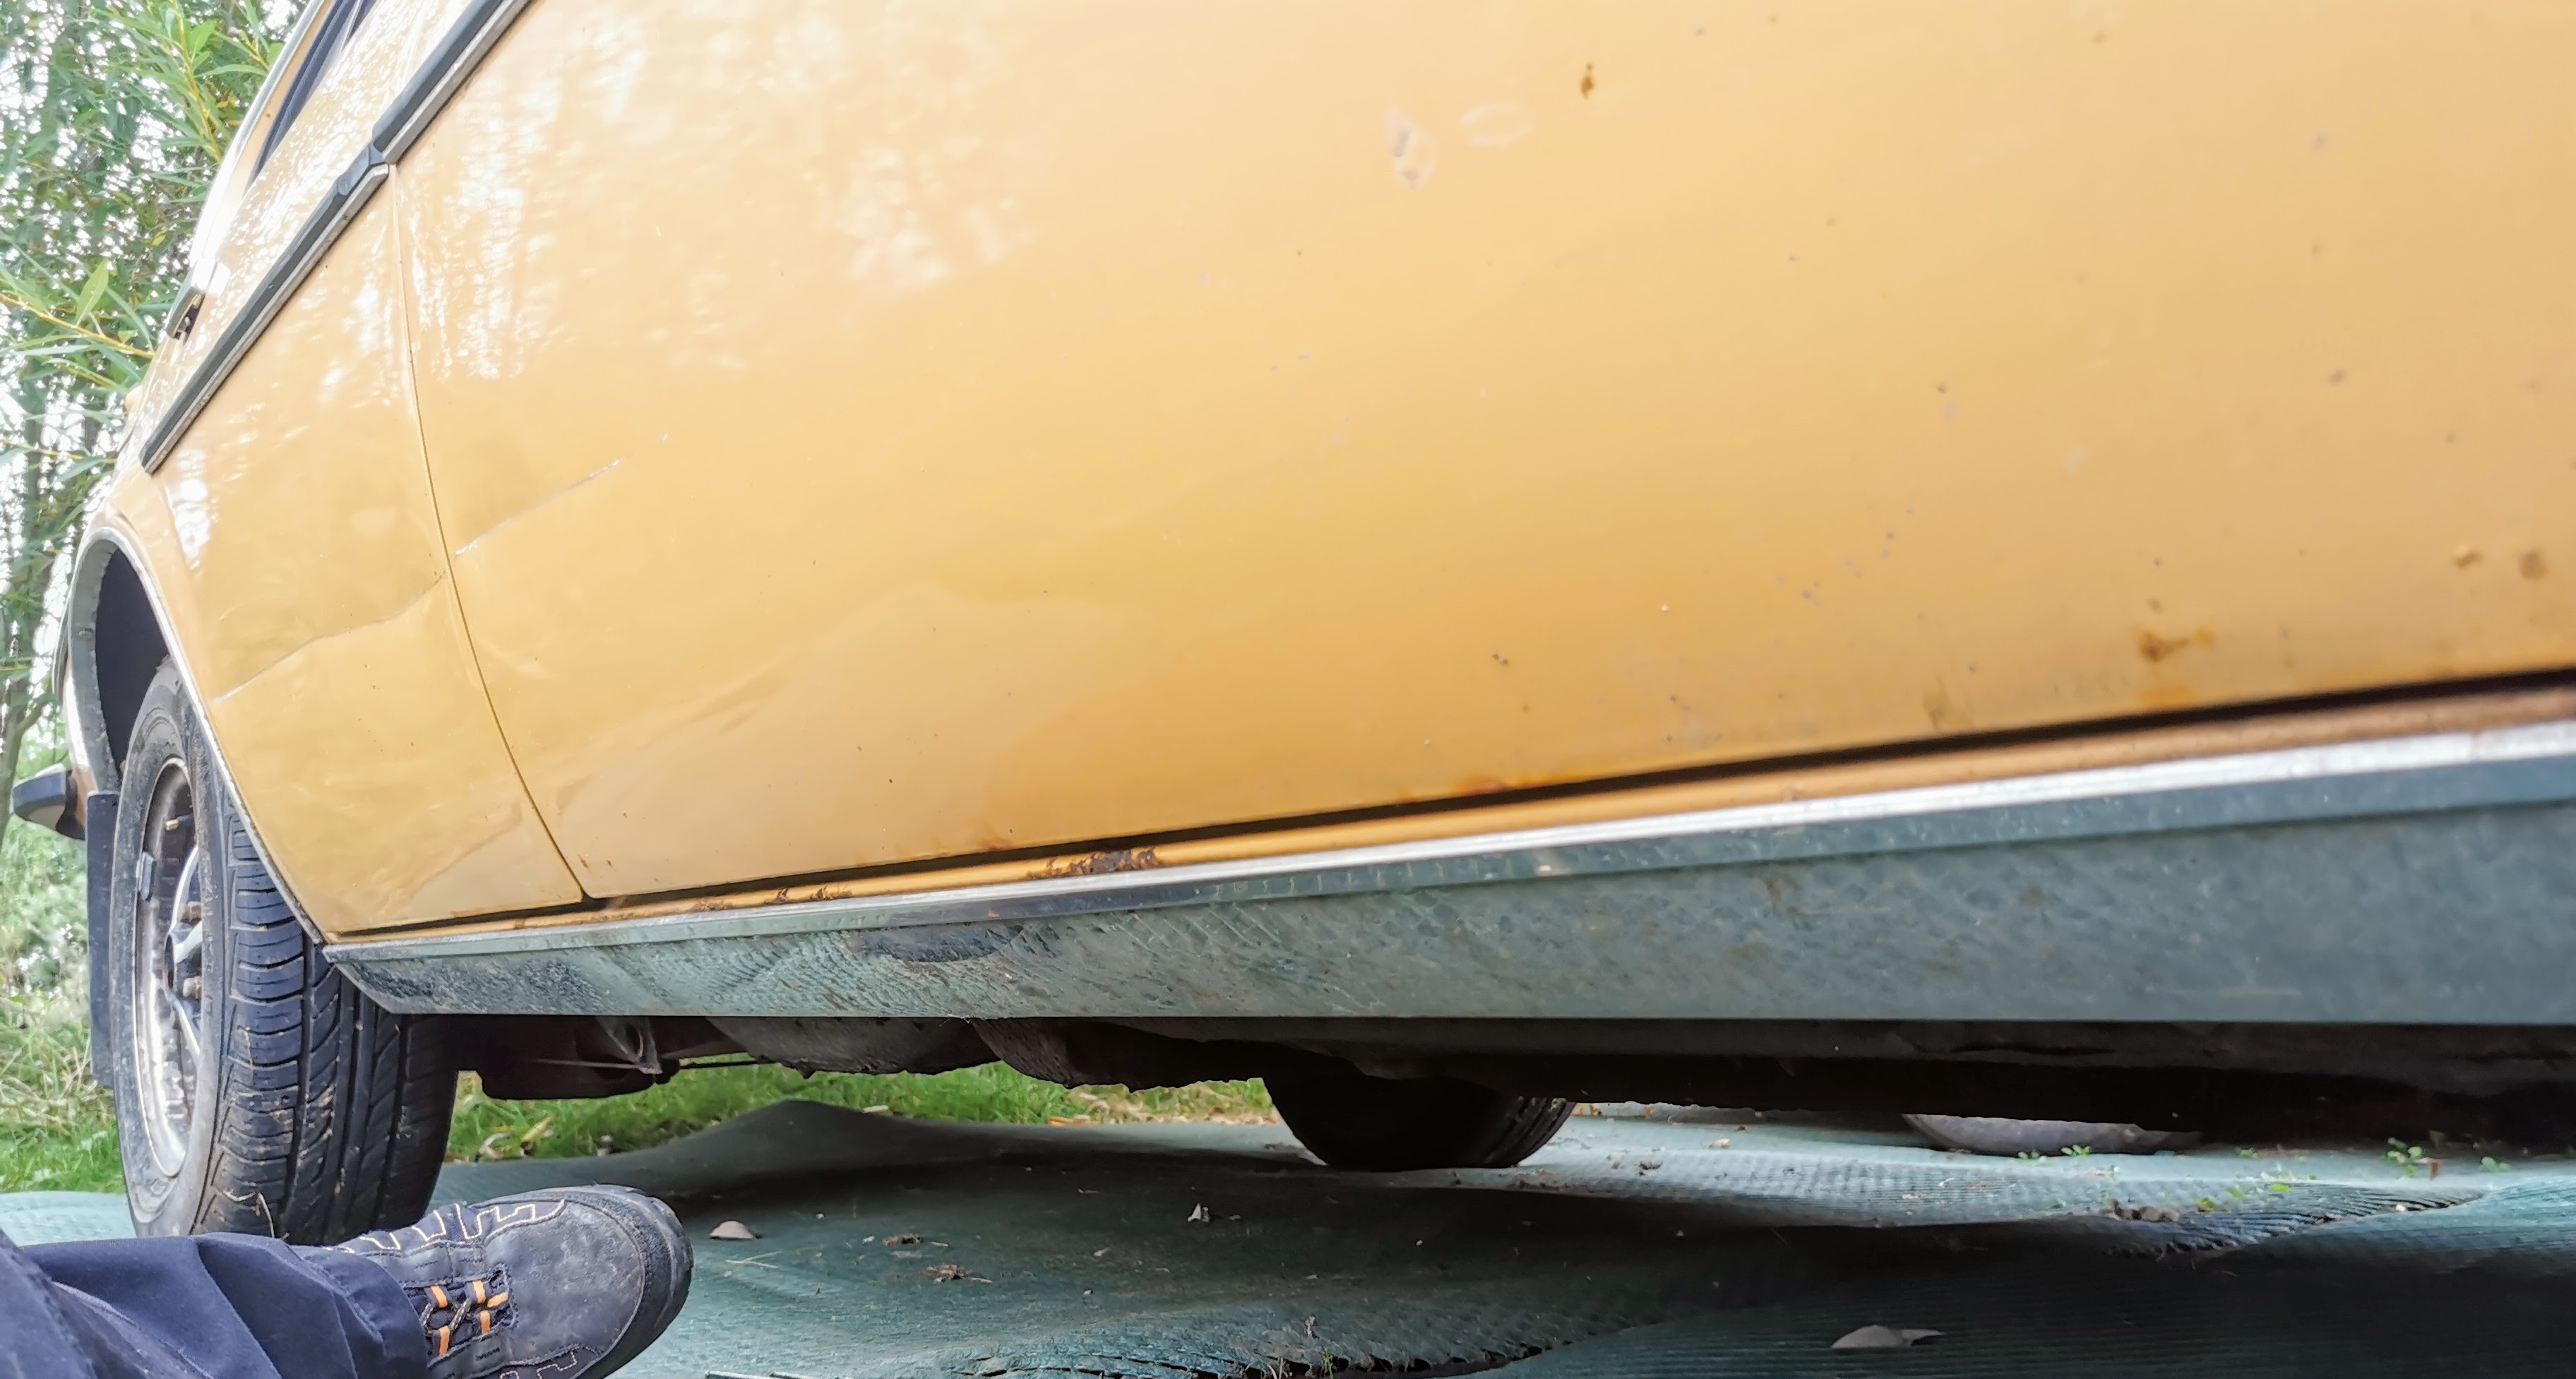
The condition of the outer sills is something of a mystery as they're hidden behind the fancy shiny stainless steel covers. I don't doubt for even a second however that there are some horrors to be found behind there, despite the absence of any sickening crunching noises when I pressed on them. The fact that they're still securely held in place and the absence of squishyness to me says that there is at least mostly still a sill behind there.
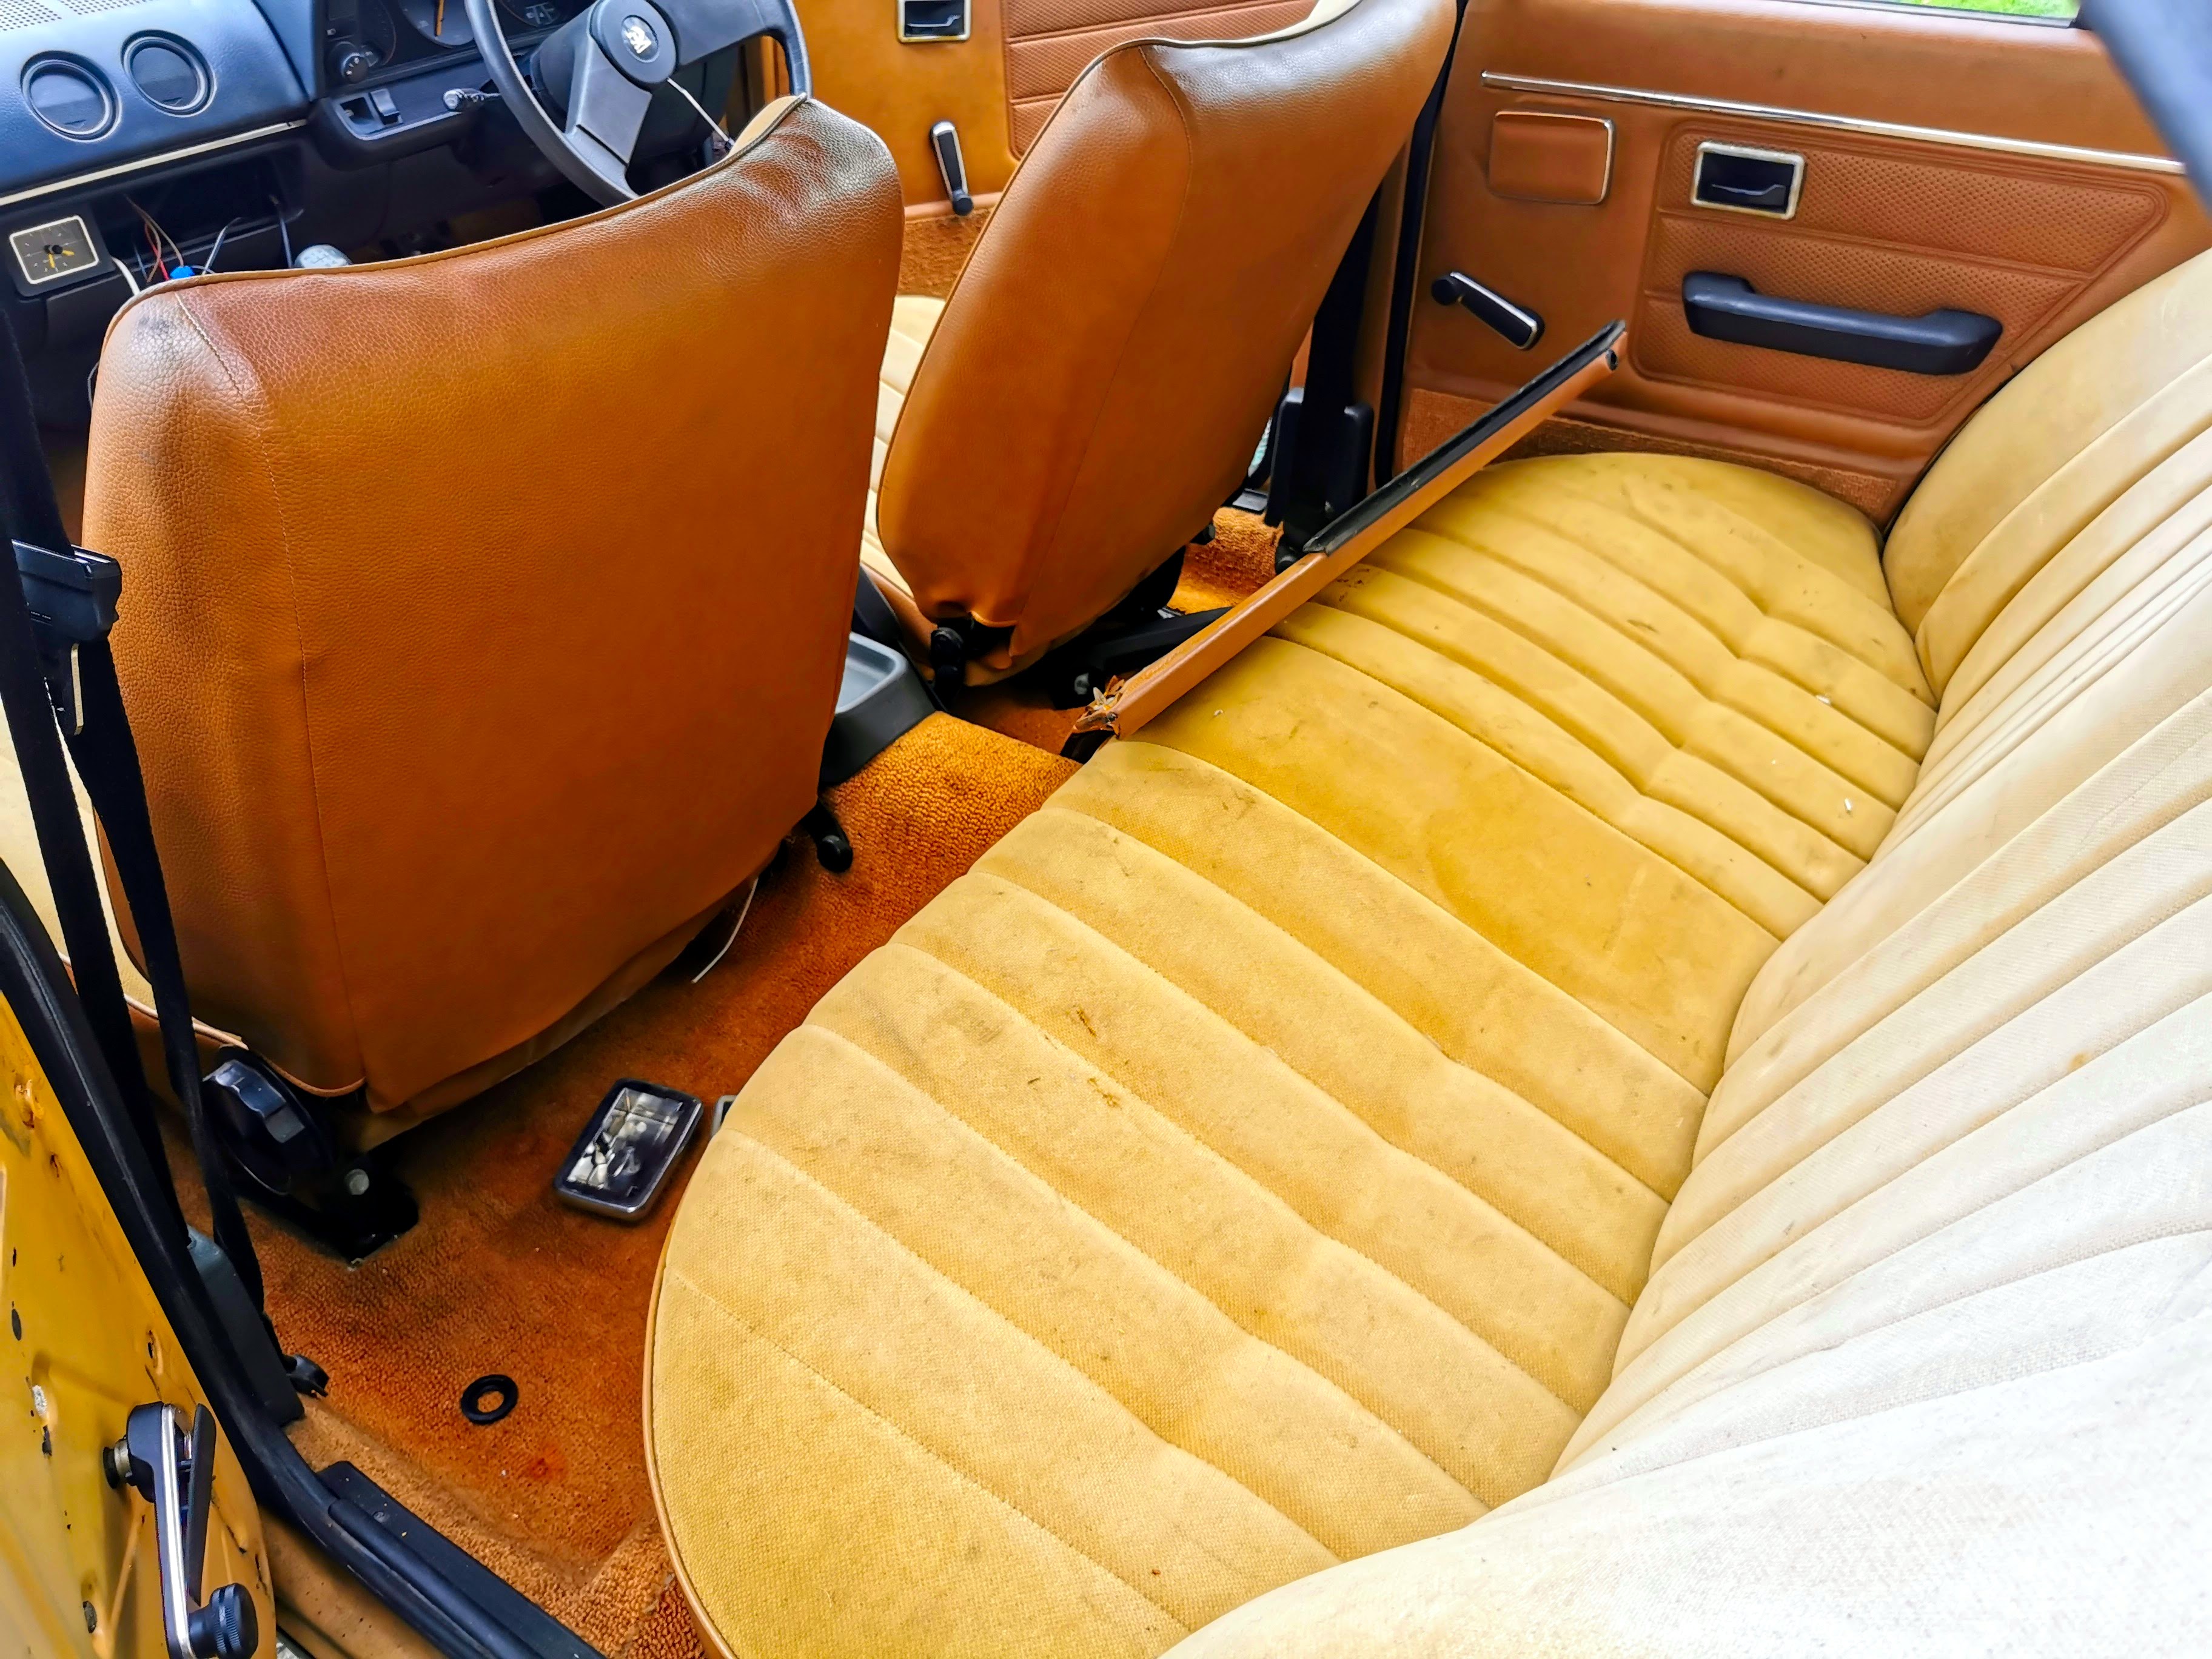
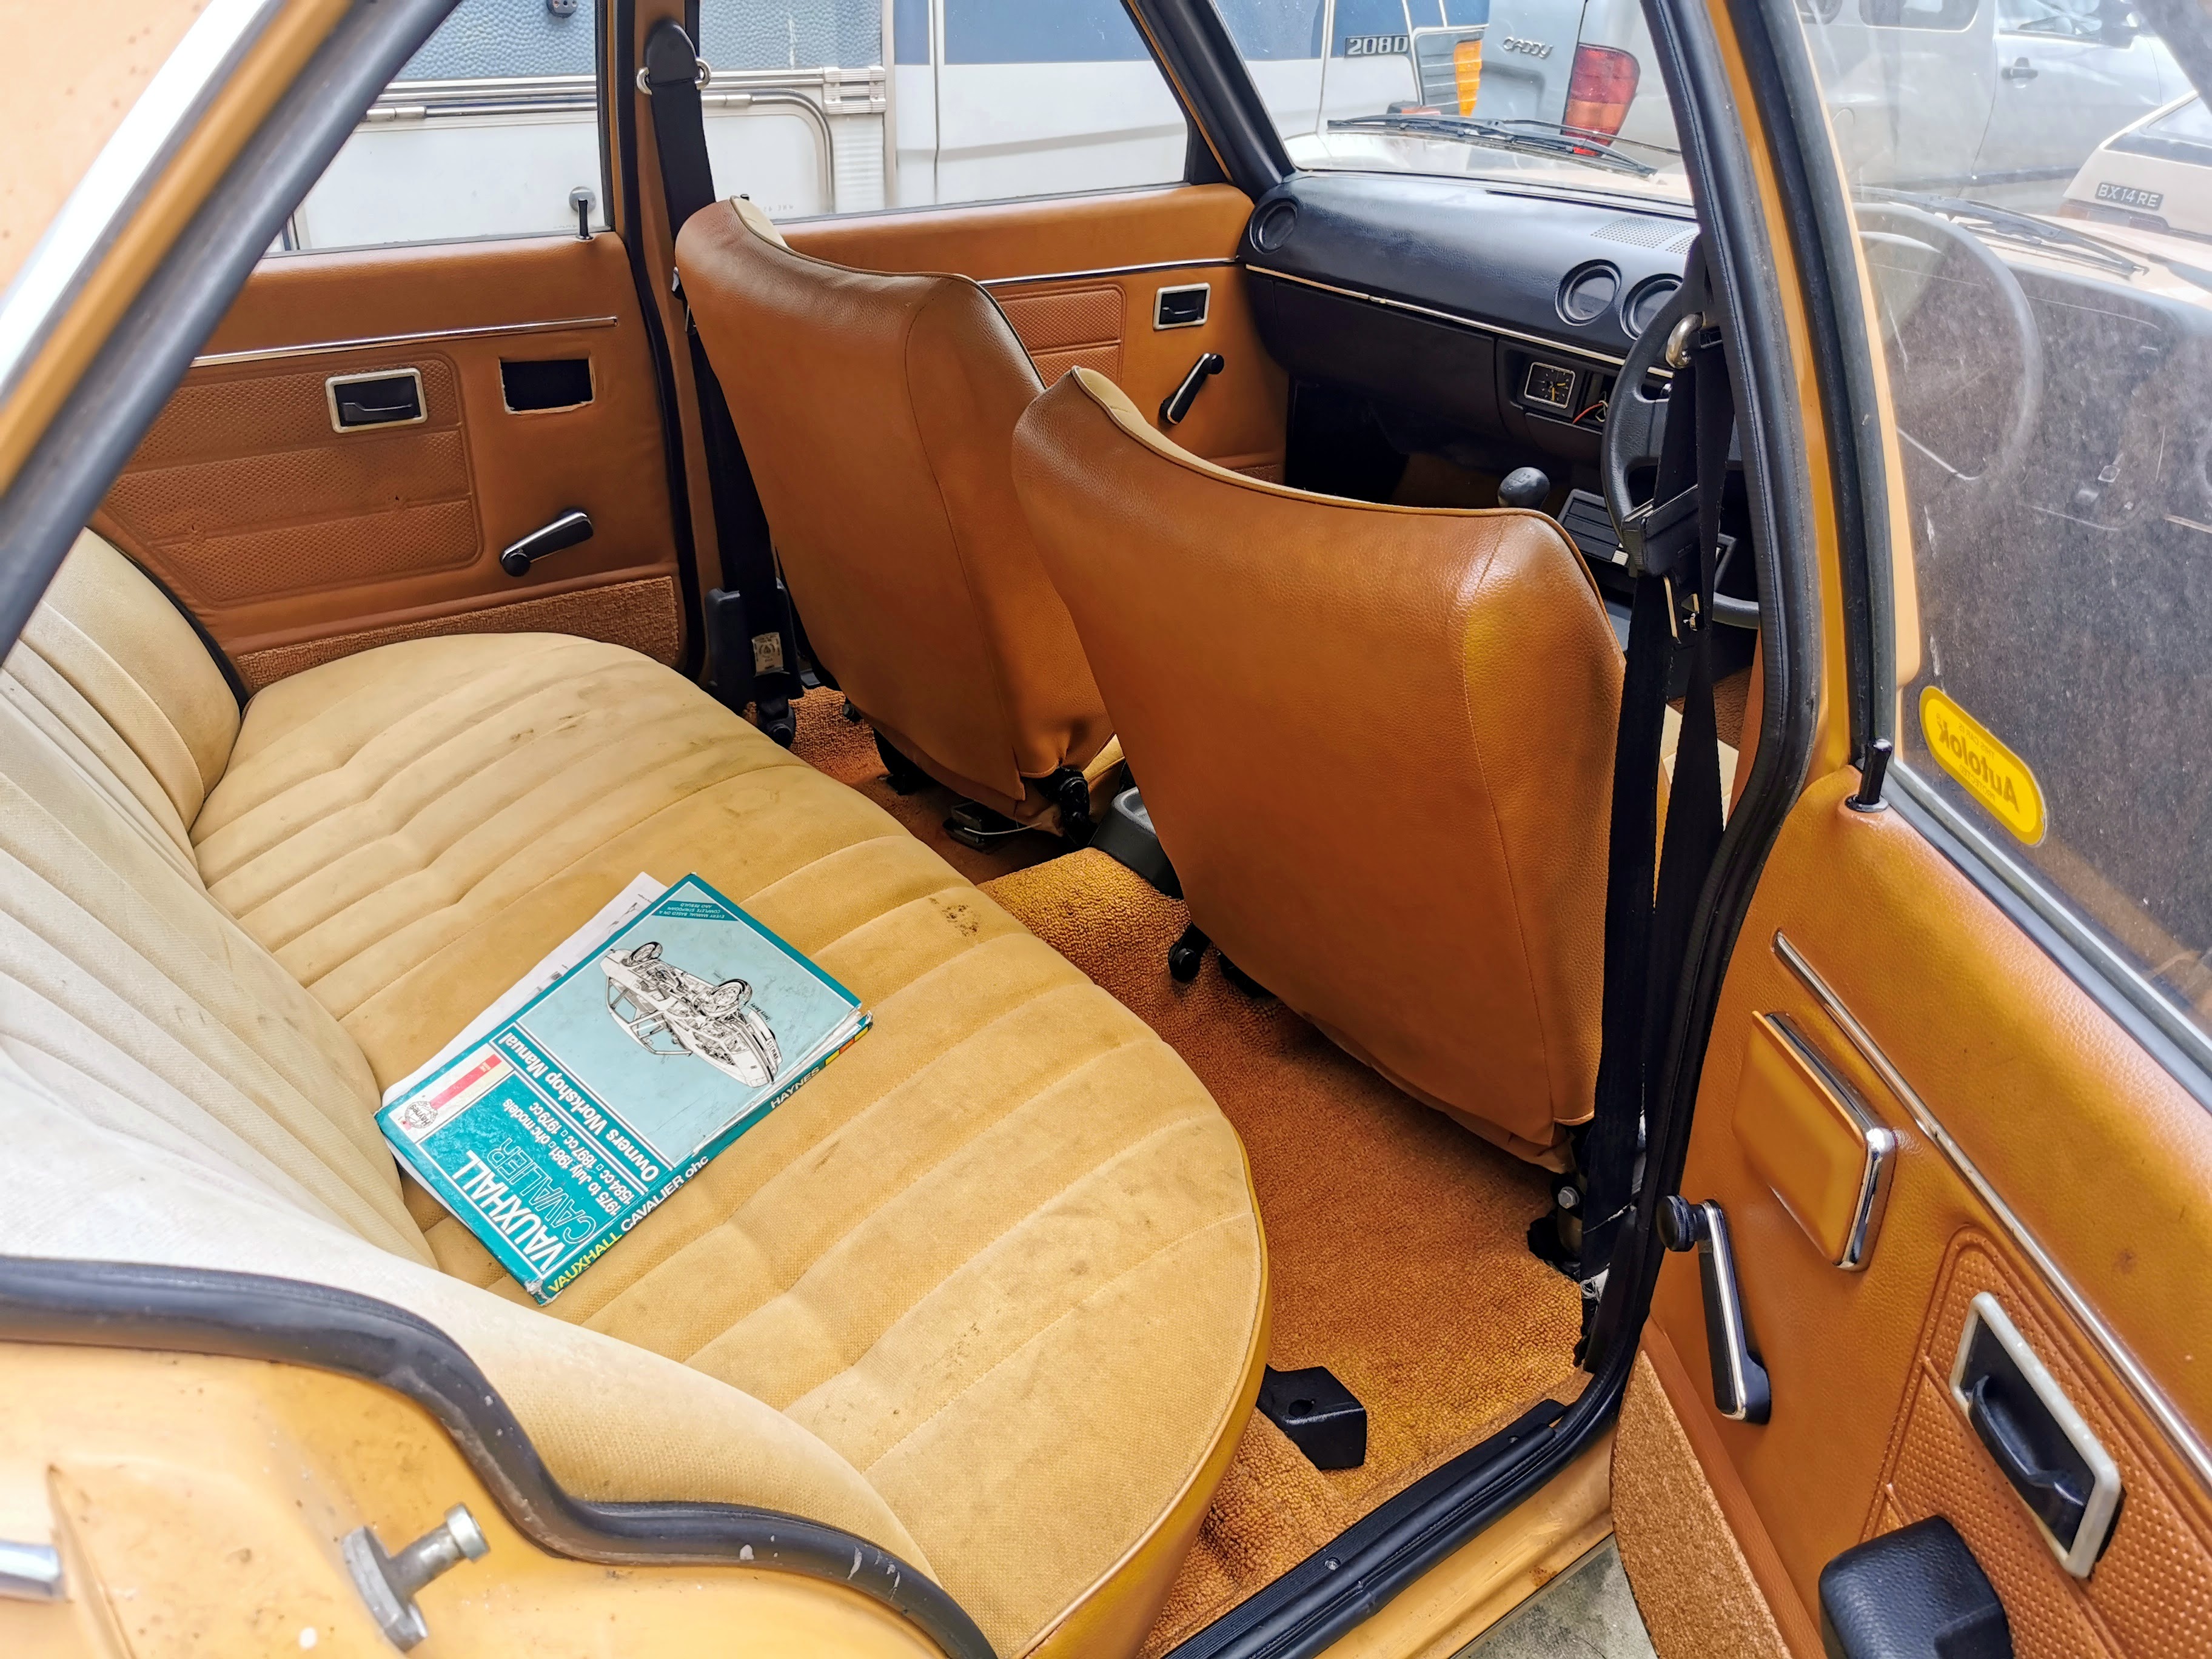
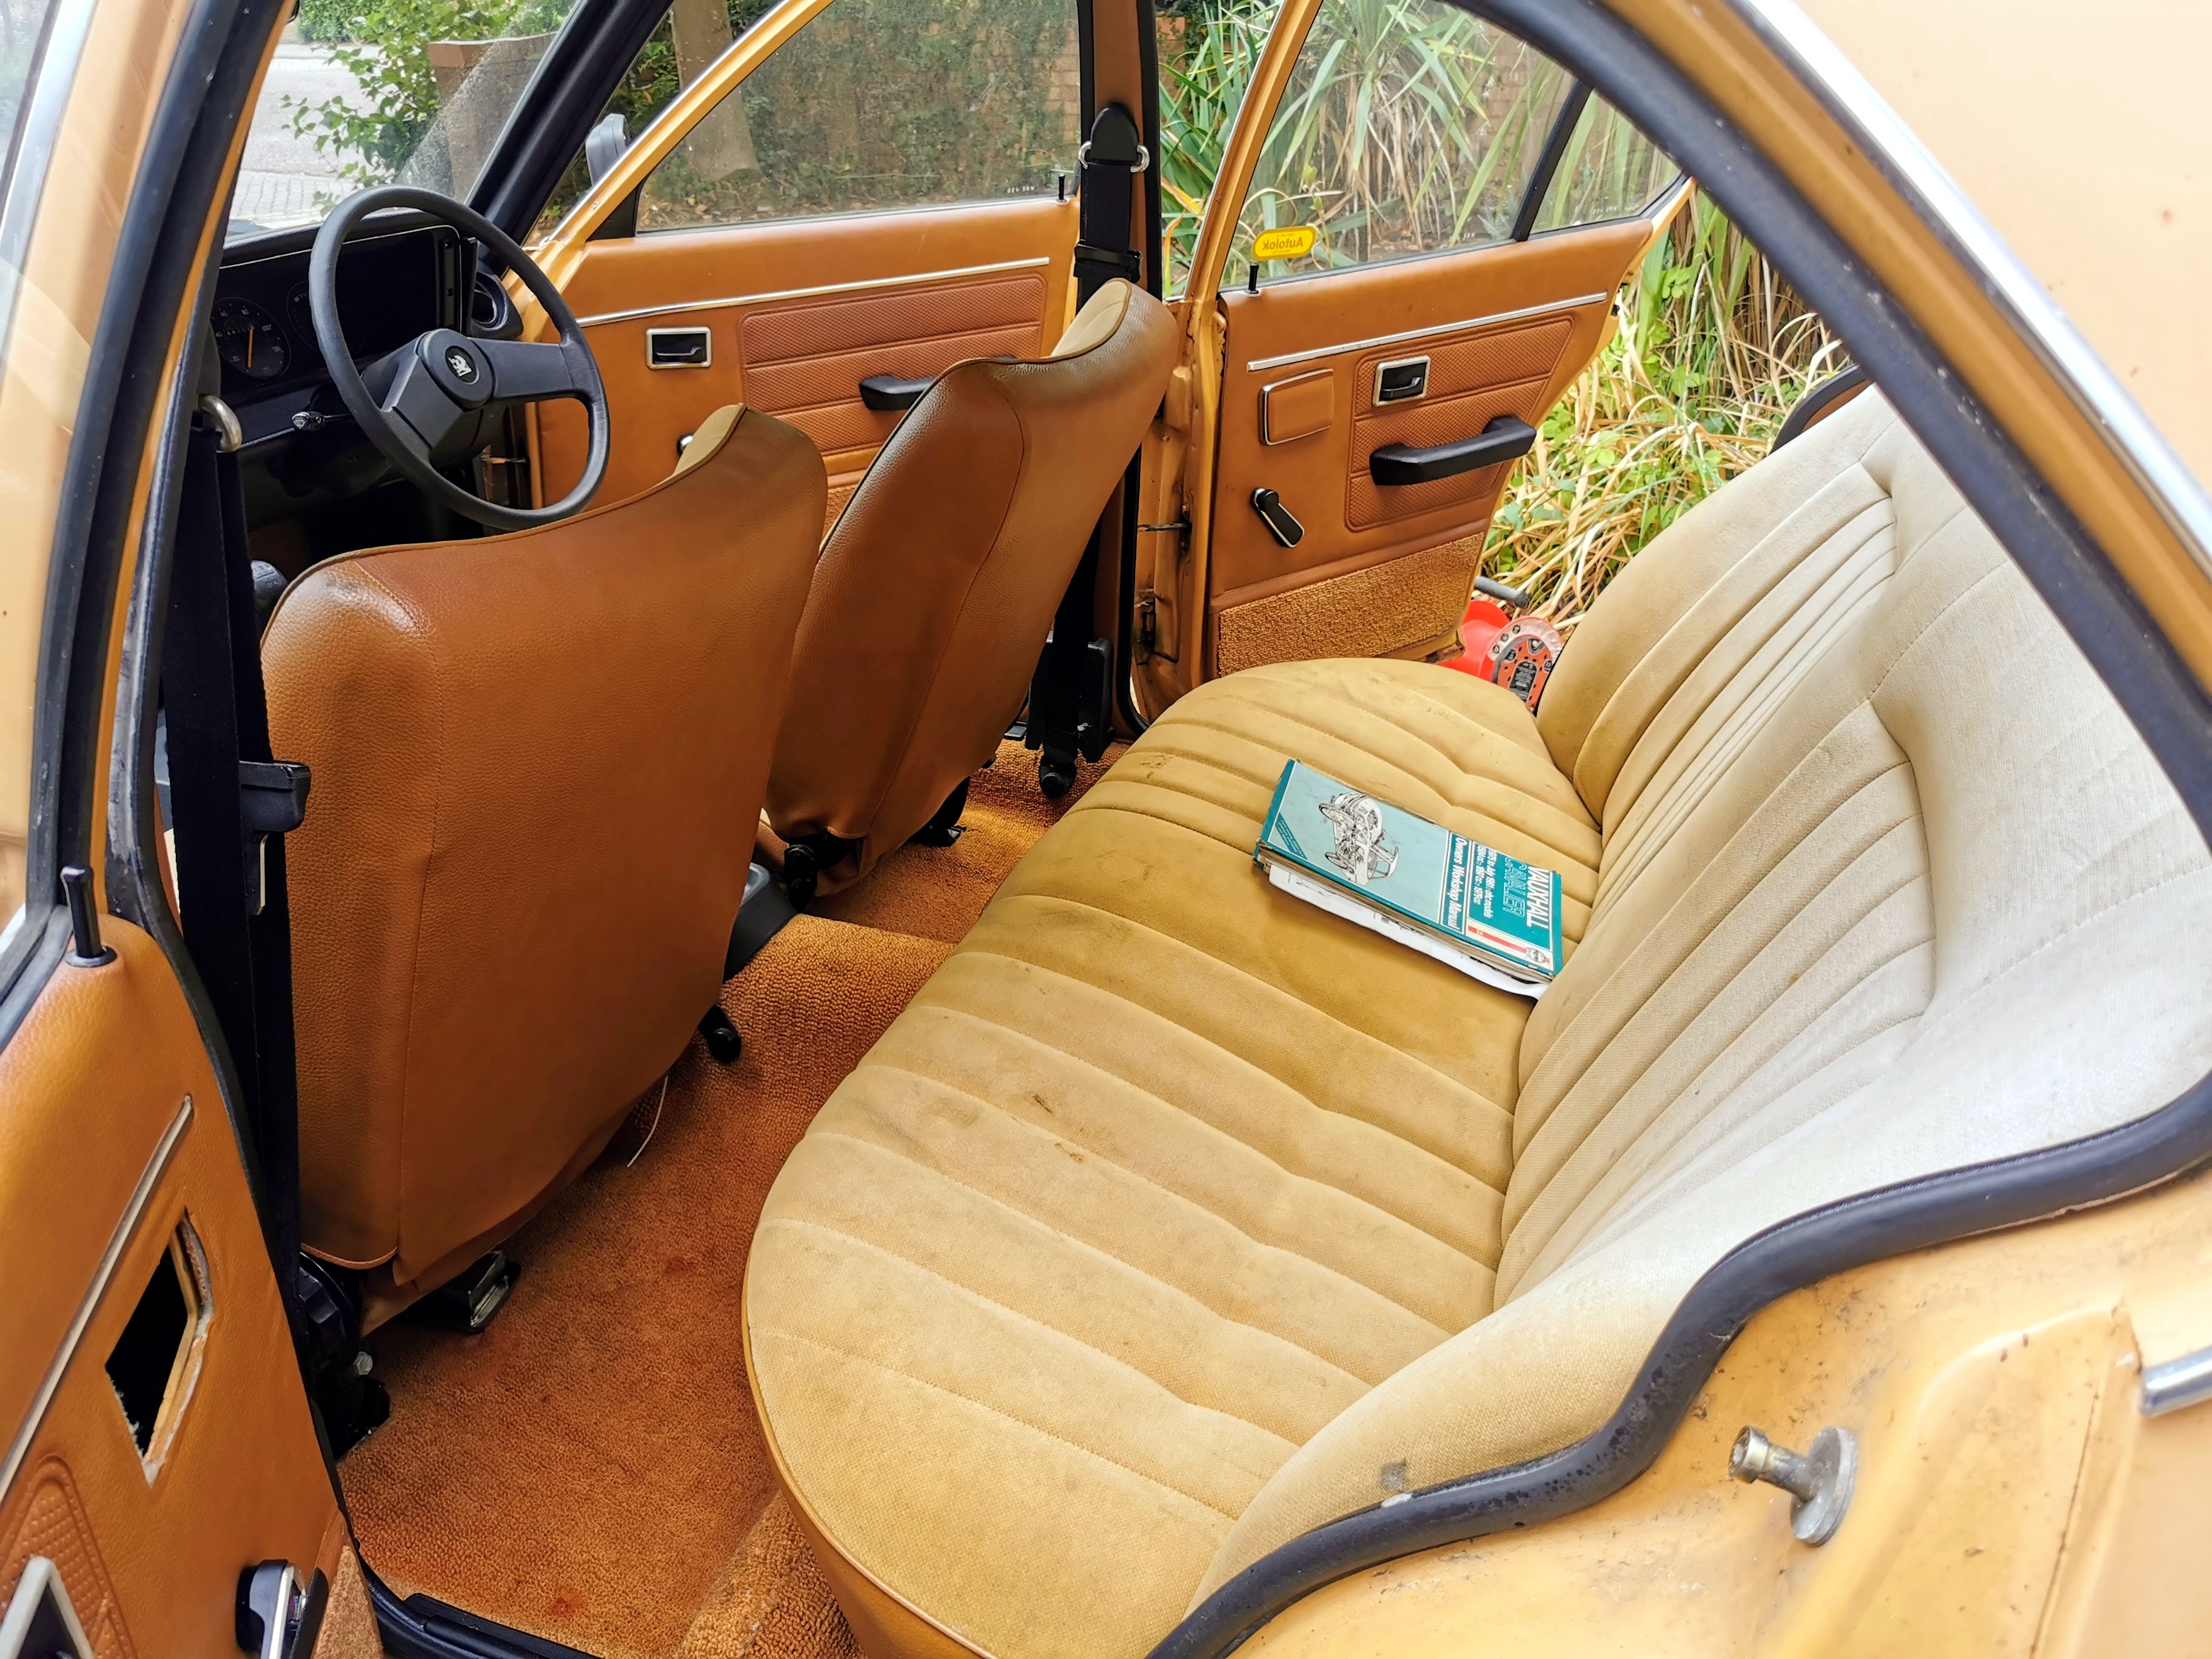
Aside from being a little grubby the interior is in remarkably good shape. The fact that the first smell you notice when opening the door is "old Vauxhall" rather than that horrible dank musty smell of damp or "OMG mouse" seemed a good start.

The sound deadening hanging down under the glove box is due to the water ingress from the perforated battery tray - though water can't have been left sitting in the car for any hugely long period based on what evidence I can find.
The door card had been removed from the nearside rear door to see if the dent could be pushed out by hand (all the bits are still present), sadly this wasn't successful though.
Finally from the rear right just for the sake of completeness.
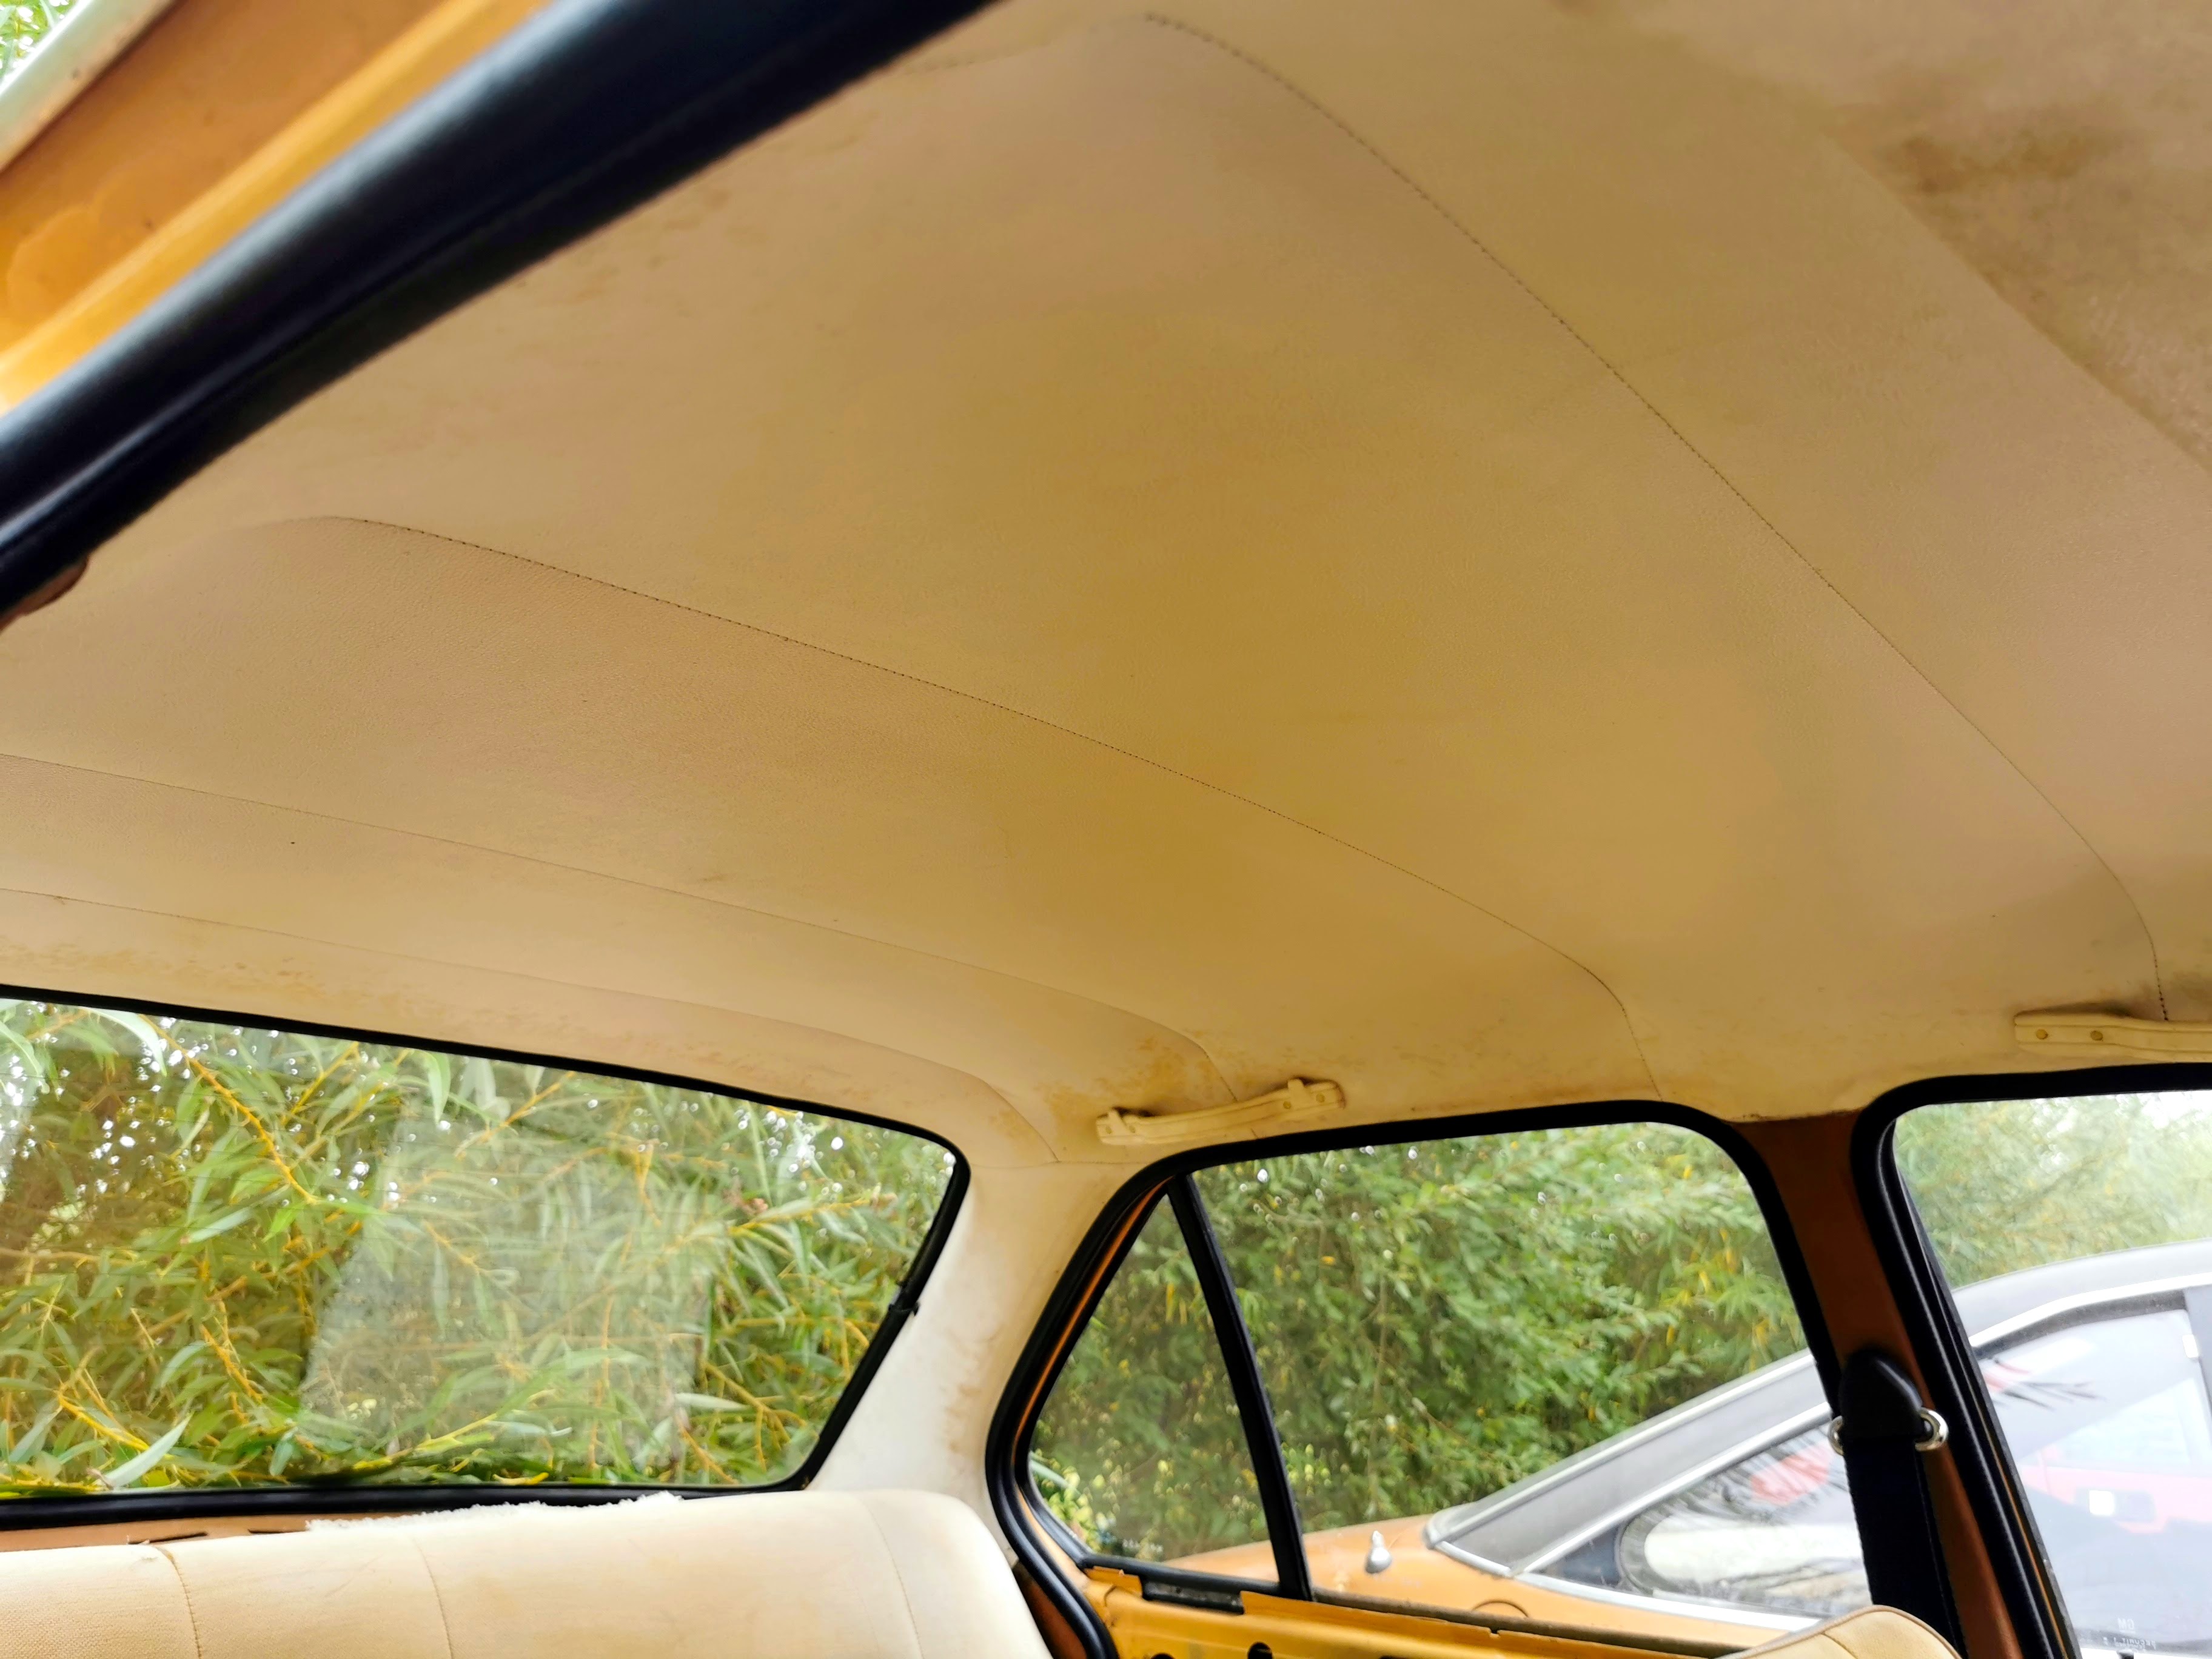
Aside from being a little dirty in a few places, the headlining is pretty much spotless. Which given that much of my automotive history has involved Saabs where the headlining *always* needs attention seemed almost miraculous. I guess that's one of the bonuses of using vinyl rather than fabric.
Overall it seemed to be a lot more of a solid base as a revival project than I had originally expected. Like by a LOT.
Of course the result of this inspection was inevitable - even if it did have to wait far closer to a year than I'd have liked between lockdowns and me needing to make arrangements to move on another car before I could progress things.

By the way, yes the very scruffy looking Bedford CF in the background is also receiving attention and despite the odds will hopefully see the road again someday.
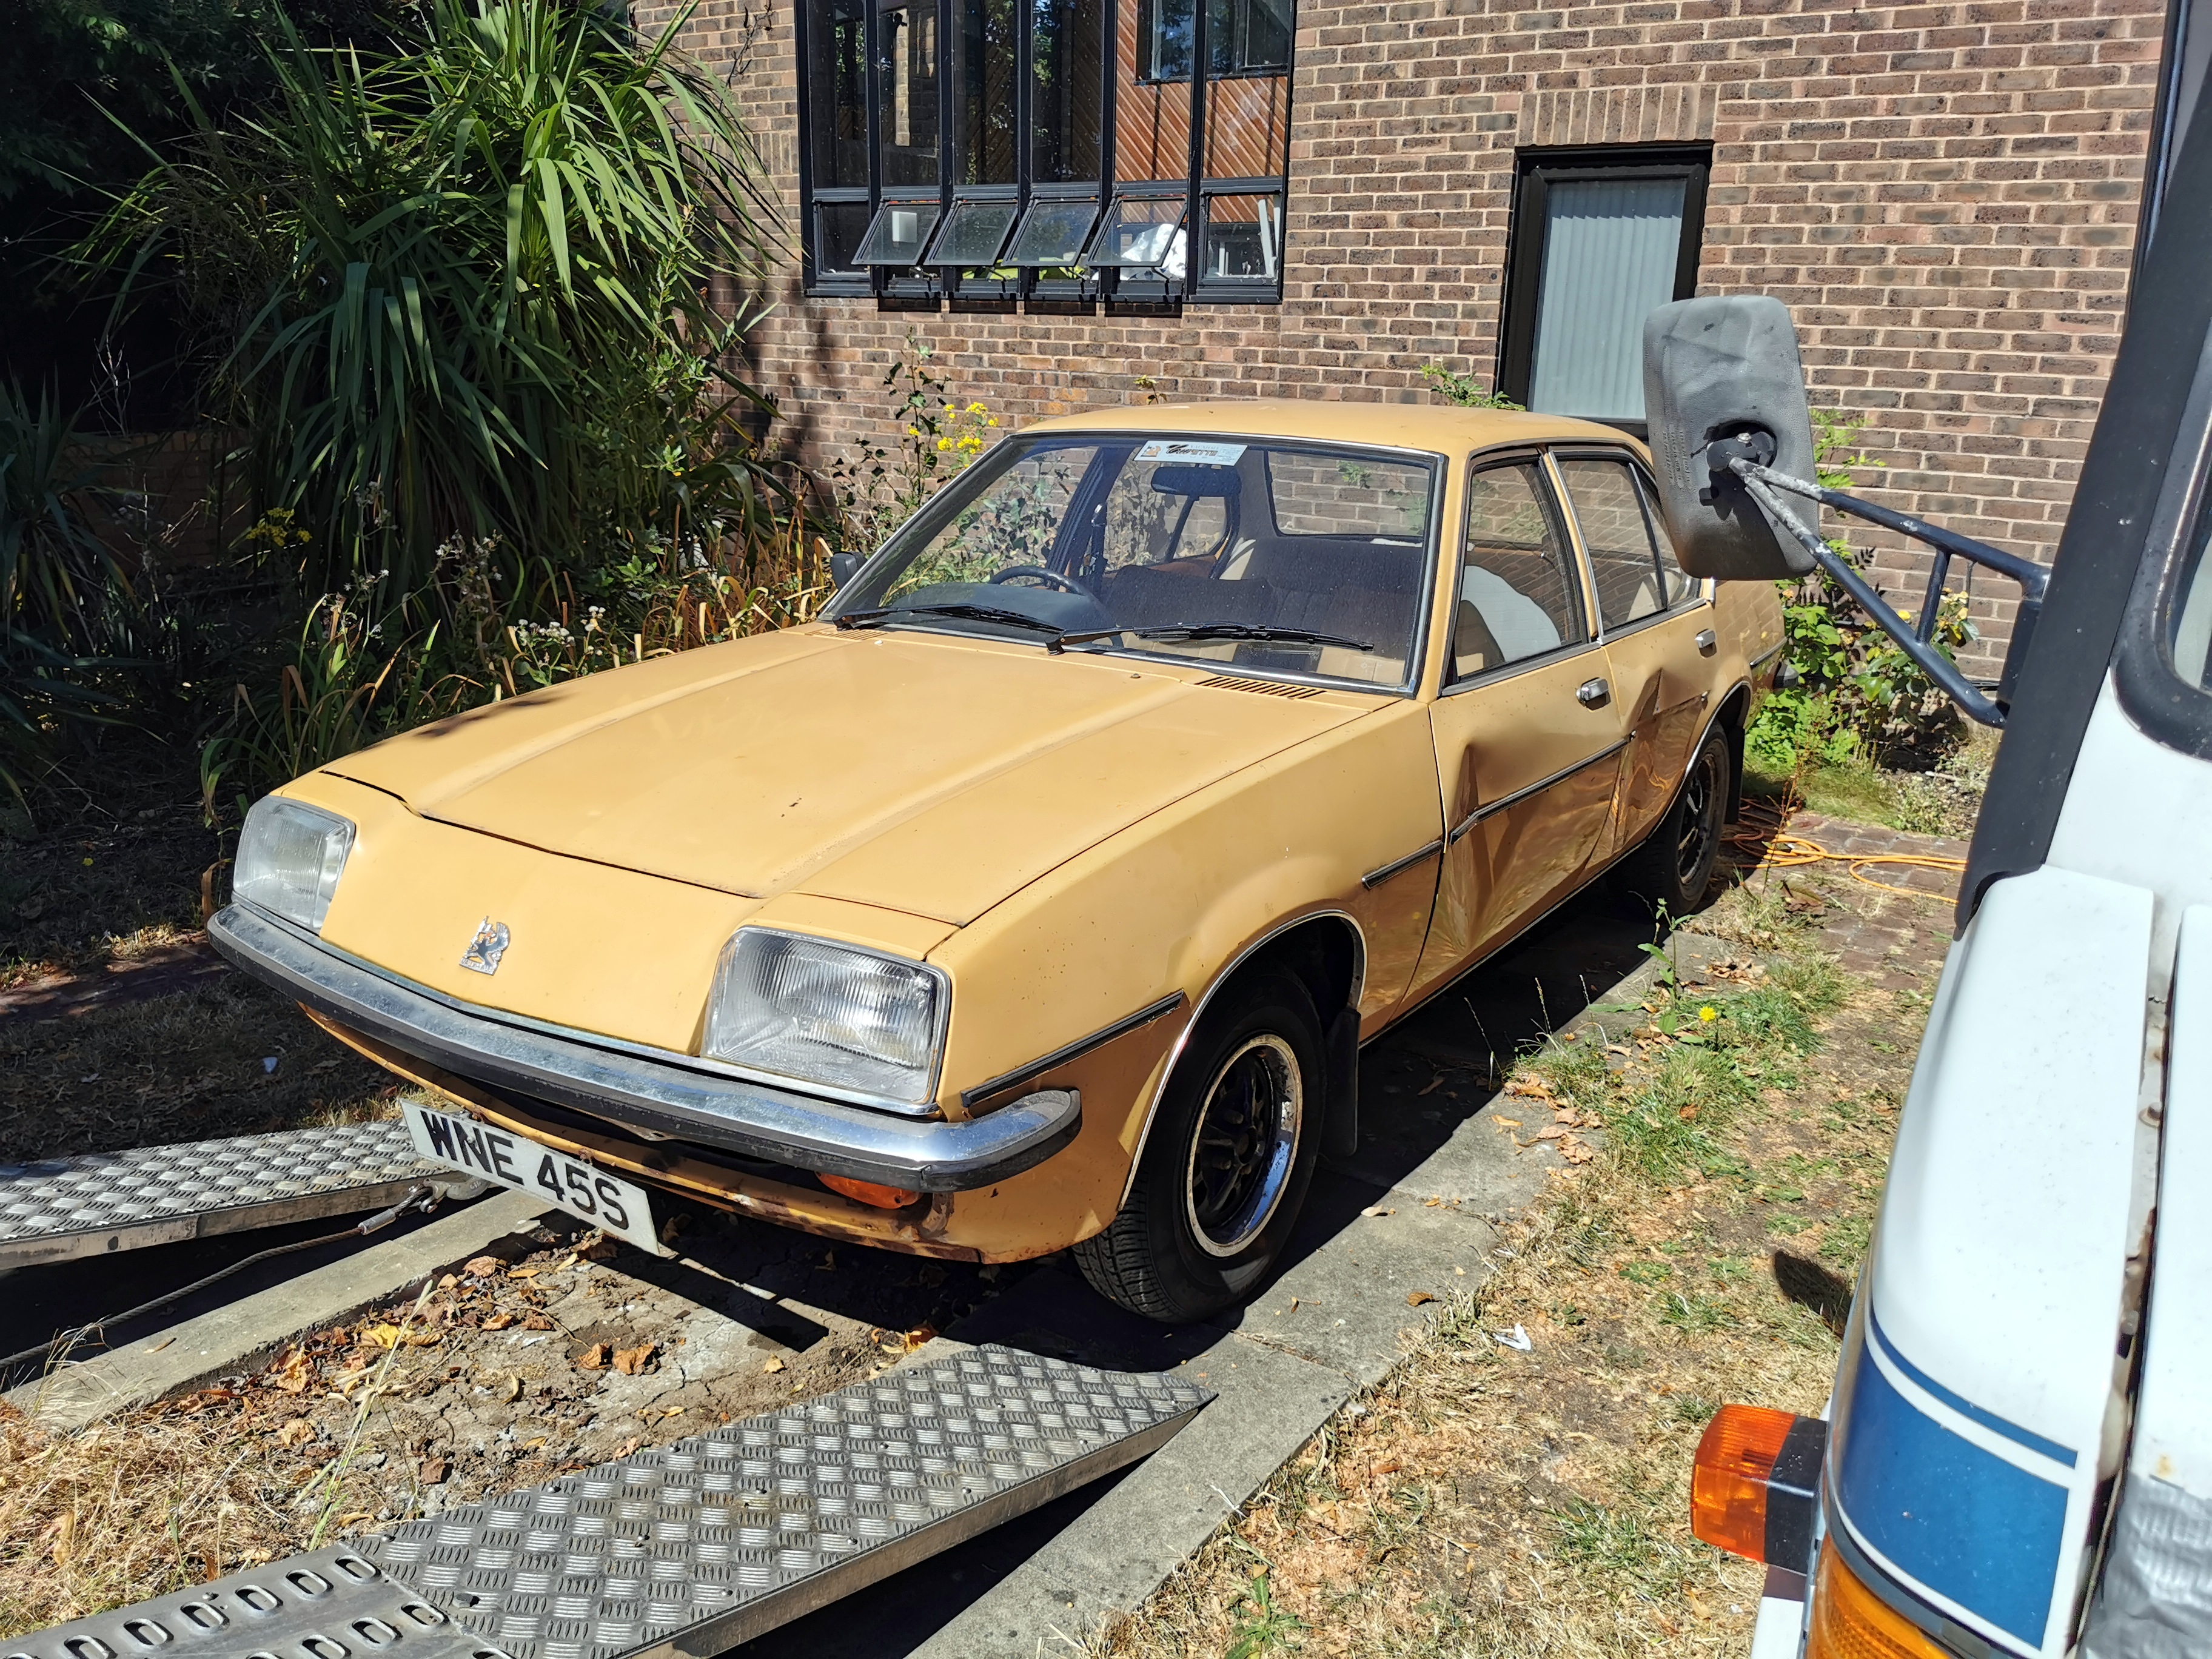
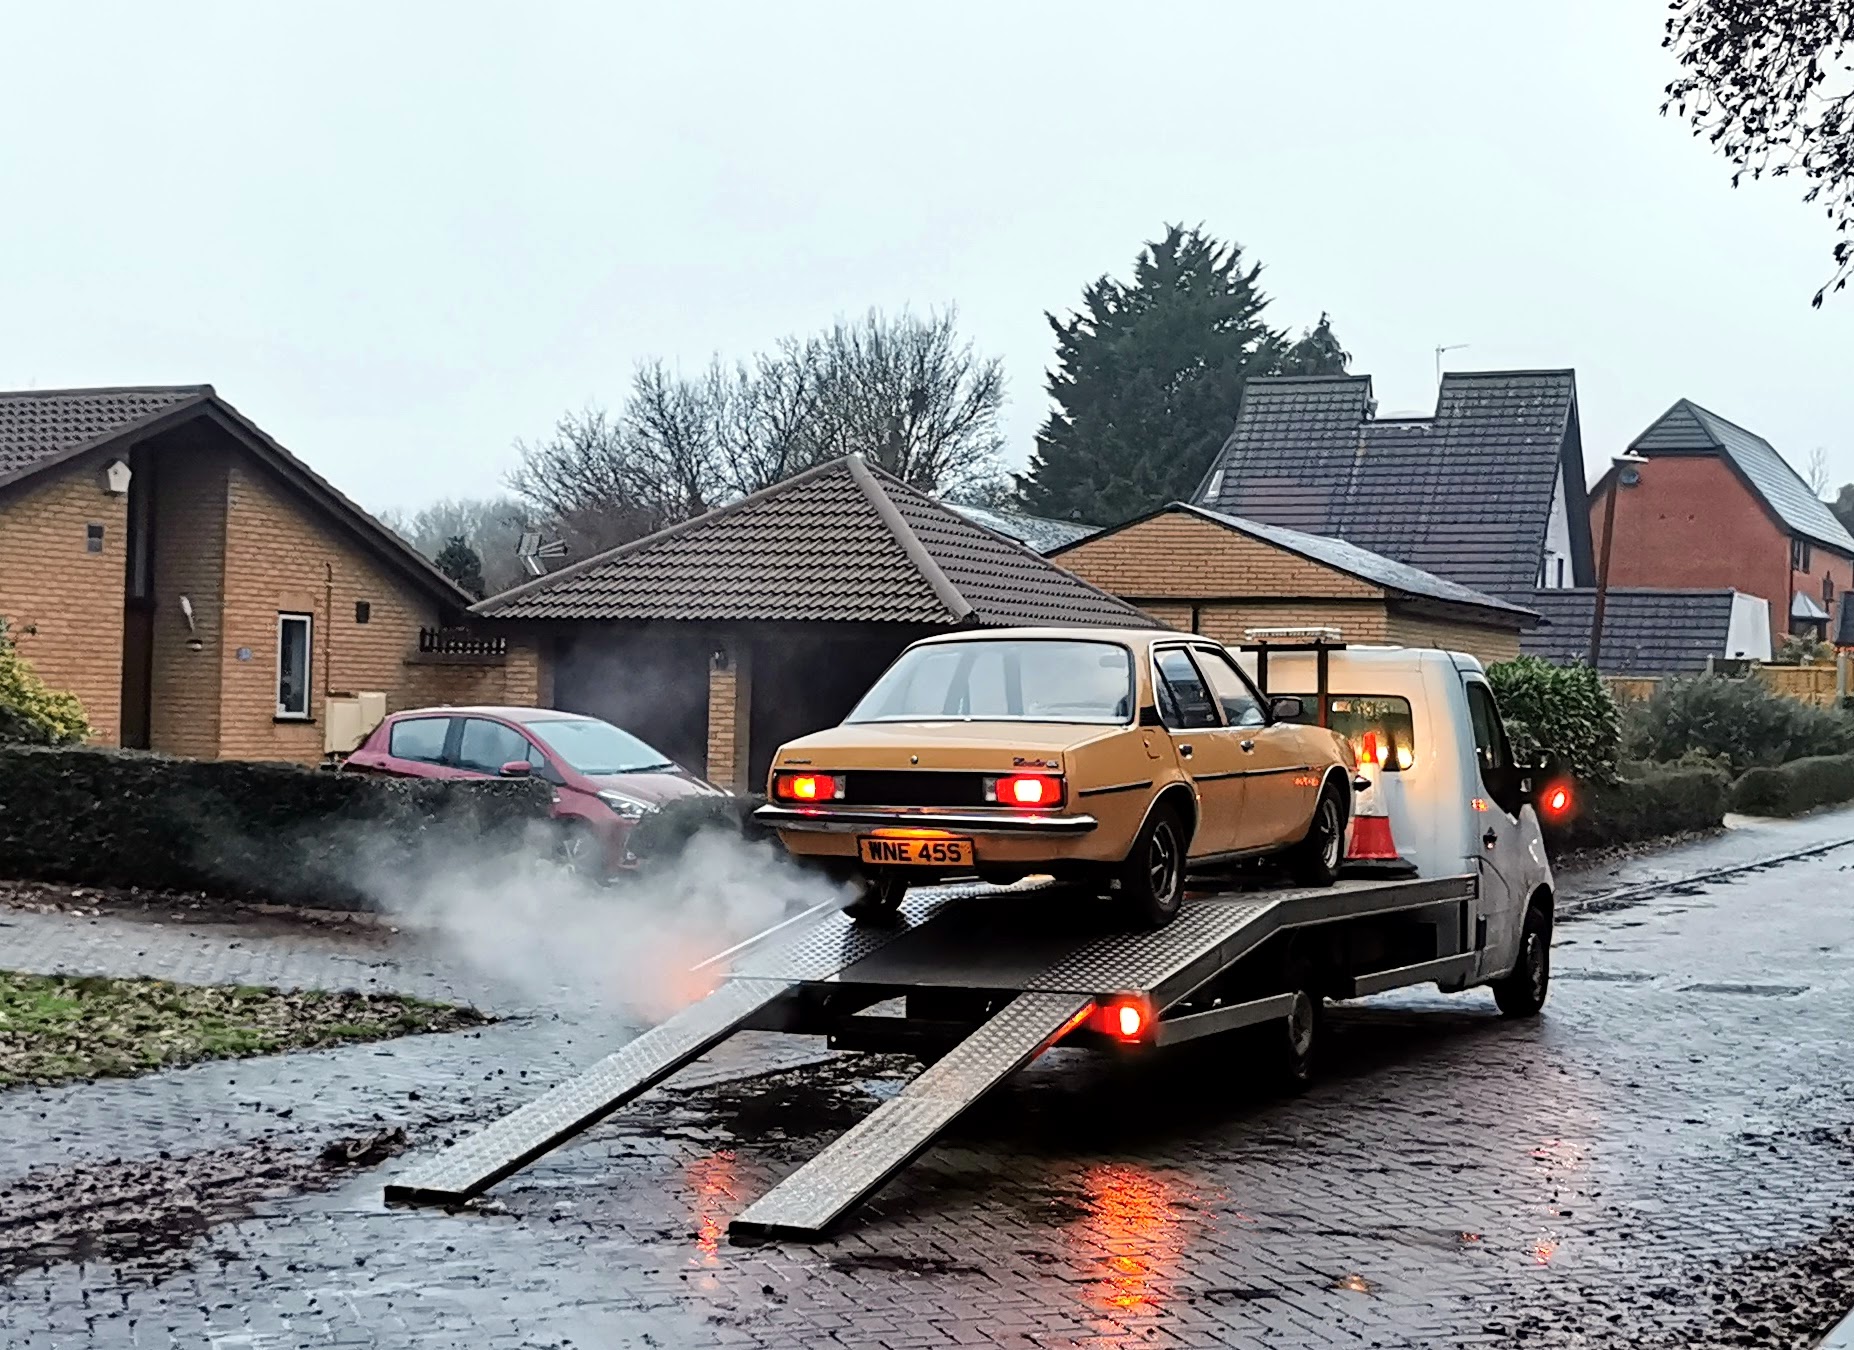
Transportation was provided by the always brilliant Windmill Towing Services.
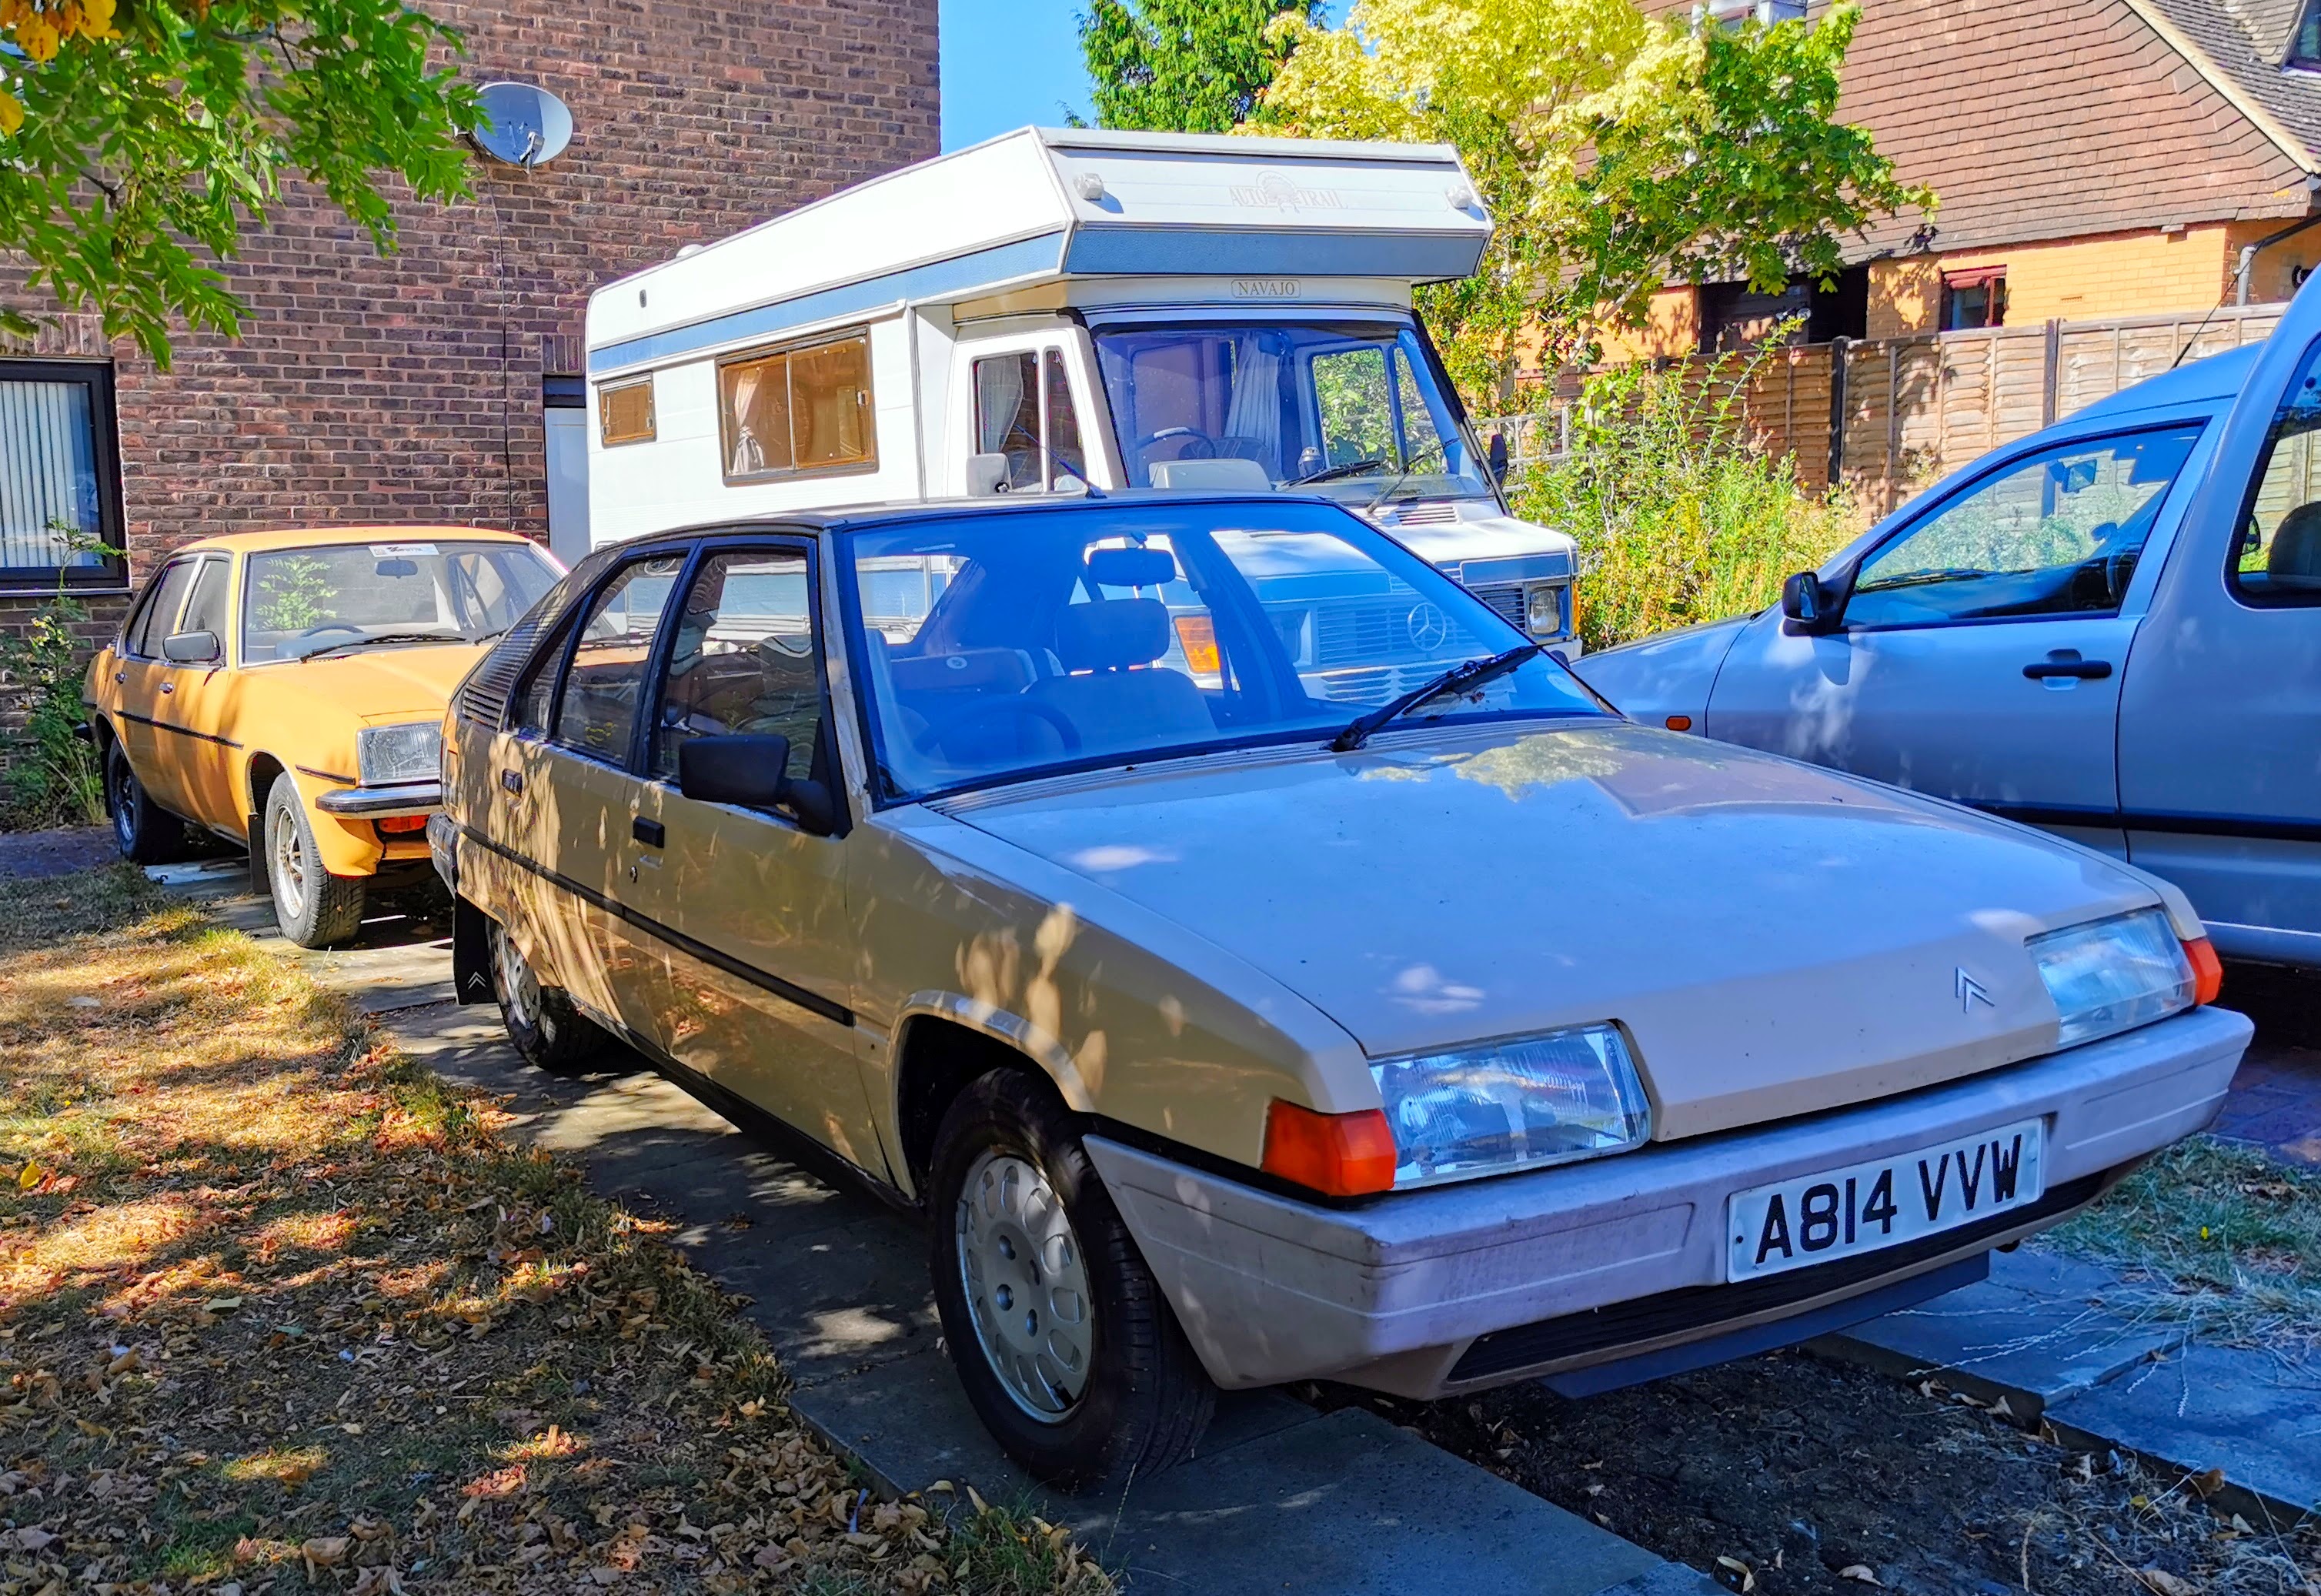
So on a blisteringly hot afternoon in August 2022, she finally landed at my home.
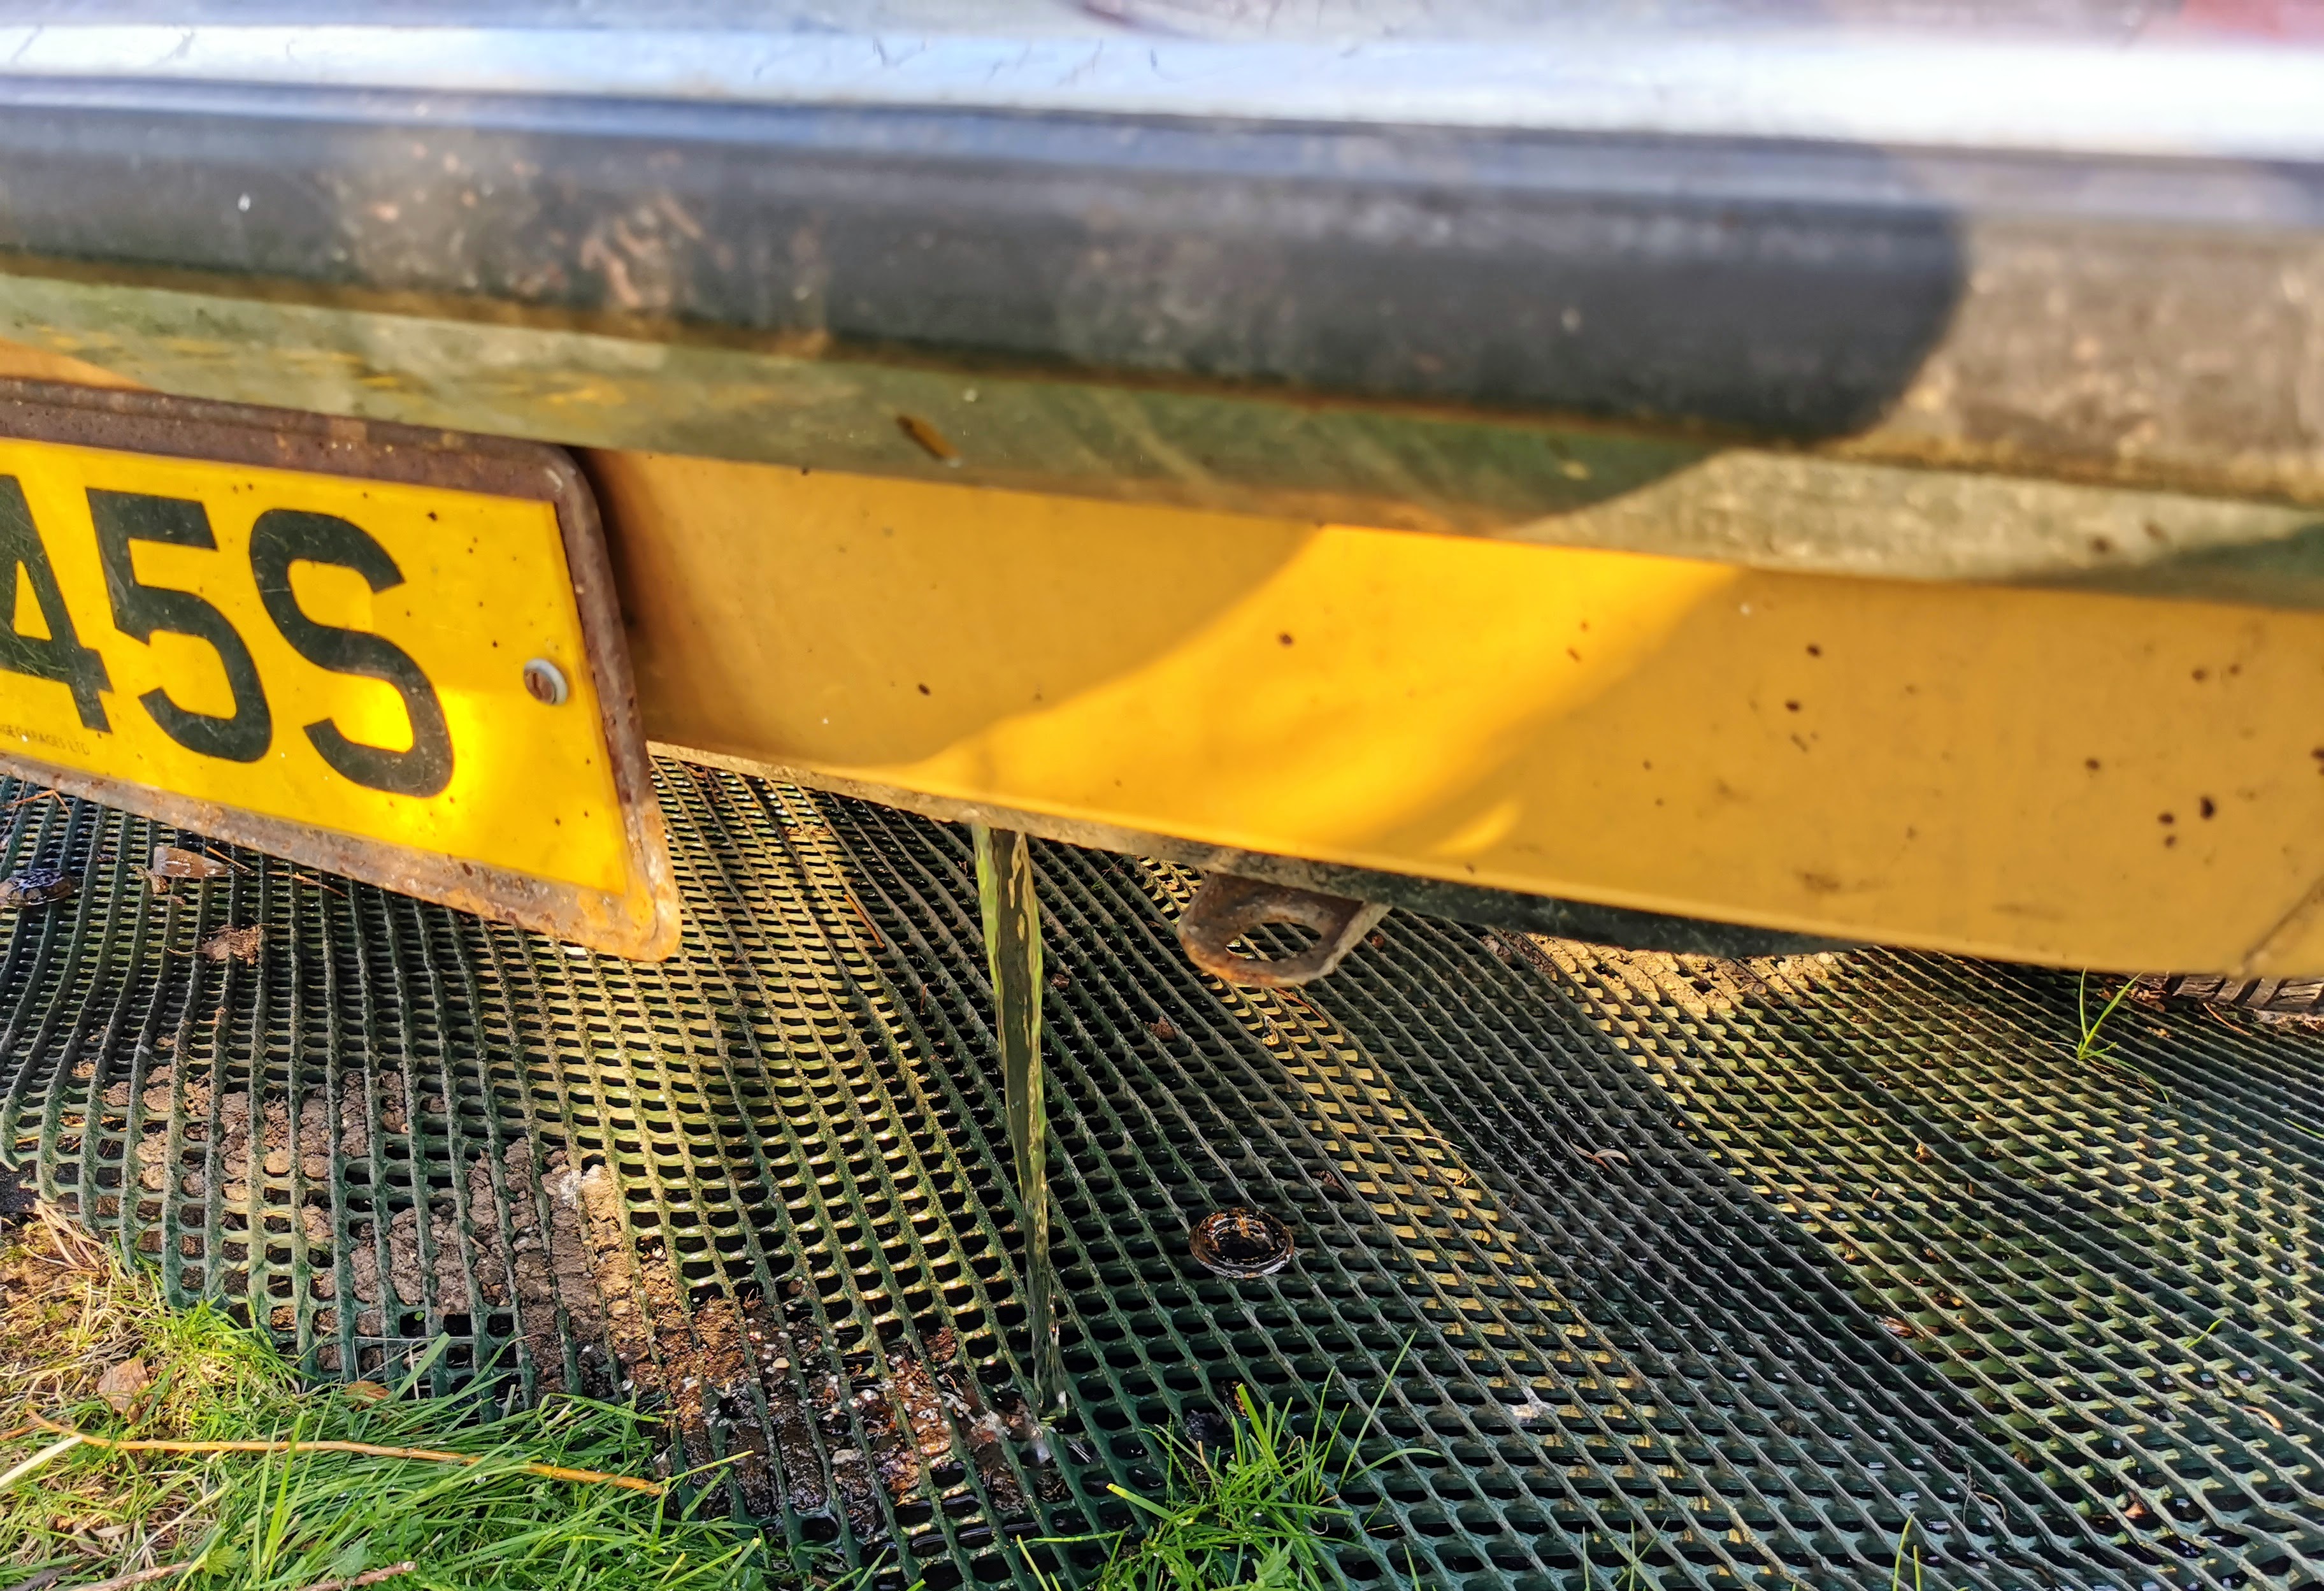
Immediately prior to the collection we did discover one small issue which will need to be addressed. While the interior was bone dry and showed no signs of water having got in while the car was sitting, the same couldn't be said for the boot.
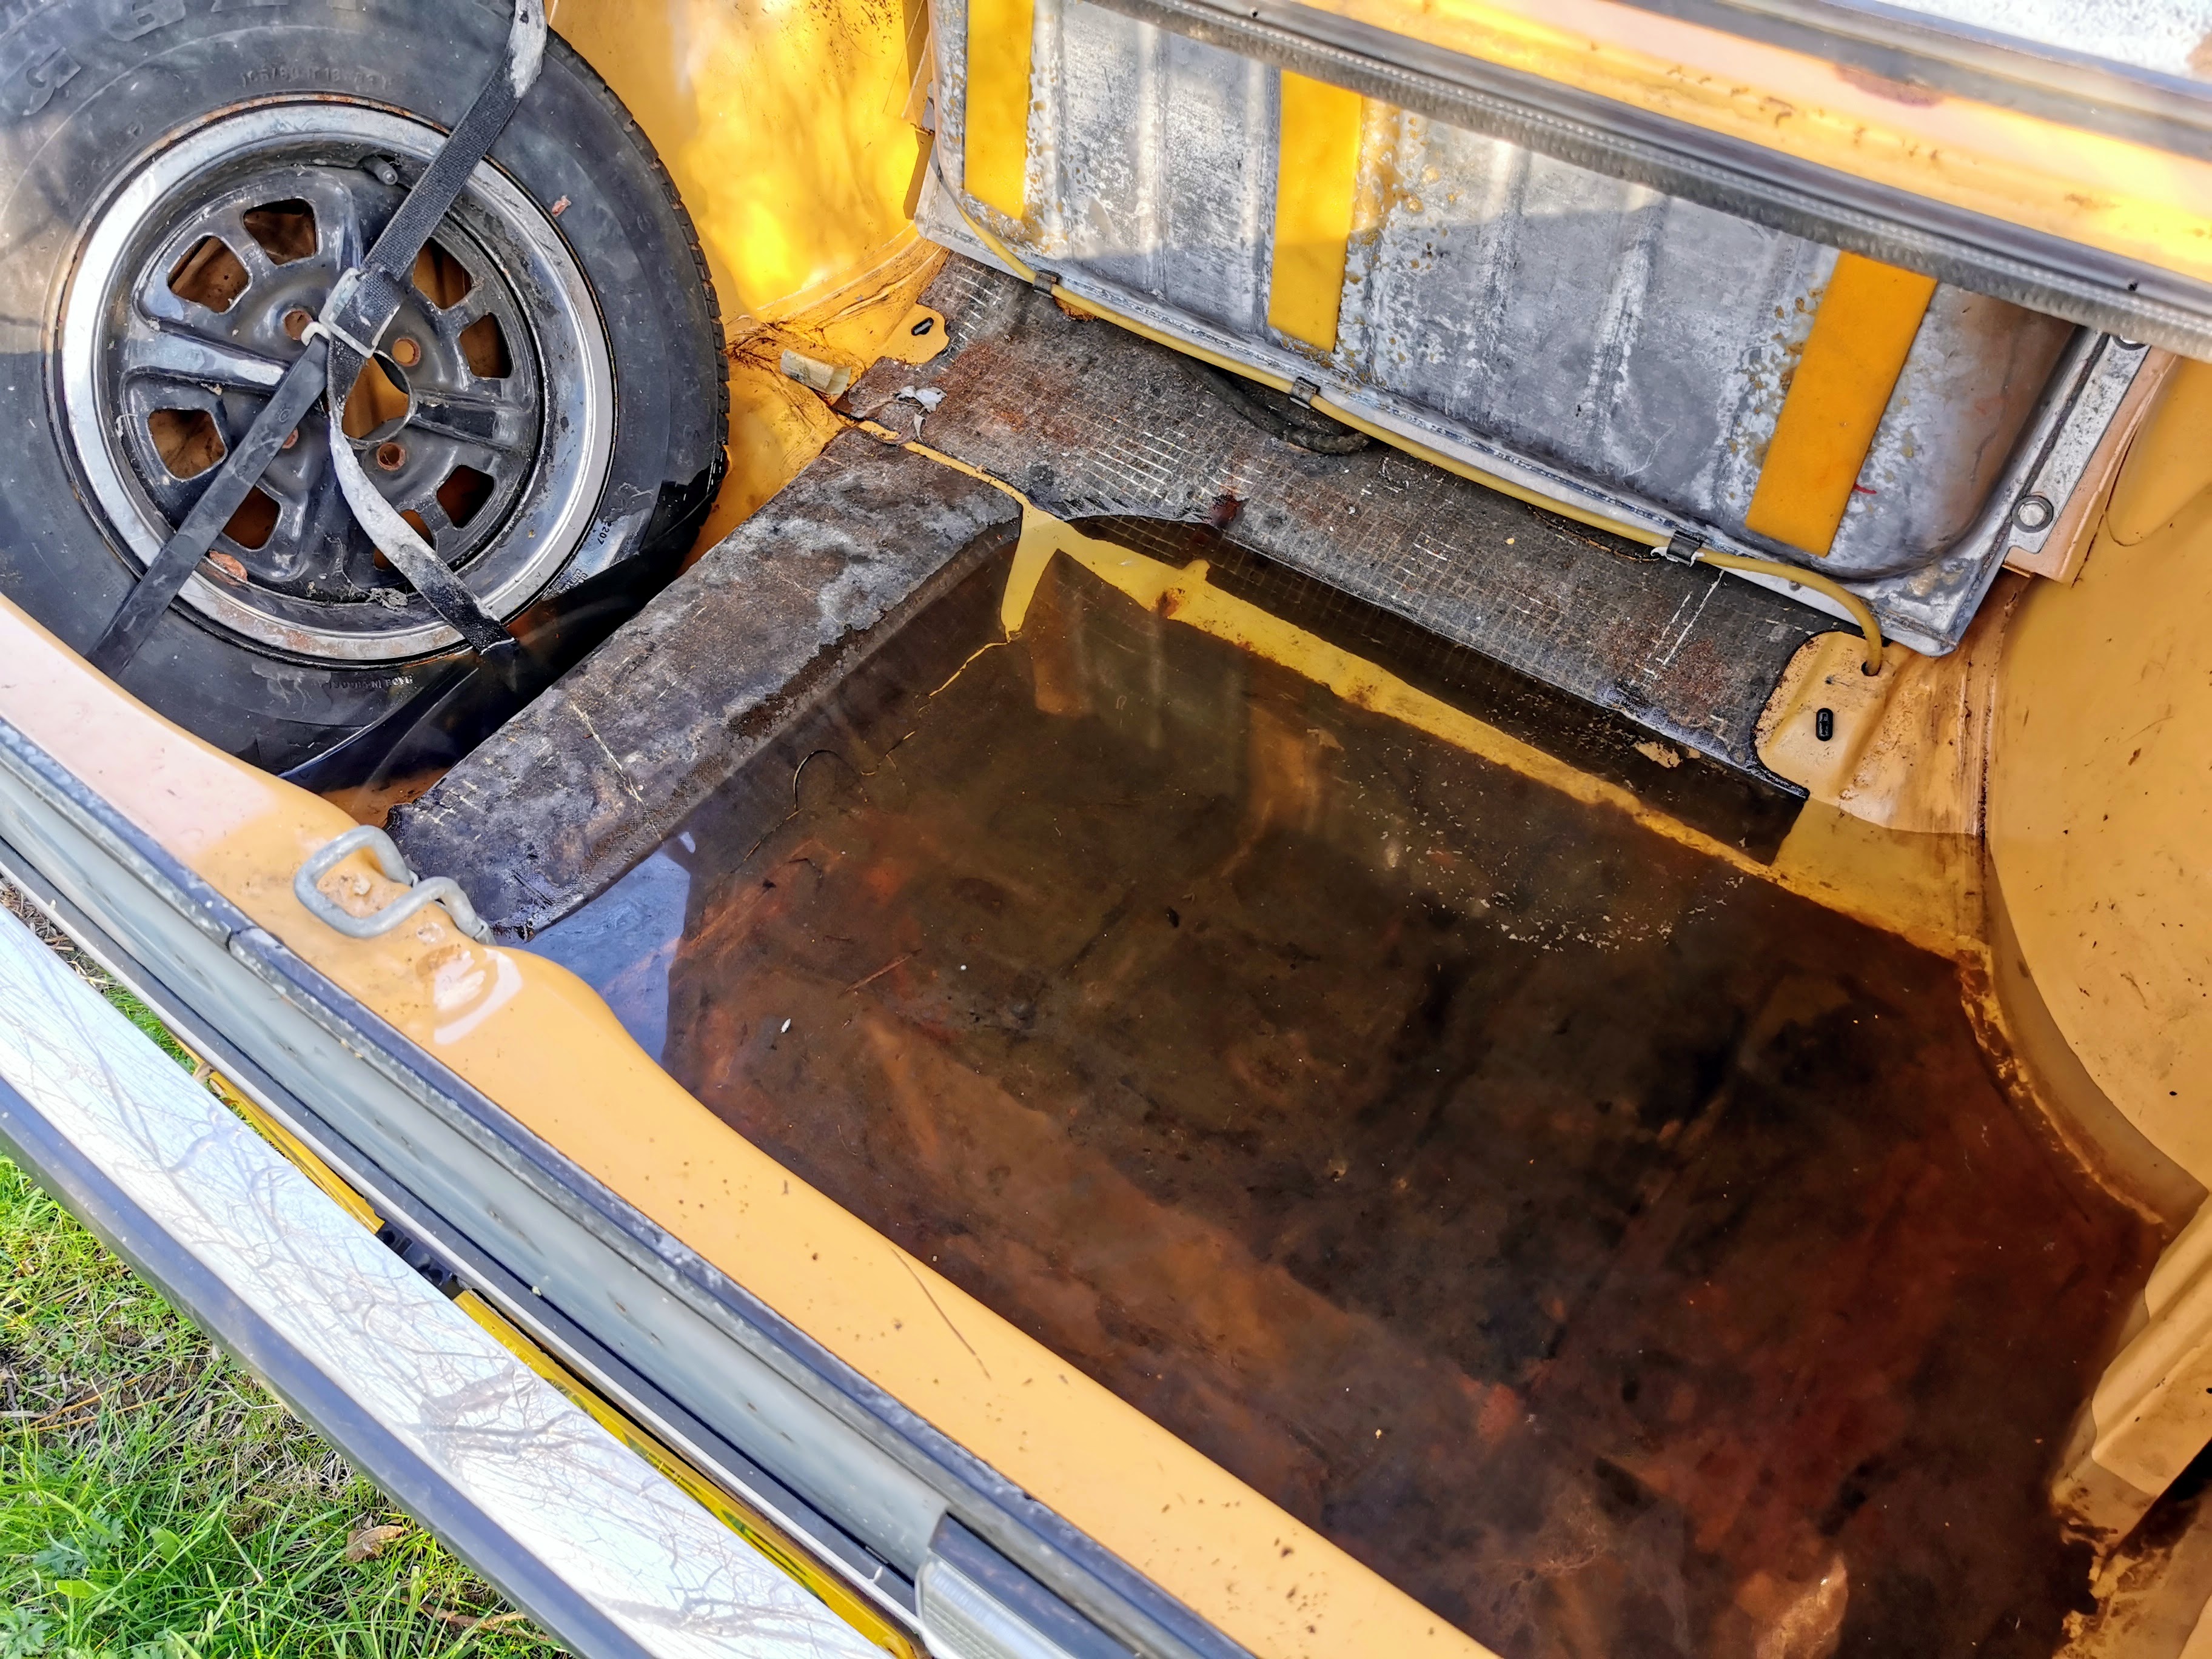
Which in the short term was resolved by knocking out one of the rubber bungs. Took the best part of five minutes for the water to drain, which gives some idea of how much was in there. Thankfully it doesn't seem to have done any damage.
Aside from that we also needed to swap the nearside front tyre for the spare. I'd noticed originally that that one had a huge bulge in the sidewall, and had apparently gone "pop" at some point between me viewing the car and its collection. A full new set of tyres will of course be fitted before the car goes near the road. Aside from that one which I assumed was damaged they all look pretty much like new in wear terms, but they're all from 2007 (so 15 years old) and all have a bit of perishing starting. I'd never even consider running a car on these tyres. It's one of the most safety critical components on the car, it's just not worth skimping on.
One of the wonderful things about owning a classic car which actually has a halfway decent following is that parts are generally far easier to track down than for a lot of cars I've owned before. As such even before the car had made it back home, a generous reader of my blog threads on a forum had offered up a replacement for the missing Vauxhall lettering on the rear panel.
![]()
I was astonished by the sheer weight of this envelope when it arrived. For no particularly good reason I had assumed the letters would be plastic, but they're actually cast metal so have a decent weight to them.
This definitely helps tidy the back of the car up a bit.
Before:
![]()
After:
![]()
Completely separately someone on another forum sent over a replacement front badge as well. This isn't missing, but has lost most of its red paint. Haven't 100% decided if this will get replaced yet - I think that will probably depend somewhat on how much the cosmetics overall get improved on this car. Nice to have it there and waiting though.
![]()
Have to wonder how many years that spent sitting on a shelf.
Definitely seemed in the couple of weeks of overlap between the arrival of the Cavalier and departure of the BX that I had cornered the marked in beige cars in our area!
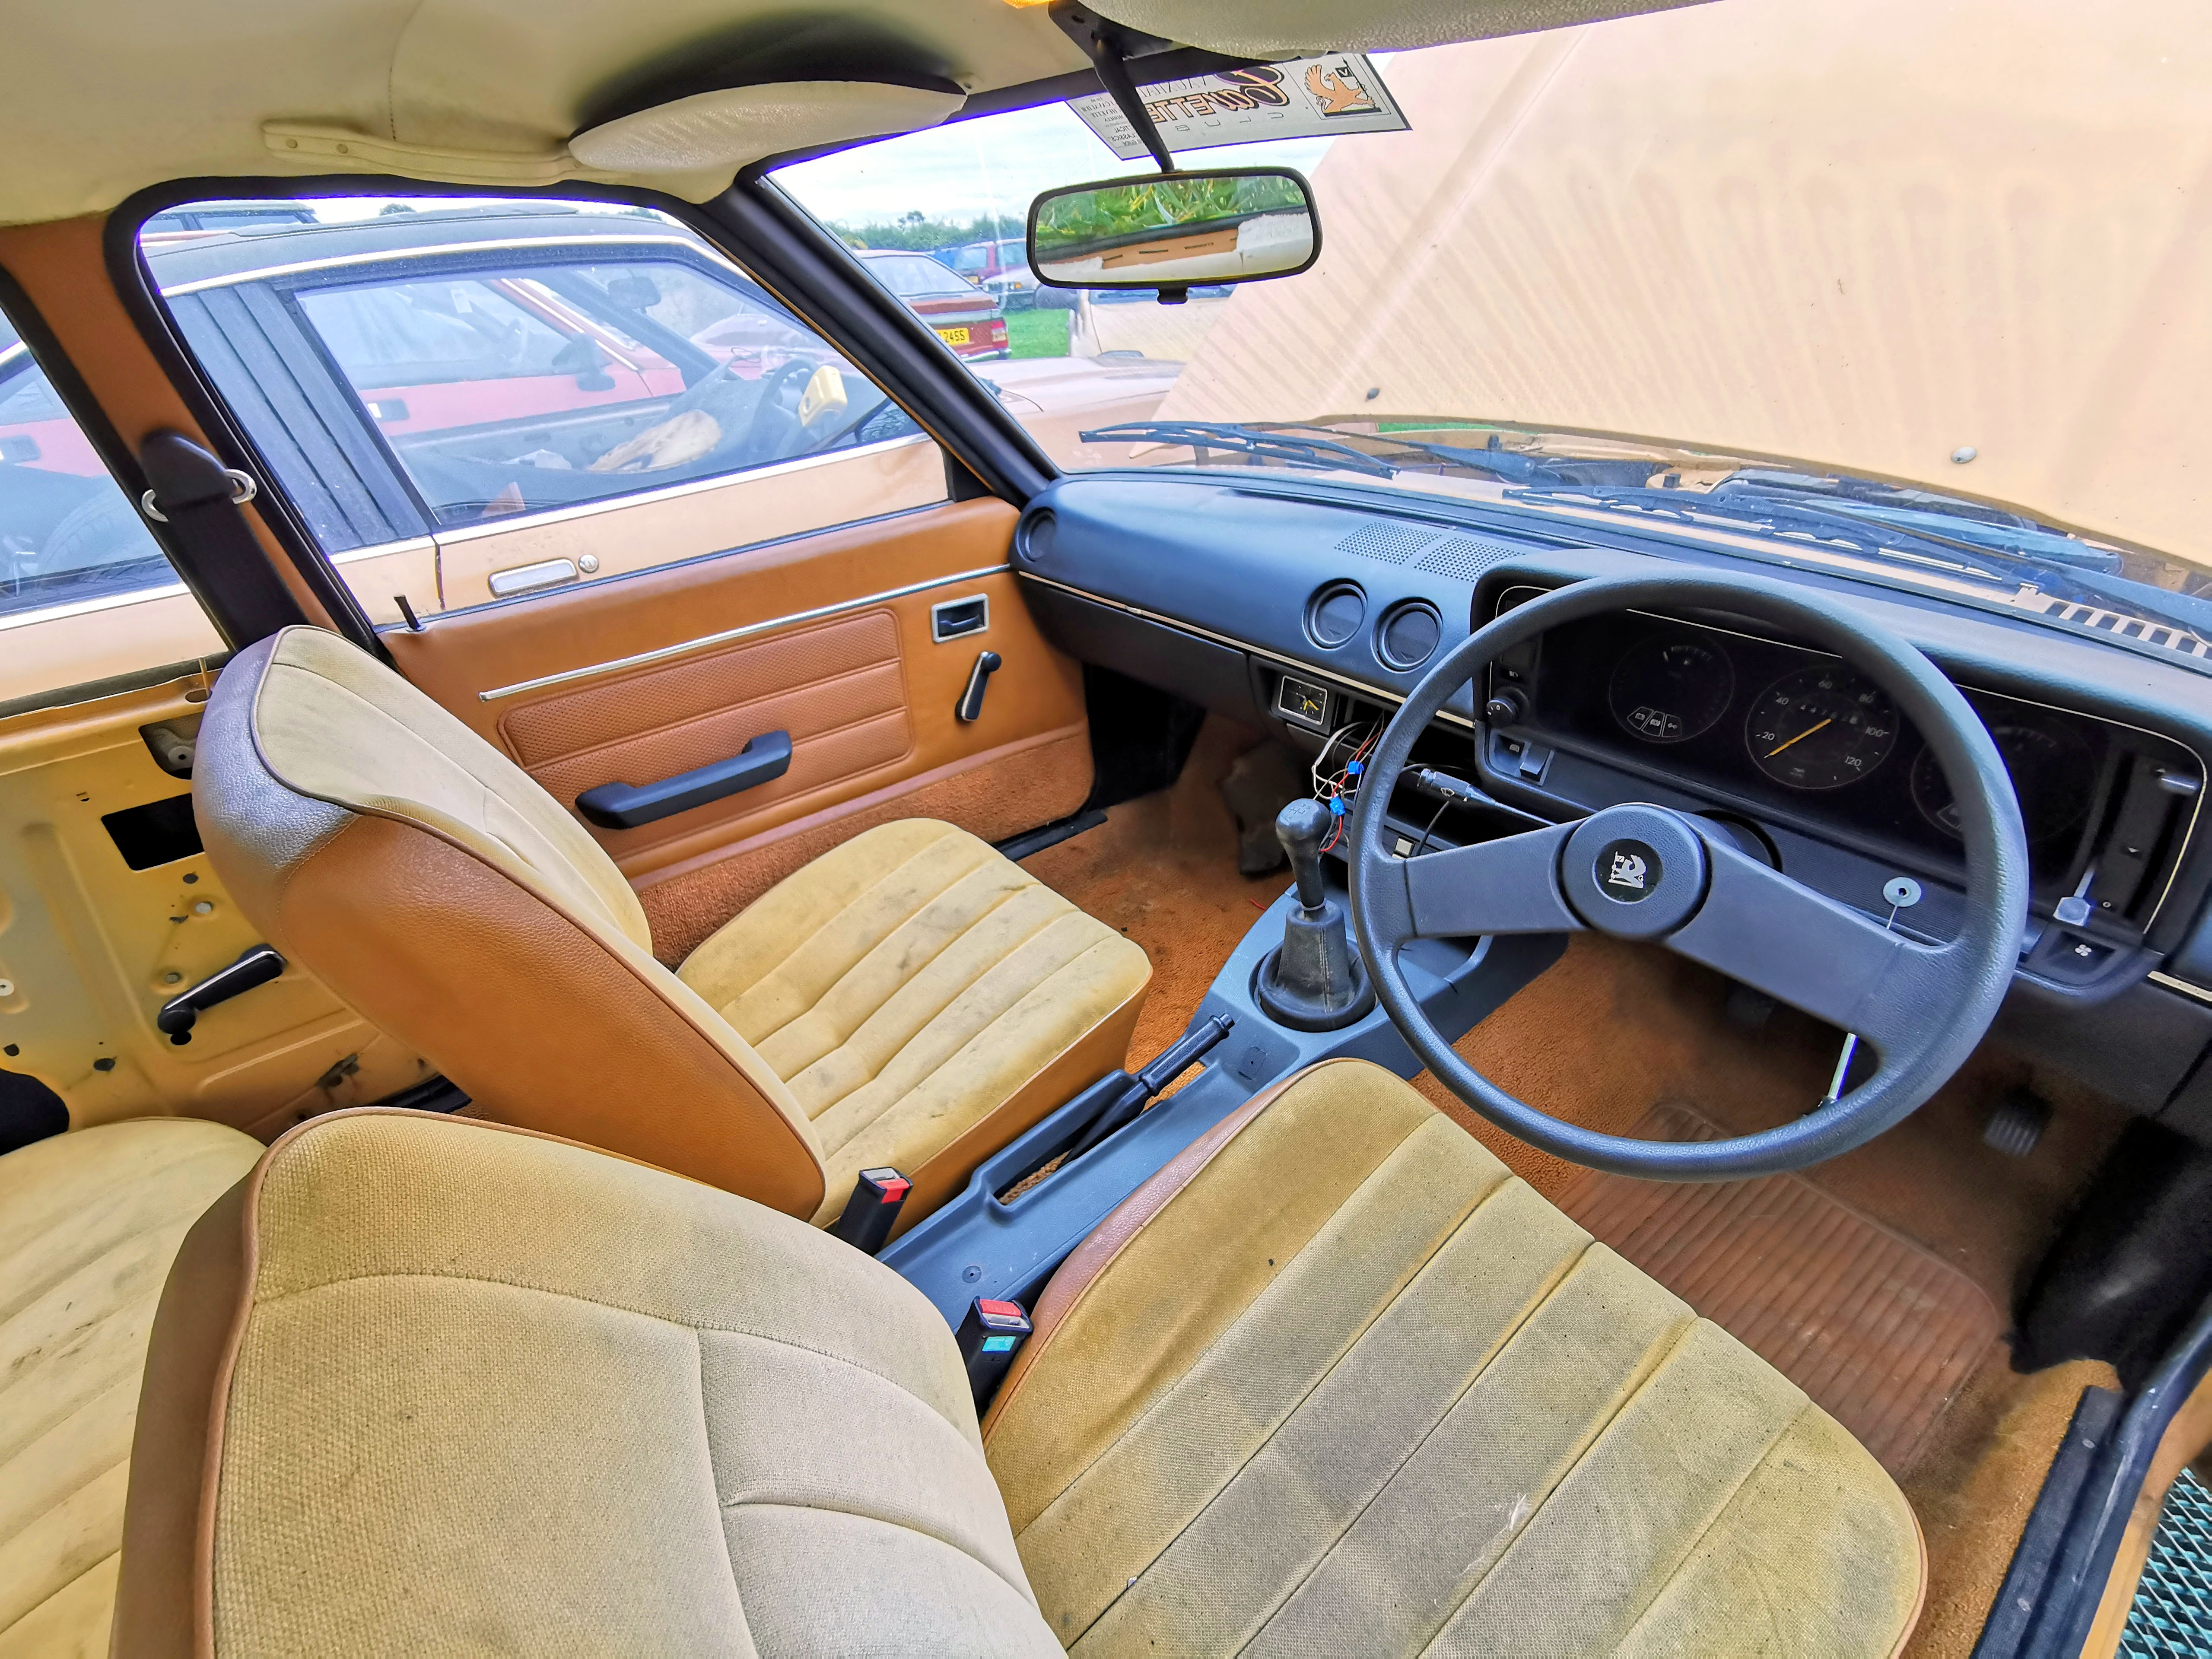
Those of you paying attention might have noticed something amiss when comparing the interior photos to the one of the rear of the car with the new Vauxhall badging fitted. Specifically this...
![]()
When looking inside, it's very clearly not an automatic.

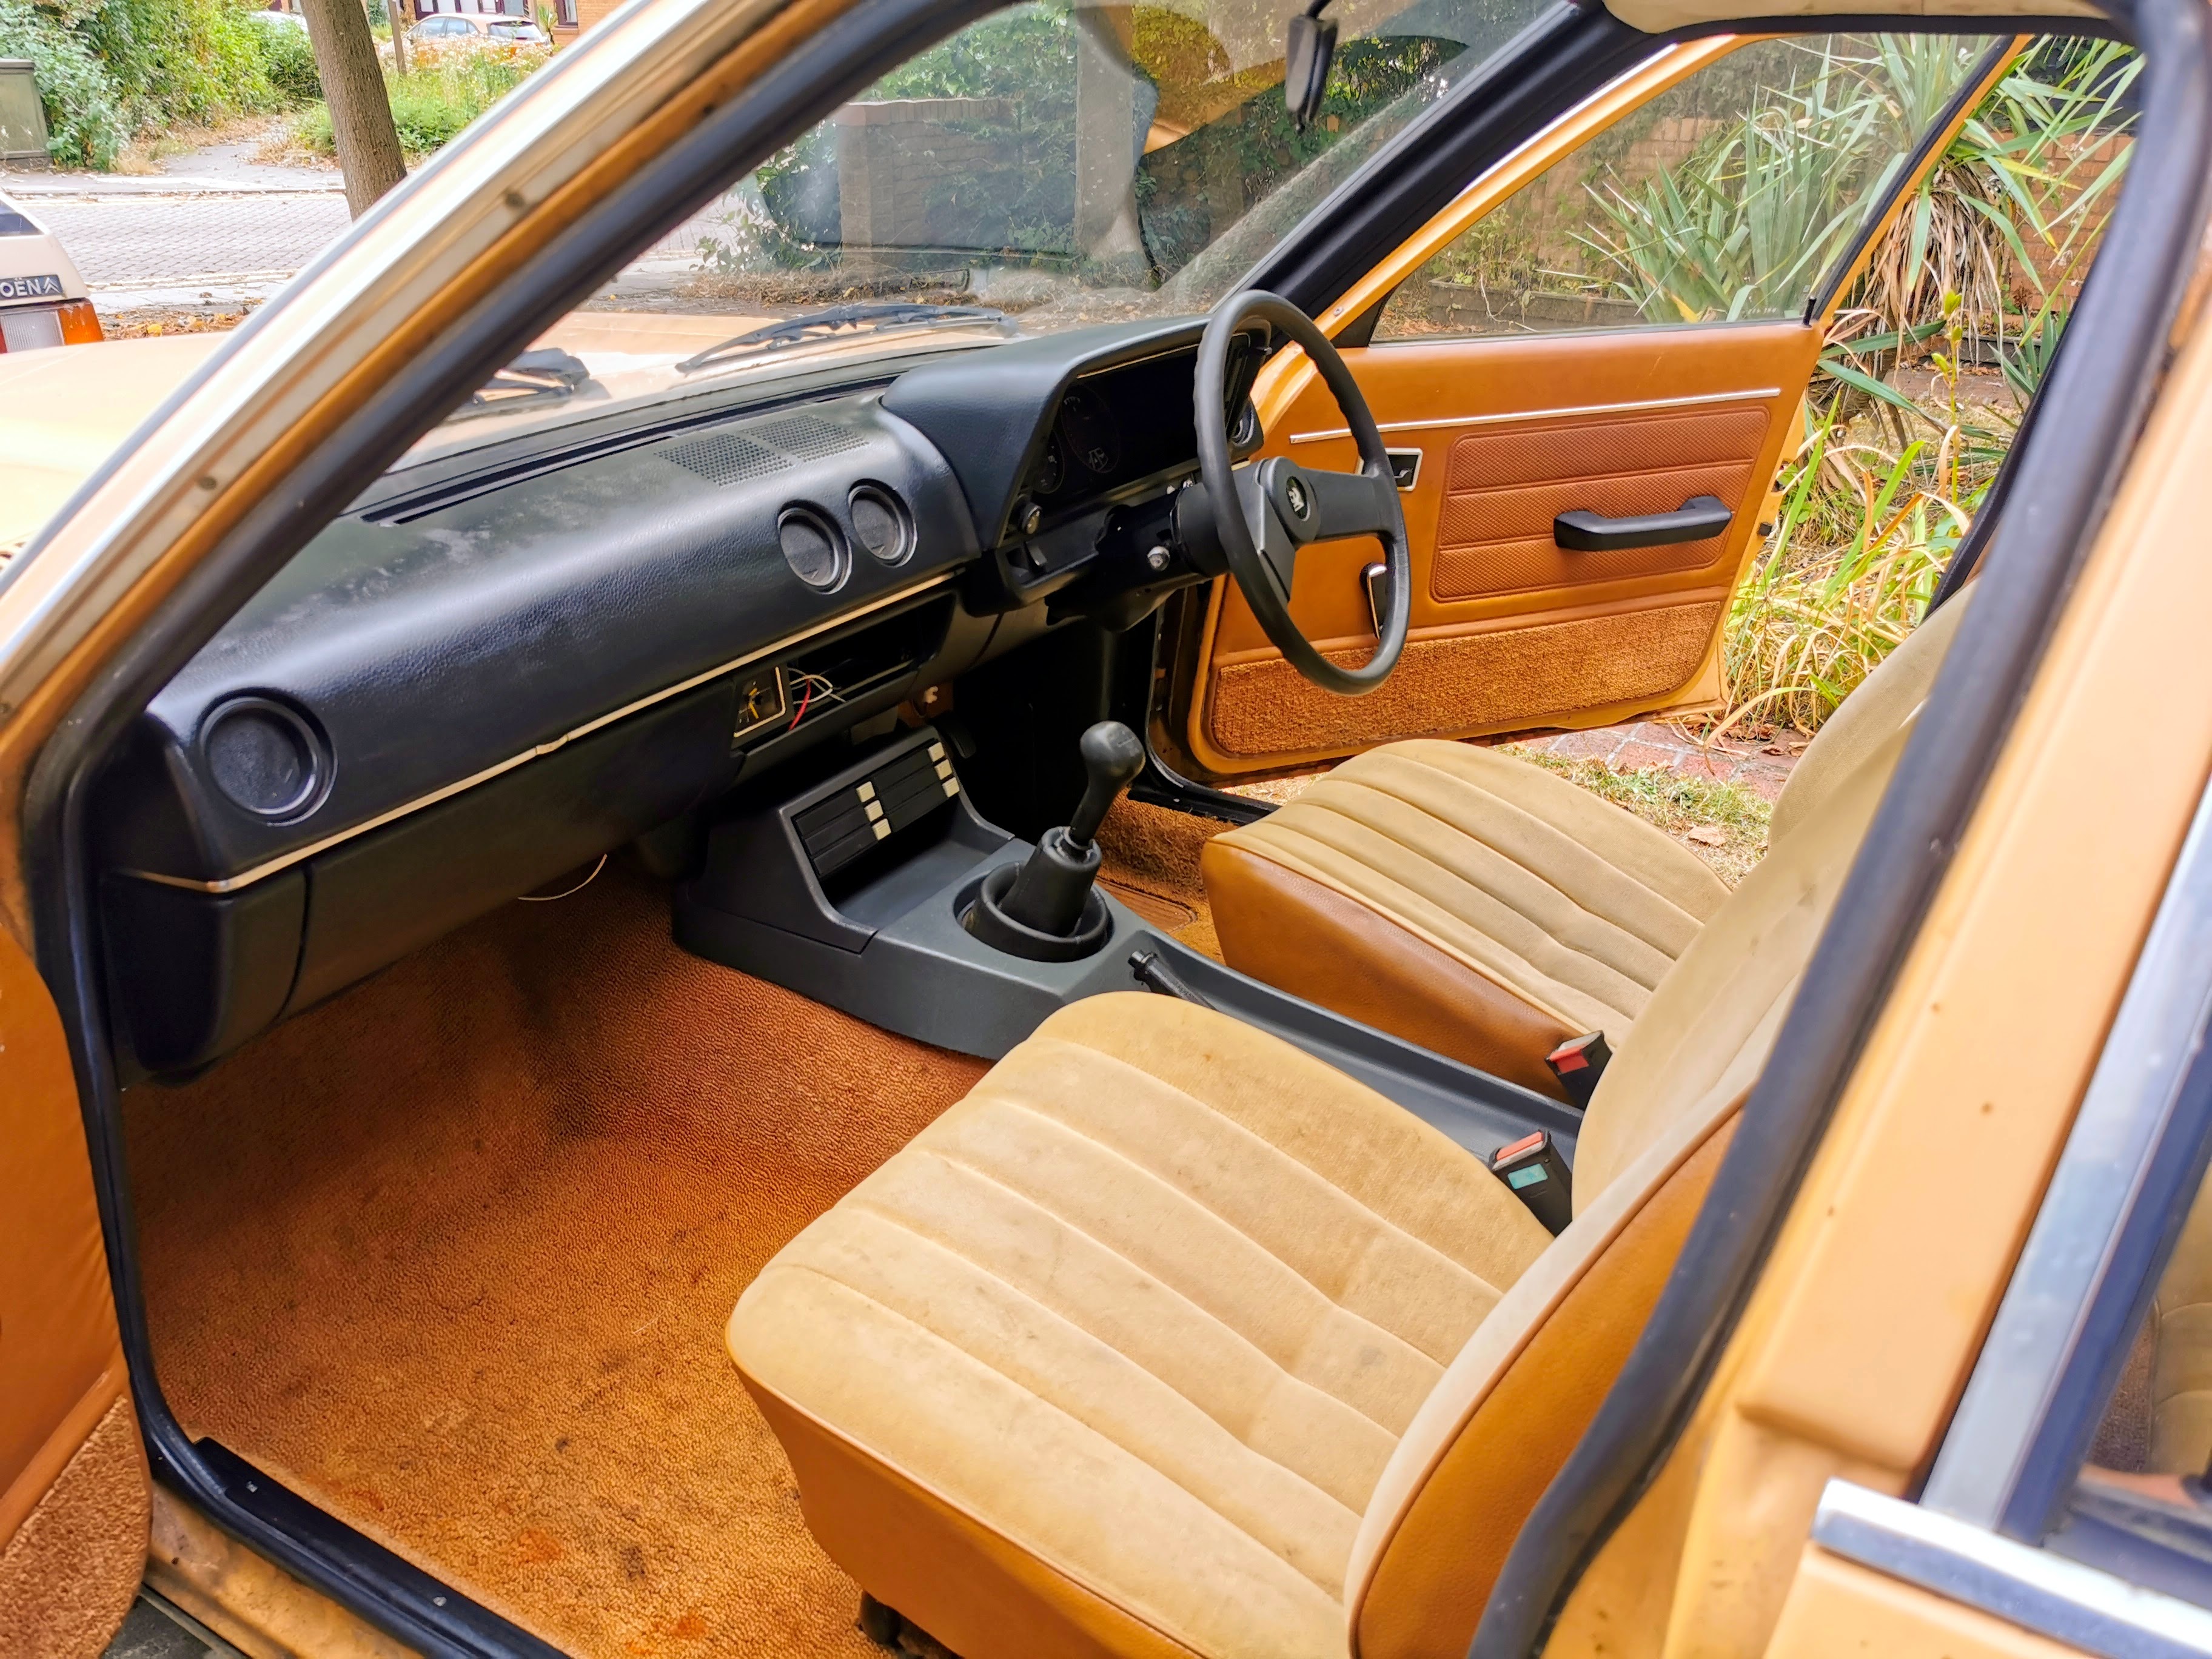
Though looking a bit closer it's obvious that there have been more changes here than it just being an auto that's had a manual box swapped in. The very 80s gear lever (and surrounding console) gives a clue. When the original automatic box failed, rather than just swapping in an identical one or one of the original manual boxes this car could have been specified with, instead a five-speed box from a slightly later Manta was fitted. This included quite a bit of fabrication work as the lever comes out of the box further back, so the metalwork under the centre console needed quite a bit of modification. The reason for going to all this work though is that this generation of Cavalier was never offered with a five speed gearbox, so that makes this quite a desirable mod to have done. It should make the car quite a bit more relaxed on longer journeys.
I really will need to find a slightly more period looking knob for the gear lever though, the 80s one currently on there just sticks out like a sore thumb in the otherwise very 70s interior. Likewise the tape holders will need to be ousted, probably in preference of a storage shelf which I believe would slot into the same space. Wouldn't complain if I came across the same console in black either, as it being grey sticks out a bit as the rest of the interior plastics are all black.
Speaking of modifications, someone has already been at the parcel shelf and cut holes in it for a set of 6x9" speakers.
I actually don't mind this at all. I like my music, so fitting a halfway decent set of speakers would have been on my wish list. However I wouldn't have been willing to go hacking about the parcel shelf for them...so someone having done it in years gone by saves me the hassle of trying to work around that.
With the car finally on my driveway I was in a better position to do a bit more of a detailed examination - even though it didn't happen immediately on account of it being somewhere around a million degrees centigrade outside, and being from Aberdeen originally I DO NOT enjoy the heat...so was limited to about 15 minutes of useful activity outside at a time for weeks.
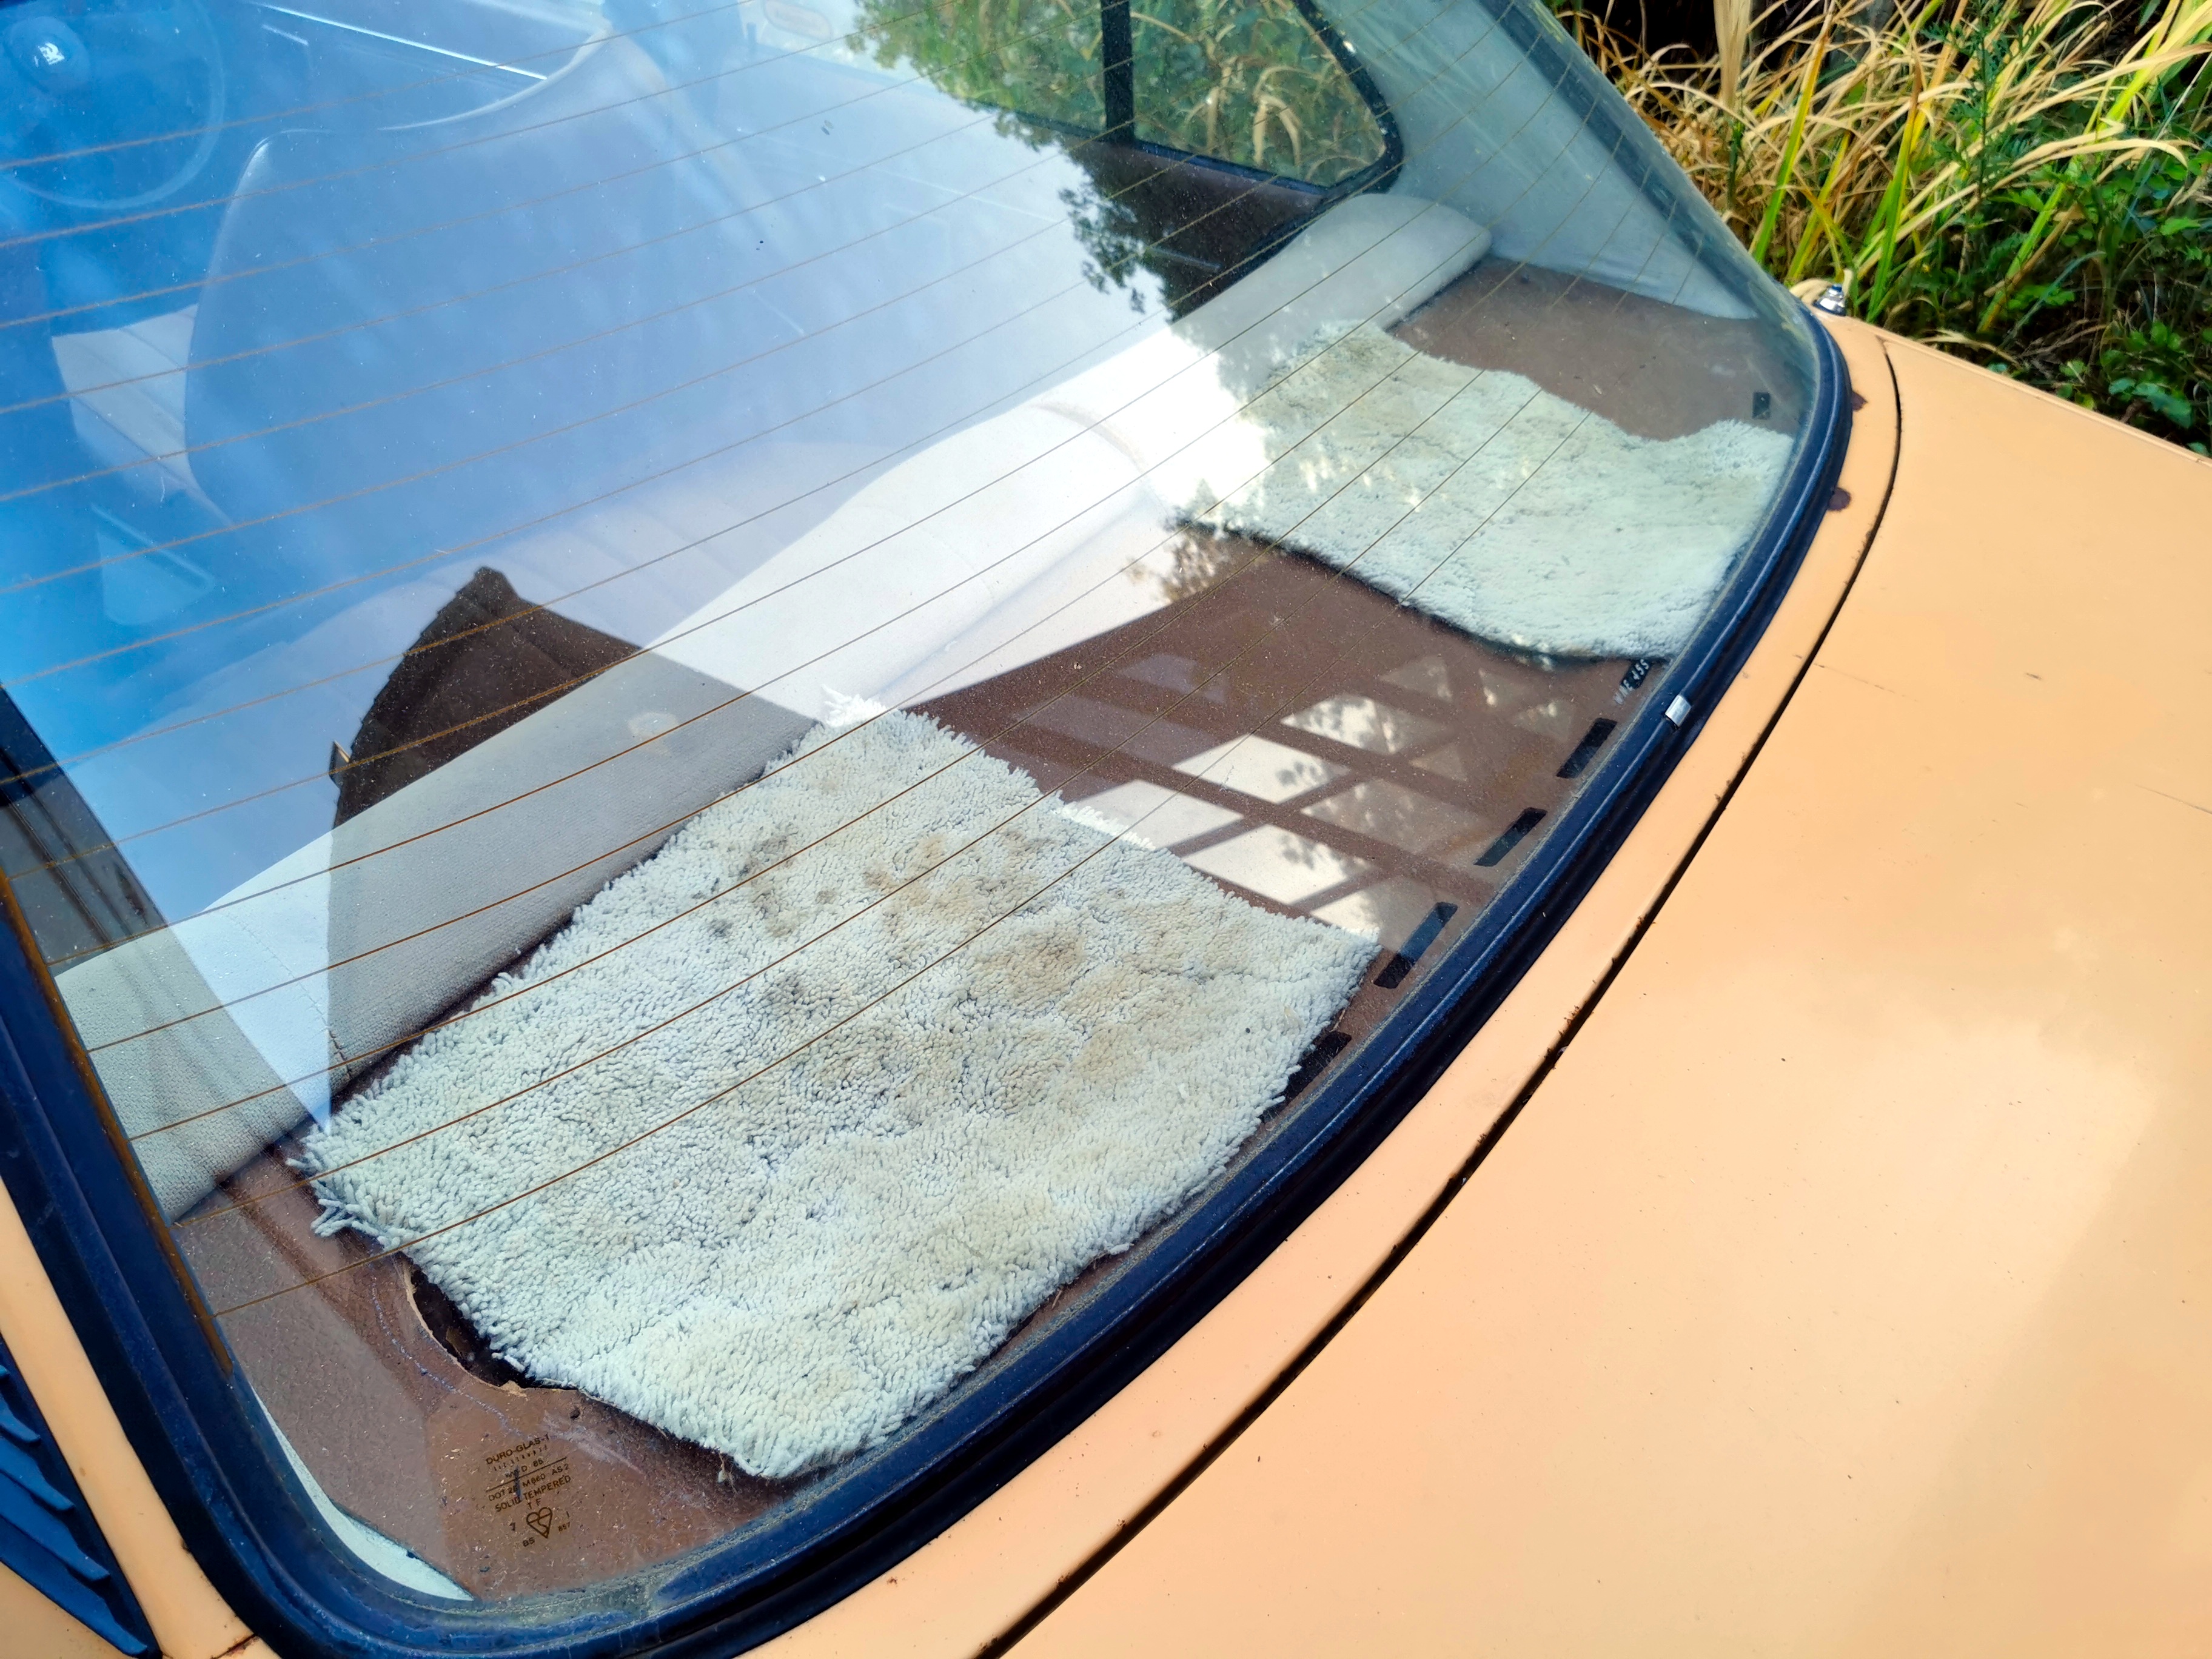
Evidence in the windscreen that I'd previously missed of a former enthusiast owner (as if the gearbox swap wasn't enough) being in one of the owner's clubs.

Who appear to still be around, albeit now simply called the Cavalier and Chevette Club. I really ought to get around to joining up.
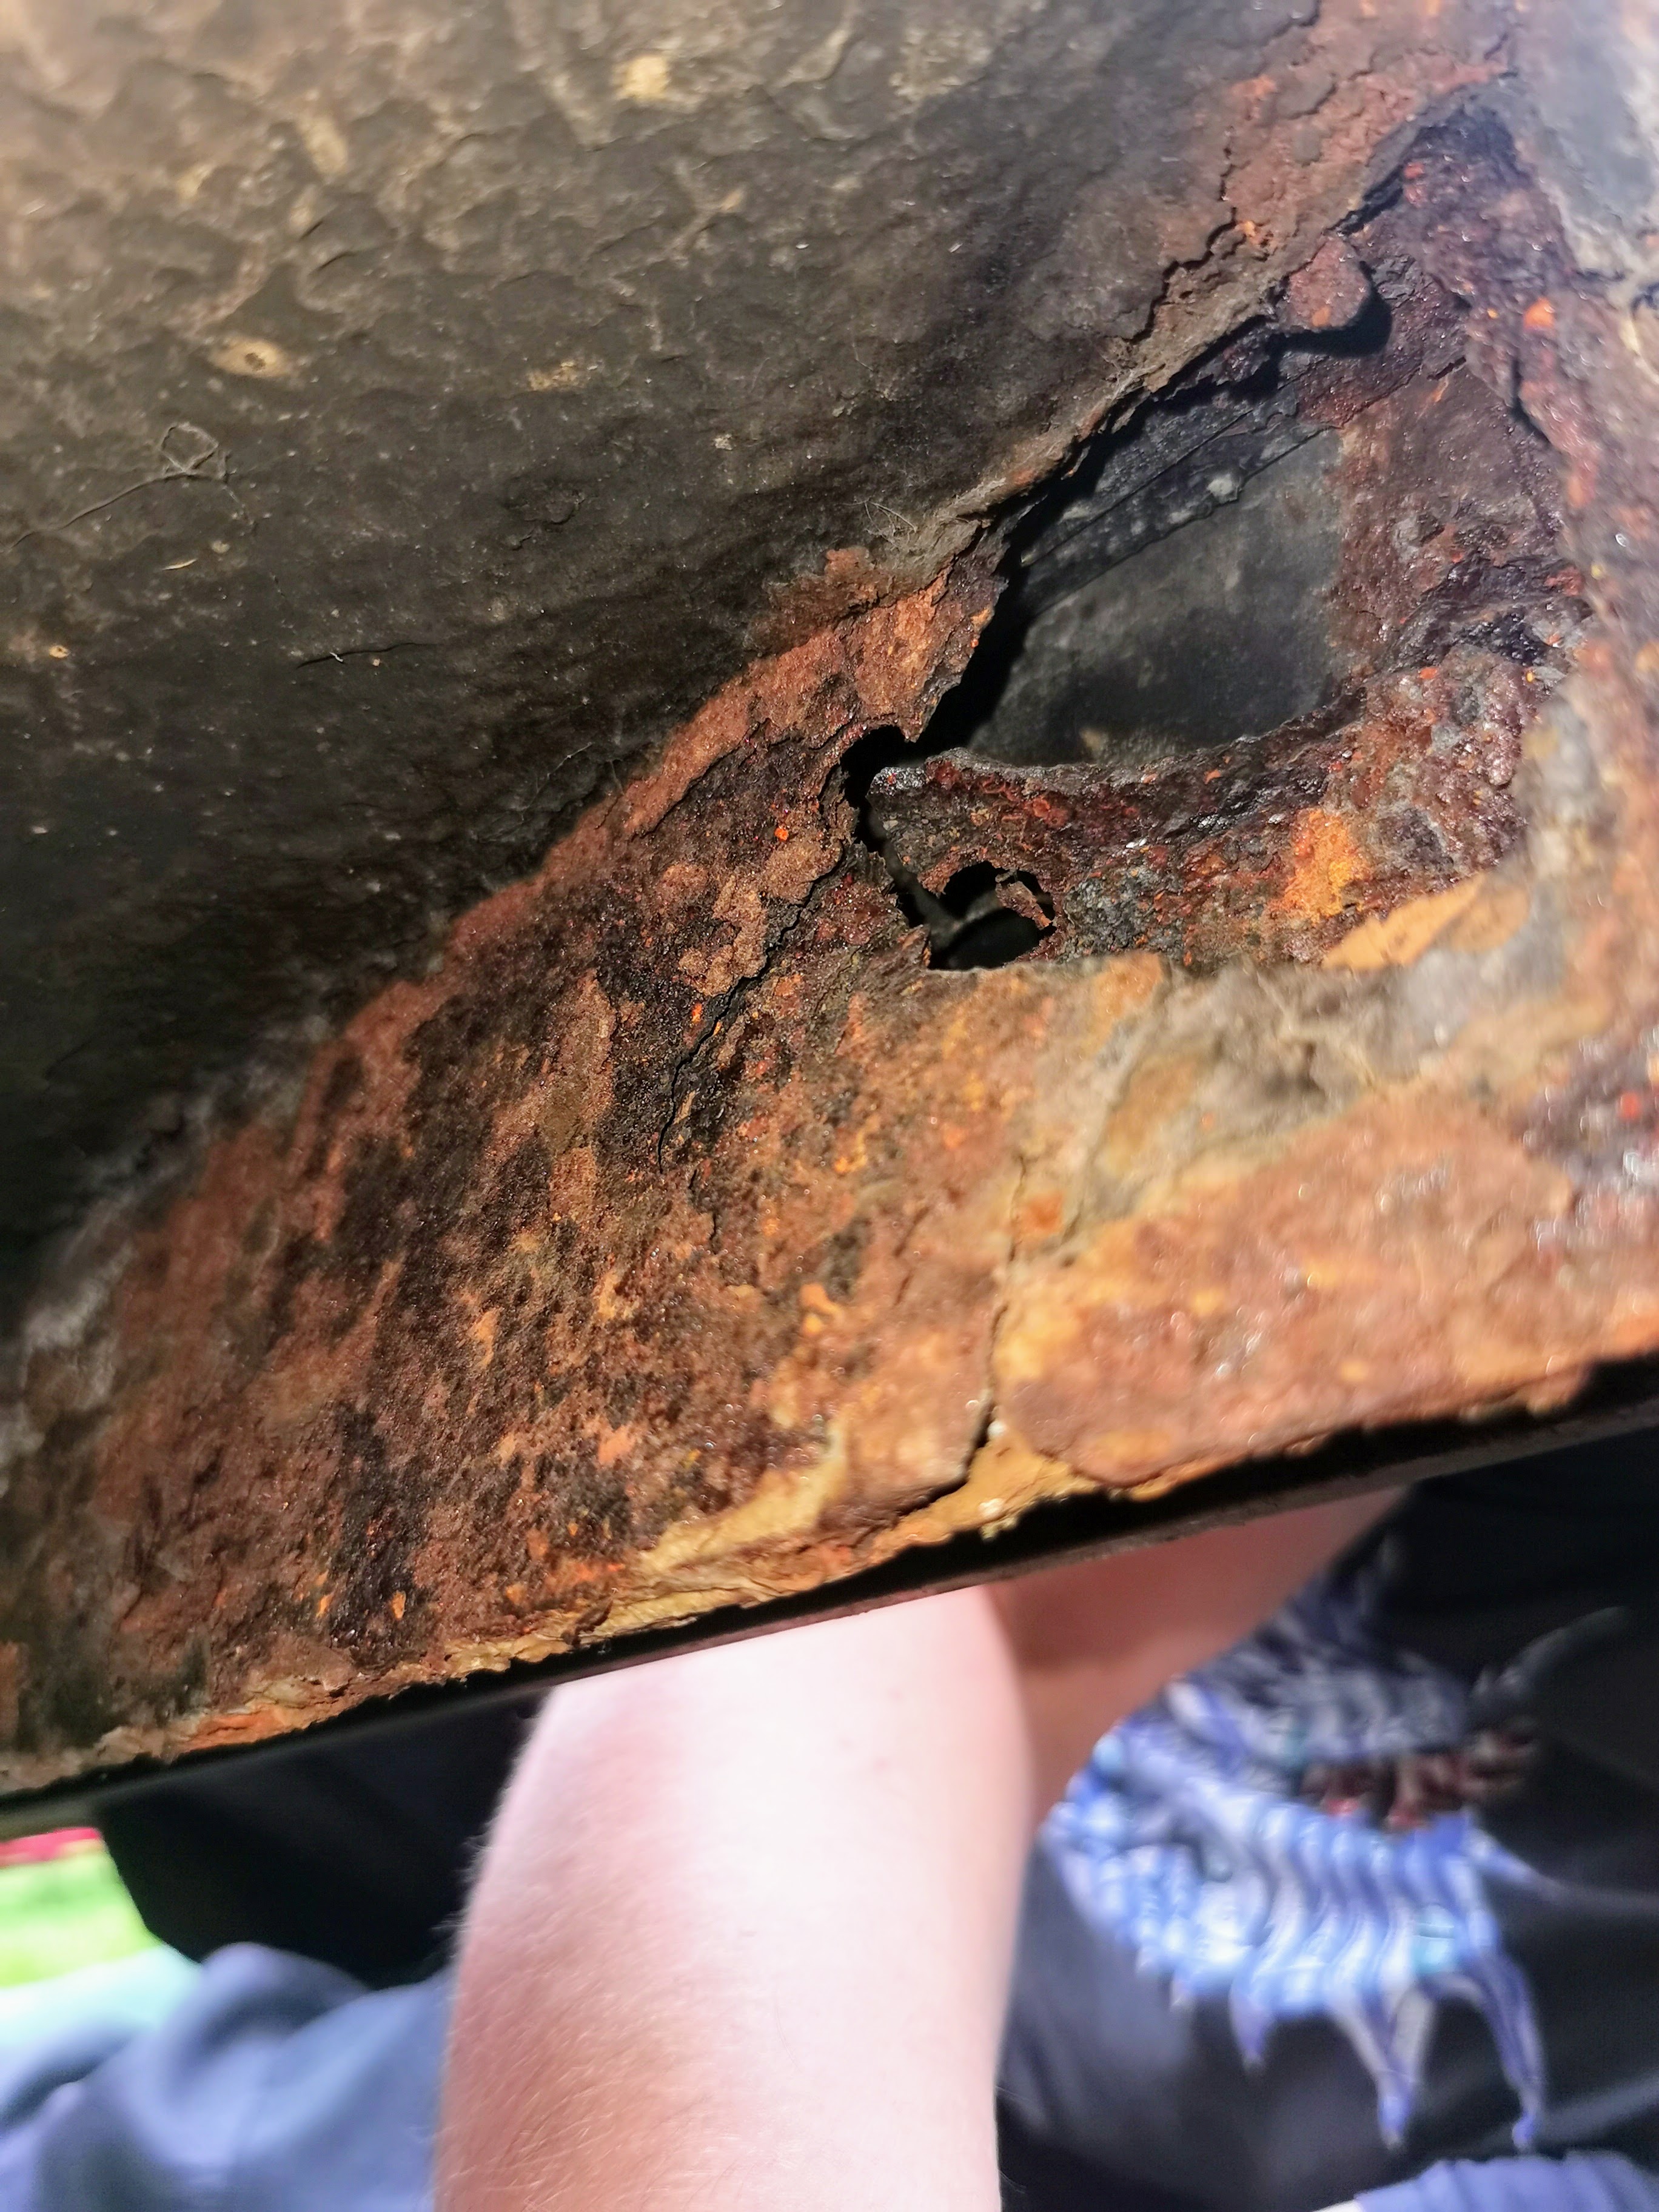
The only slightly alarming crispy bit I found that I didn't clock when I originally looked at the car was this bit of the chassis rail on the nearside.
It's definitely a bit crusty there, but didn't seem nearly soft enough to account for the degree of damage until I figured out how that had happened. Moving back a couple of feet makes that more obvious.

If you look, the centre of that damaged area (and the previously unnoticed bend of the exhaust) are perfectly centred in the dent on the door - so that area was clearly damaged by the forks of the telehandler which had lifted the car. The area obviously needed some remedial work anyway and it's just a square box section so not the end of the world. Given some of the damage I've seen to cars which have been carelessly lifted I reckon I should count myself lucky.
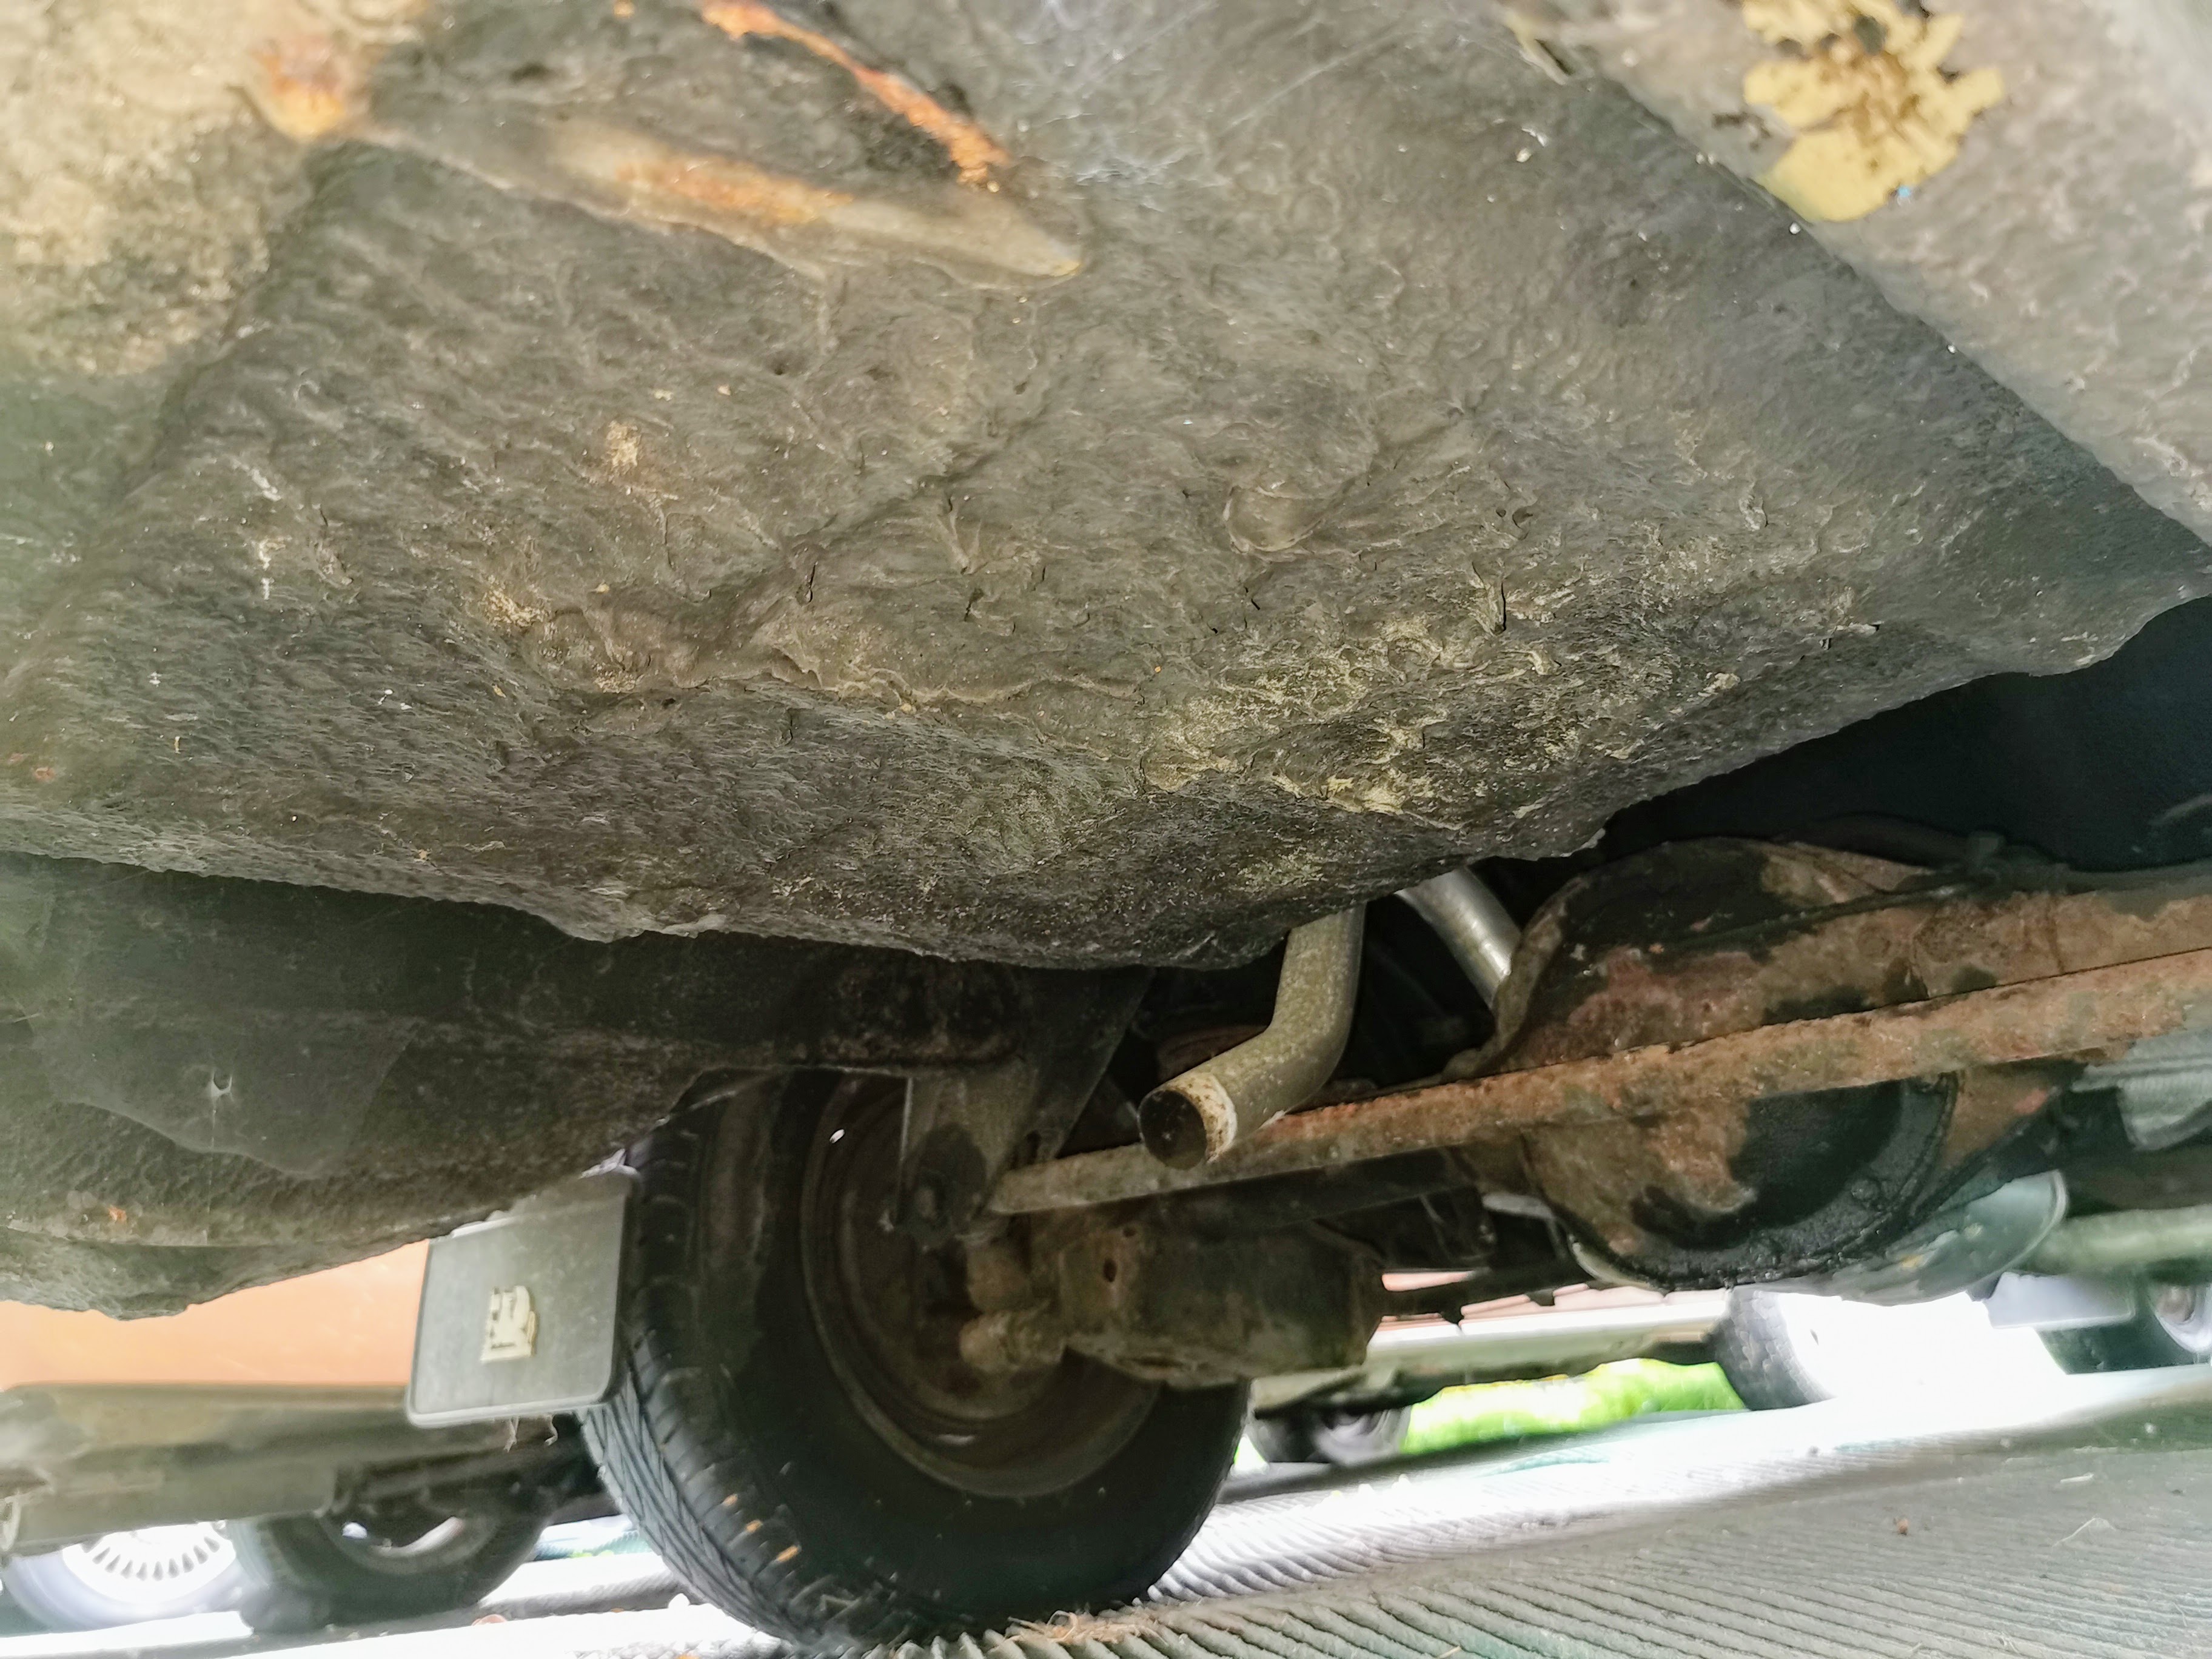
I reckon I might be in the market for a new set of shock absorbers sooner than later as well, though they seem to work just fine just now. I don't imagine they would last hugely long once pressed back into service.
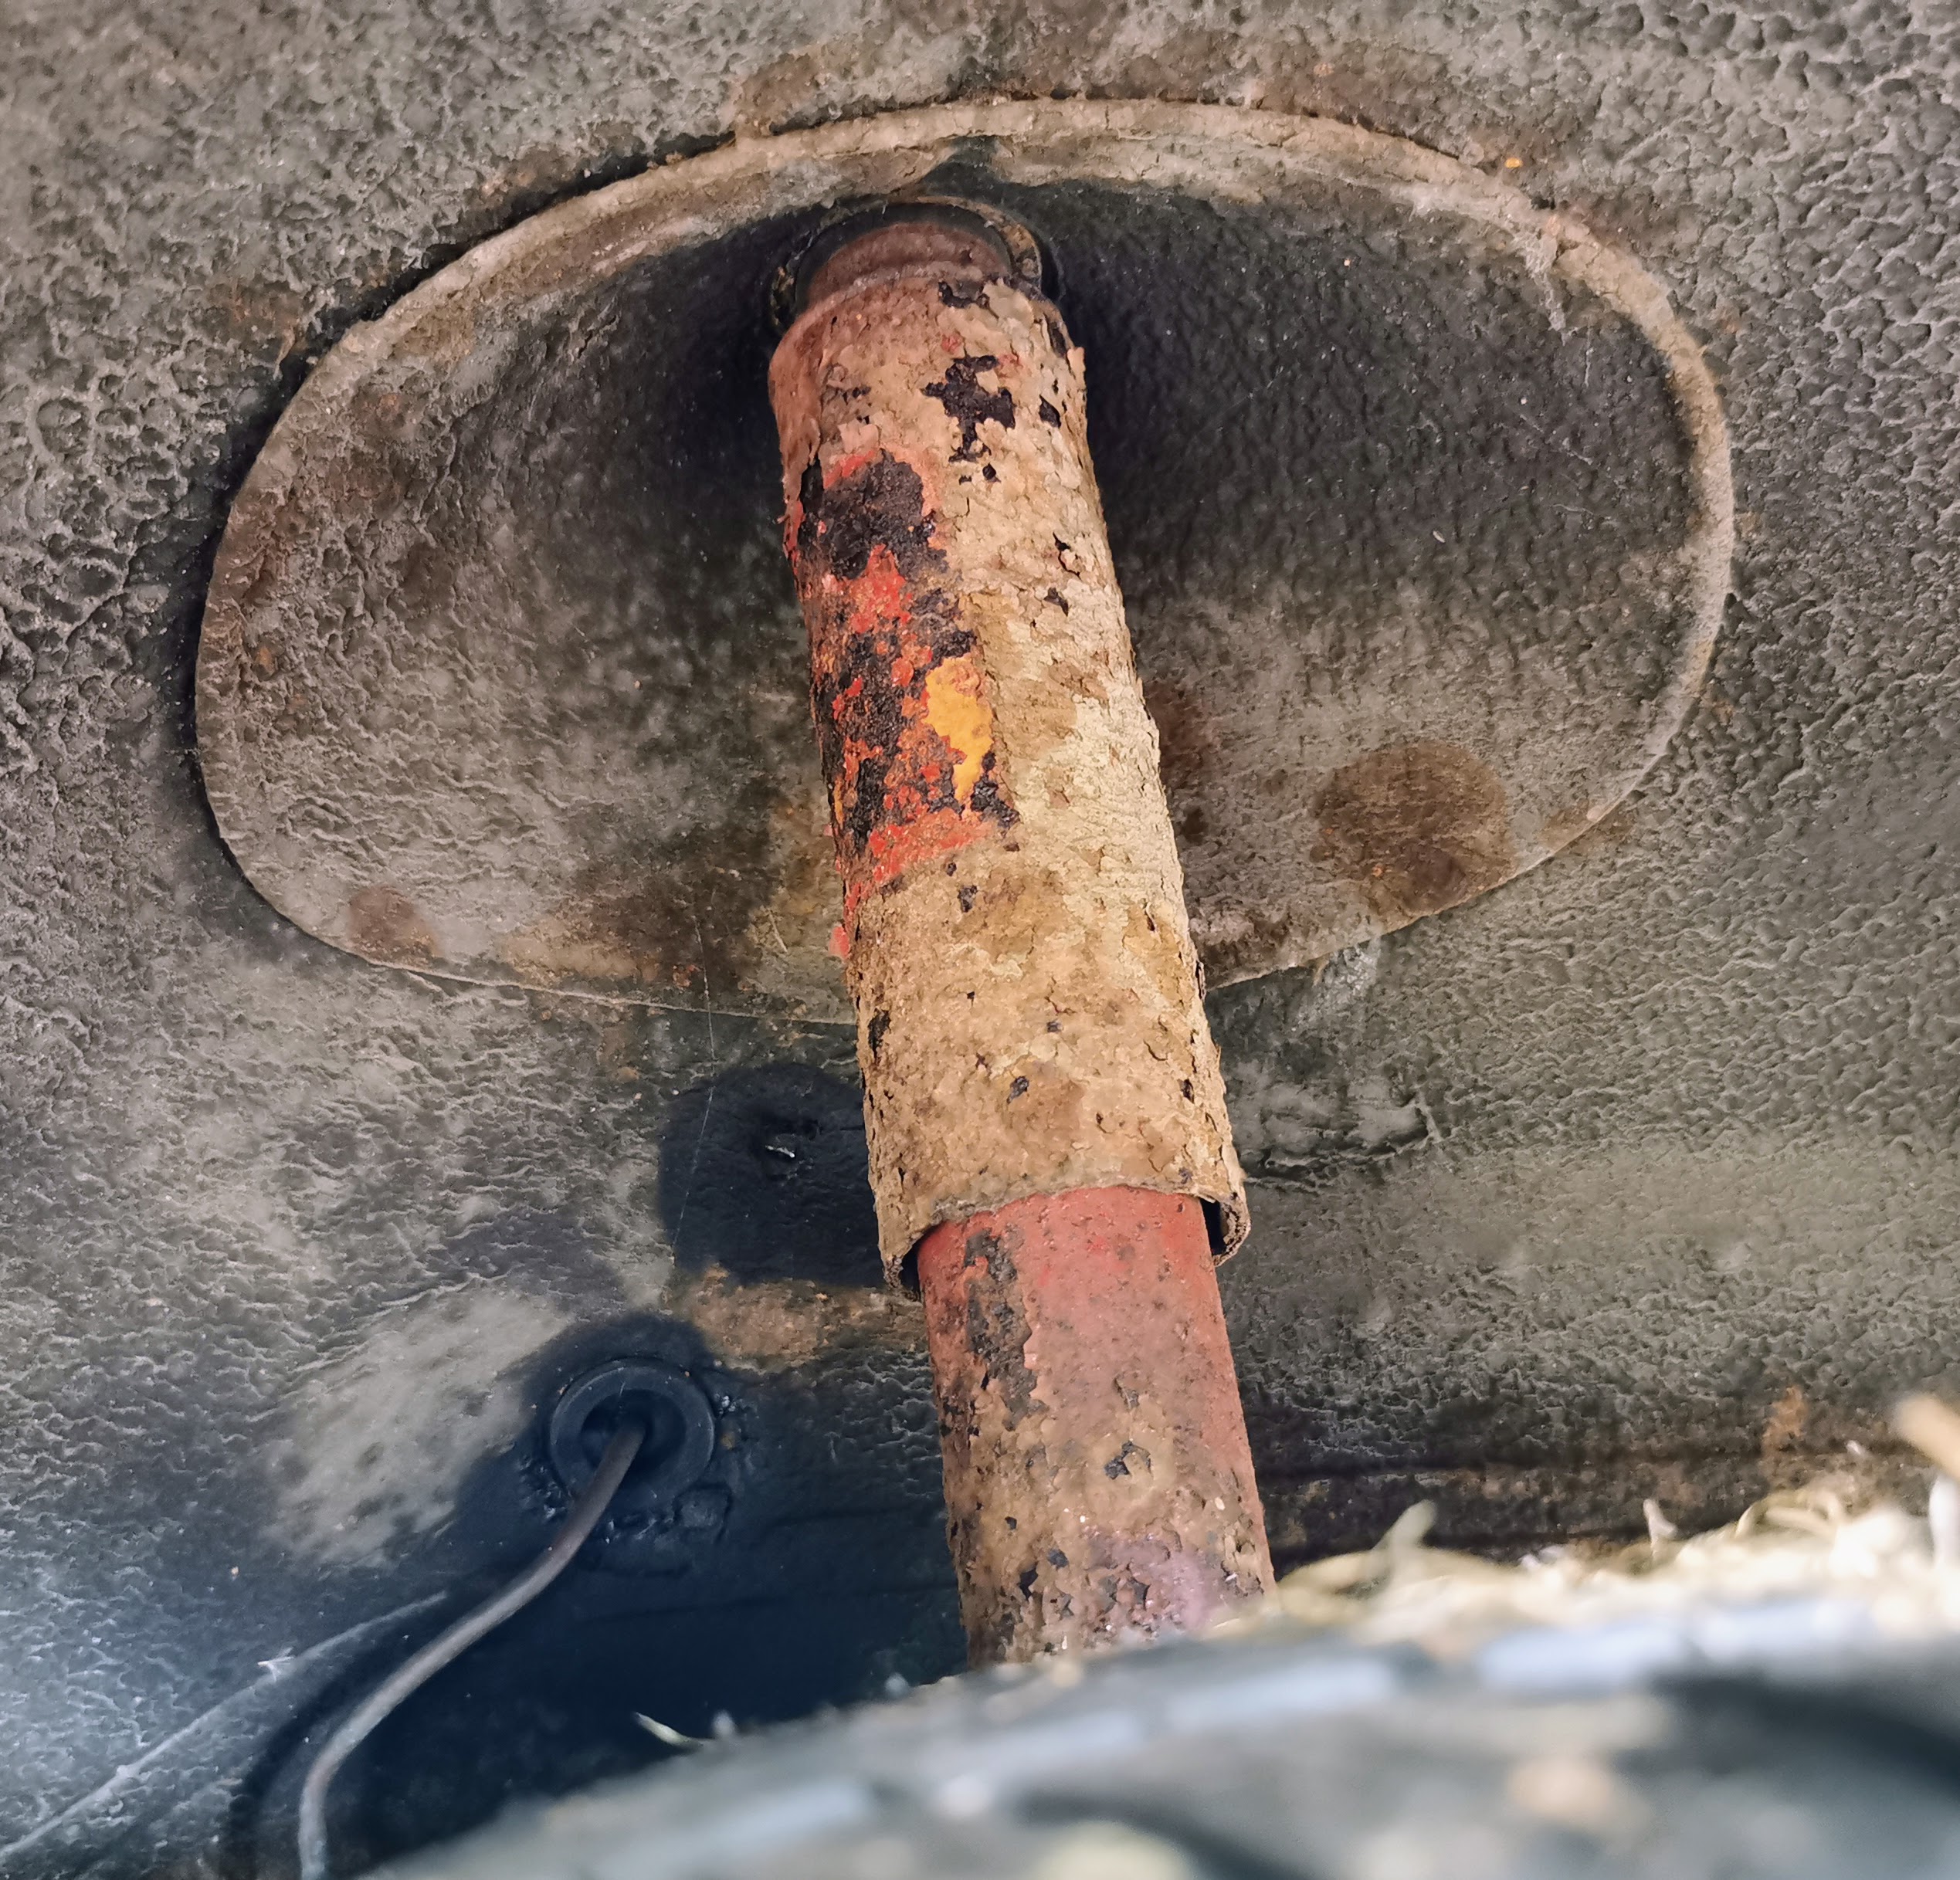
I was more interested in the condition of the metalwork around the shock absorbers rather than the units themselves though, which thankfully looks to be in good shape.
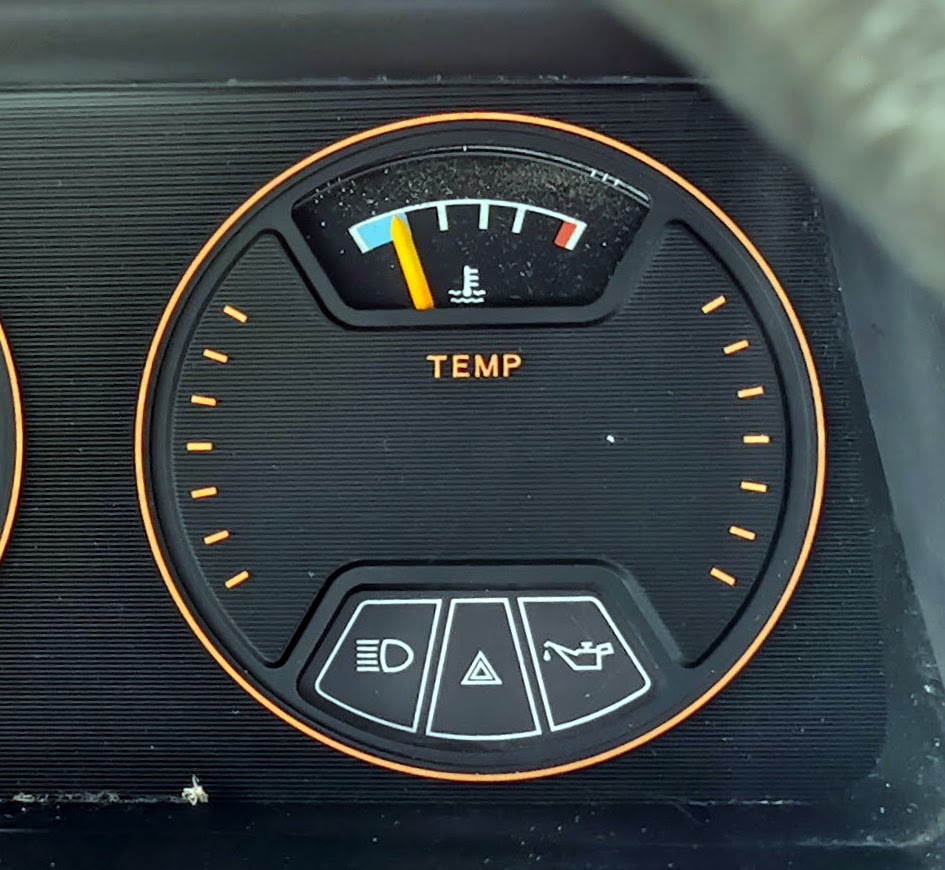
A walk round inspection revealed that the only things which didn't work were the brakes (which we knew beforehand, the front calipers both being totally seized), the heater blower, clock, windscreen washers, temperature gauge and the light in the boot.
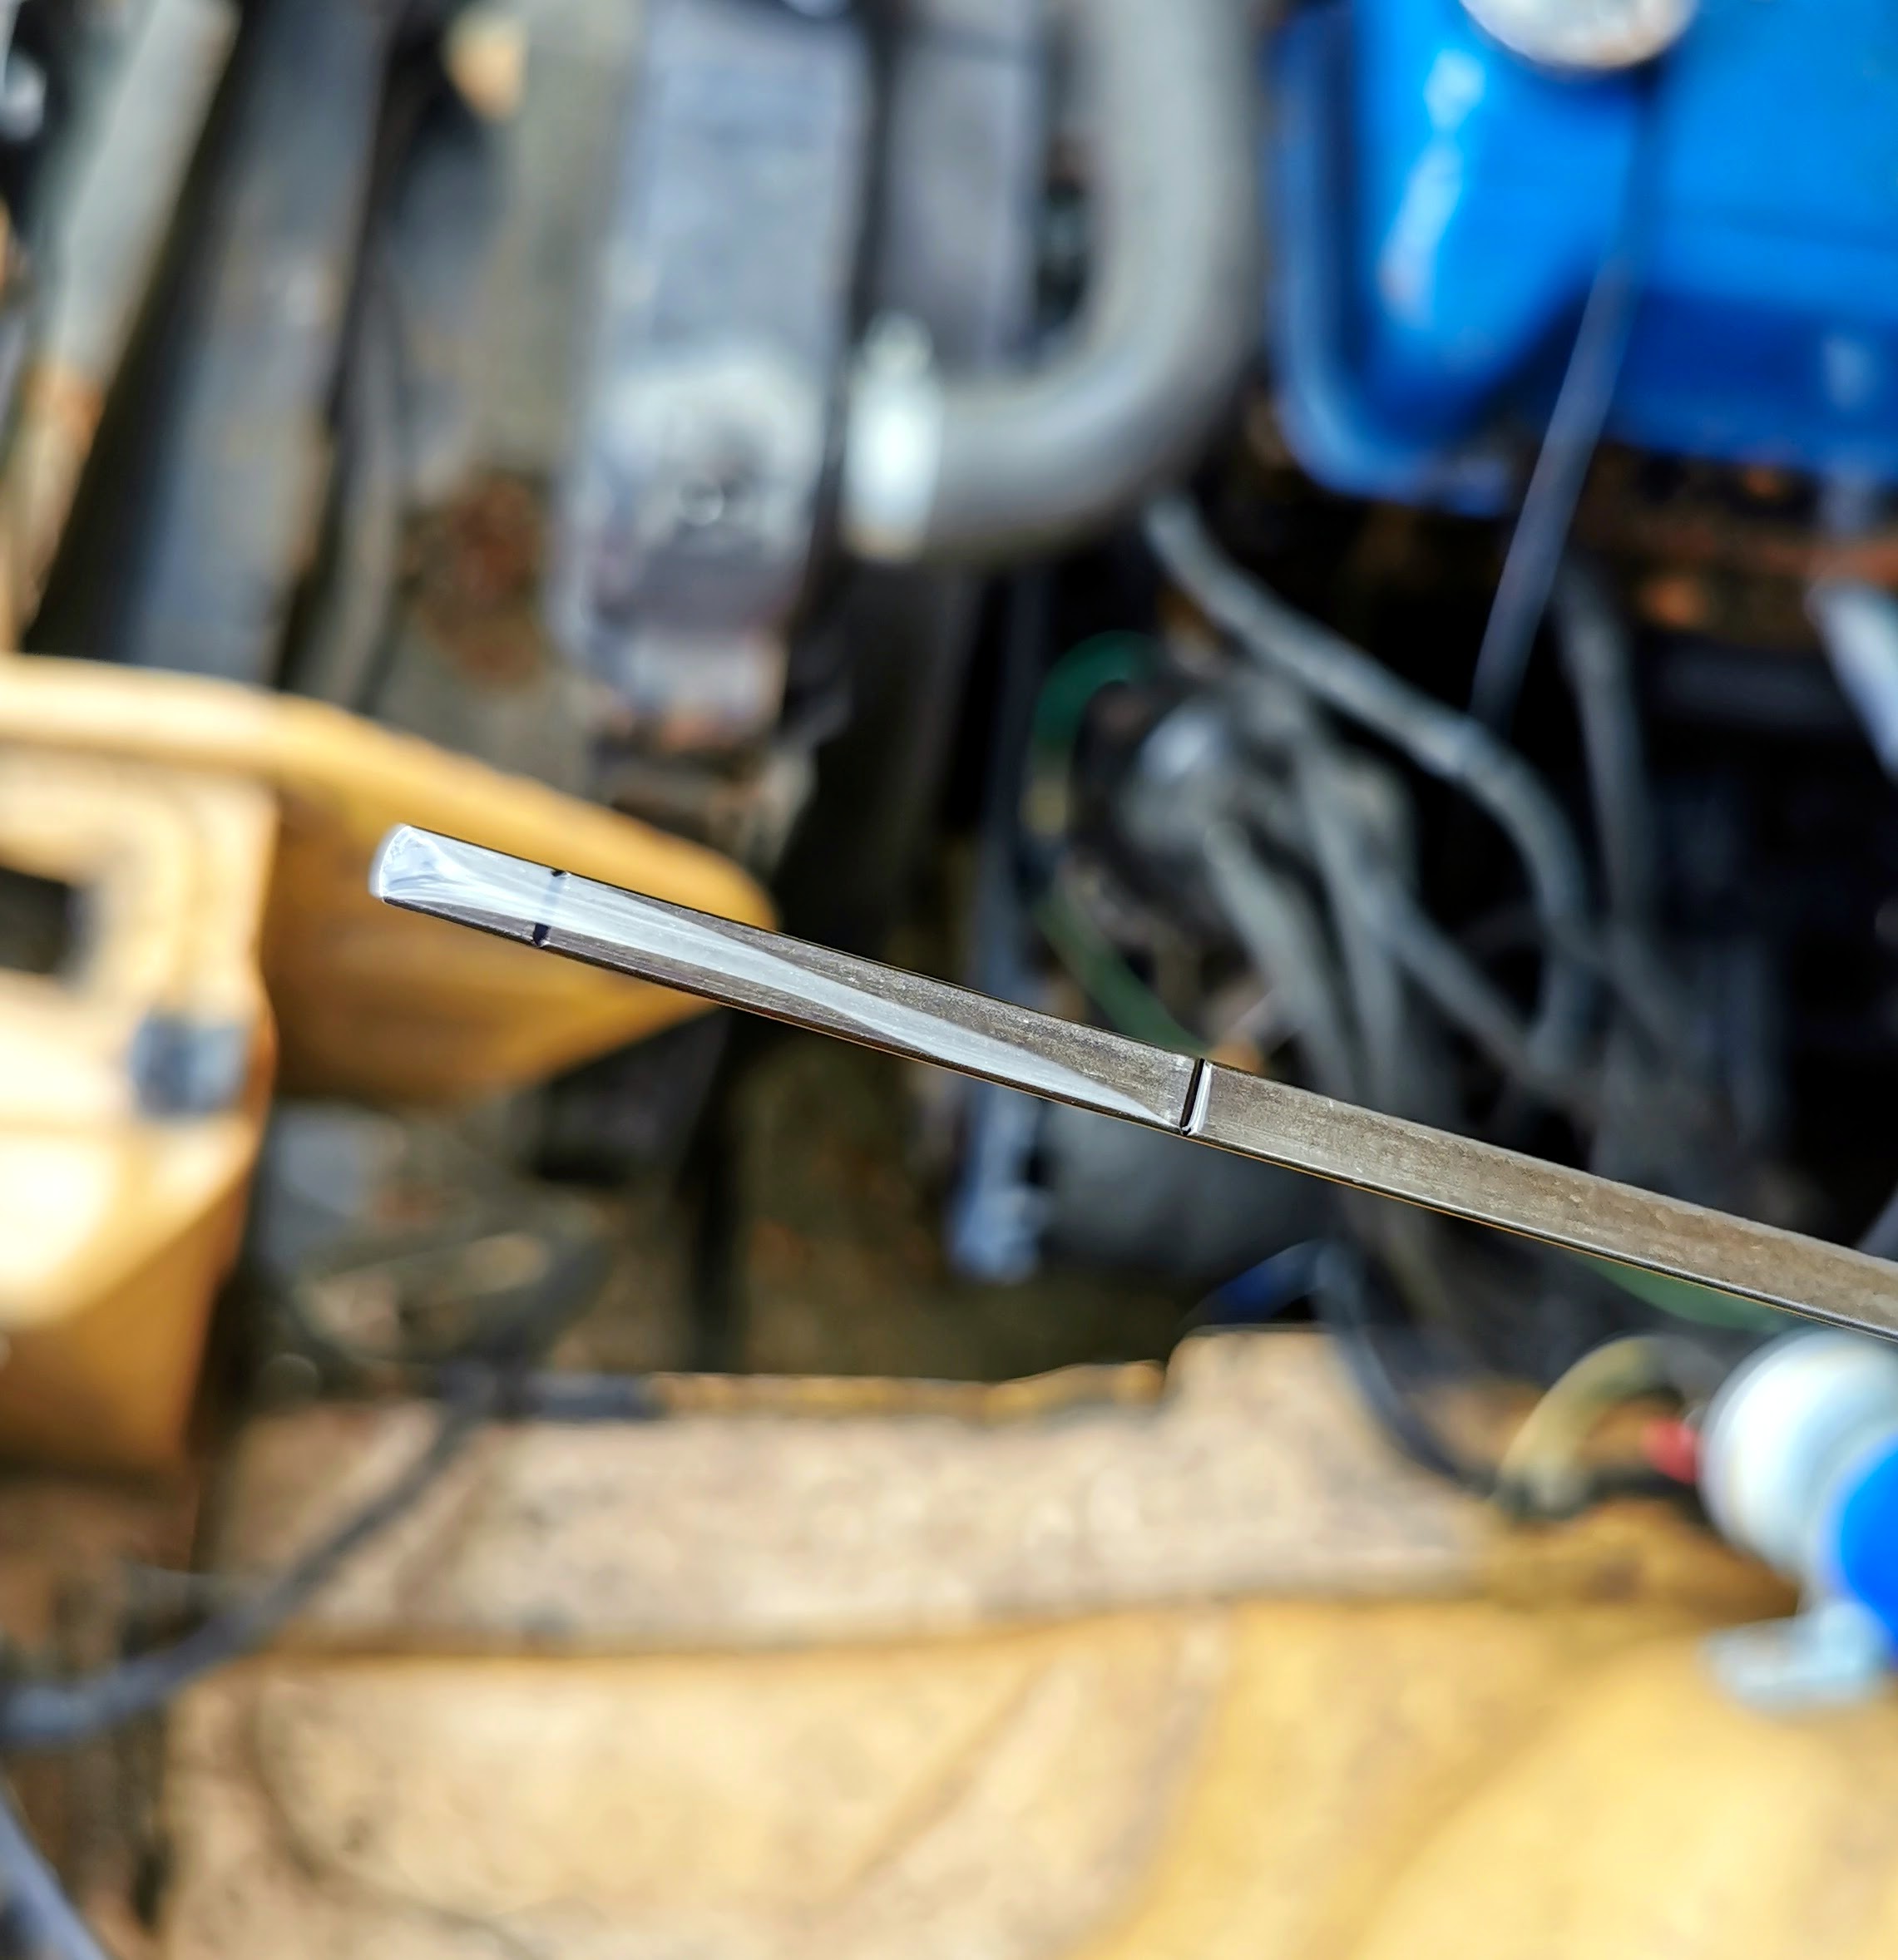
The temperature gauge was a very easy fix as I found a loose blue wire with a spade connector which happened to be exactly the right length to hook up to what looked like a temperature sender on the side of the cylinder head. Right here...
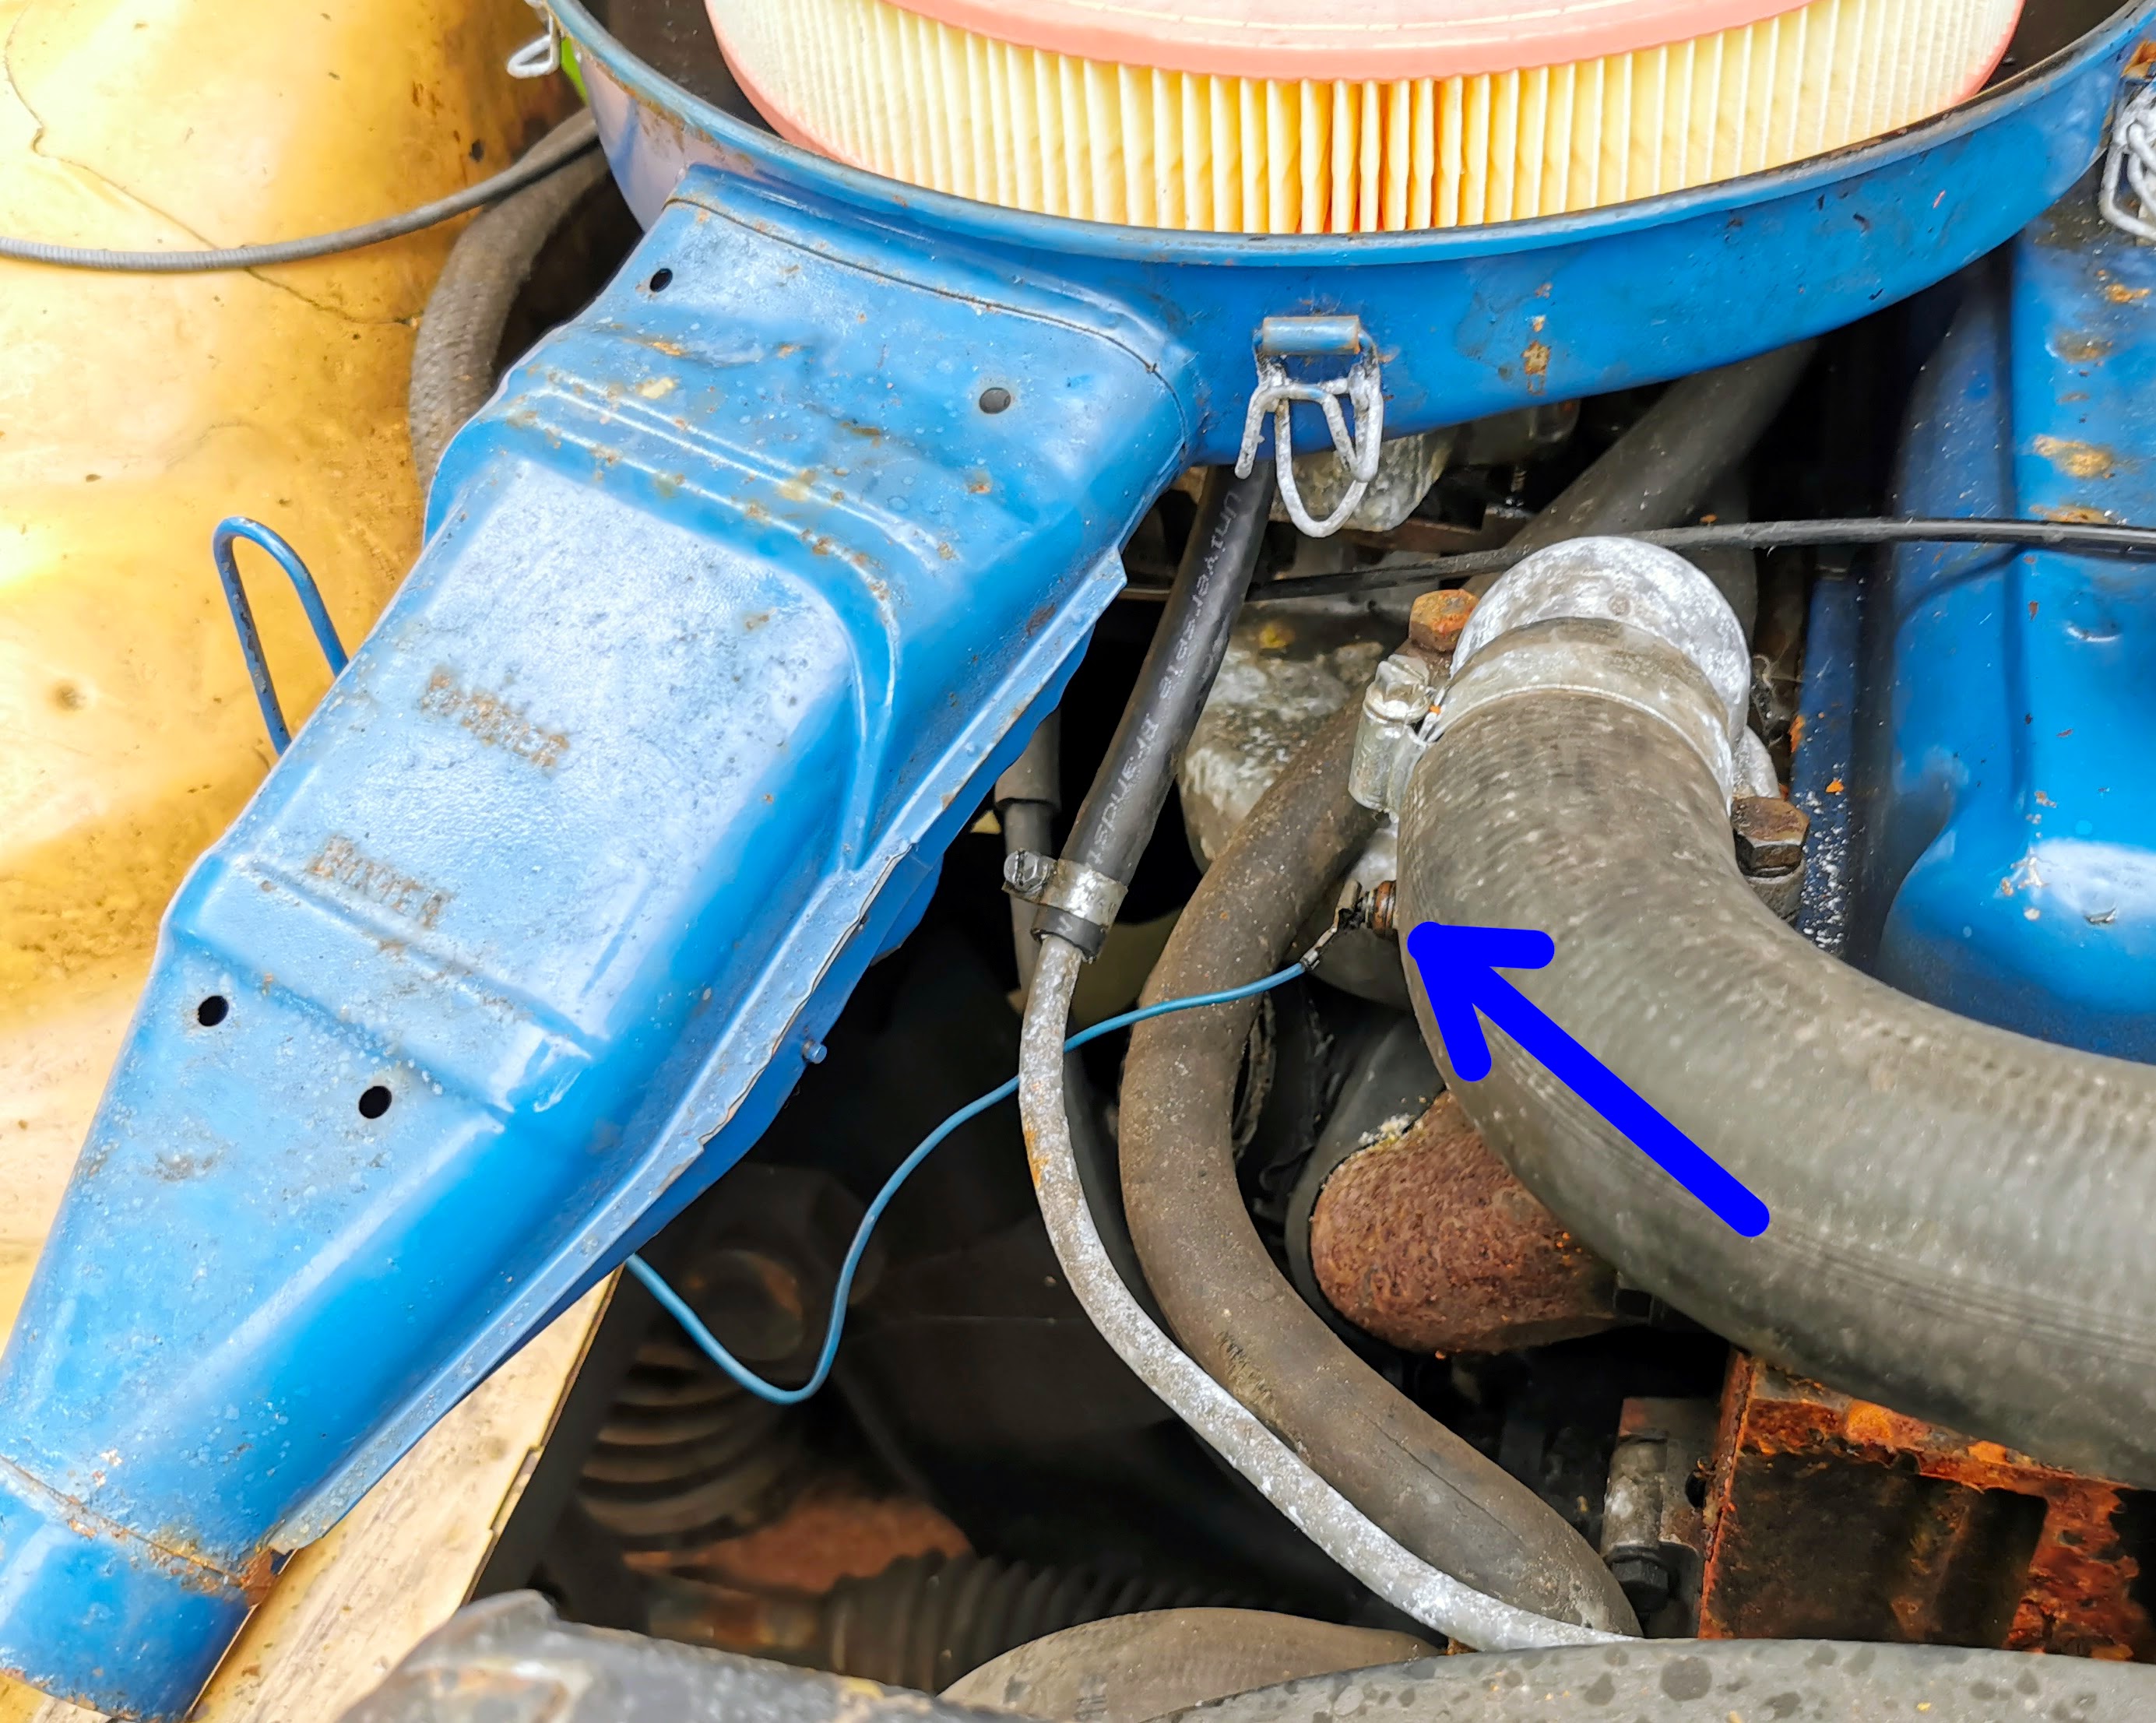
Once these were reunited, the gauge sprang to life and worked as expected.
The light in the boot was similarly simple, the contacts on the bulb were just tarnished. A quick clean up of those and it worked just fine.

Not the brightest thing ever, but it does the job well enough.
The heater blower was a little more involved as the blower motor had seized.
Thankfully unlike the majority of cars on the Mark I Cavaliers the blower is really easy to get to, it's just behind a plastic cover at the rear of the engine bay. A handful of screws need to come out to reveal it...
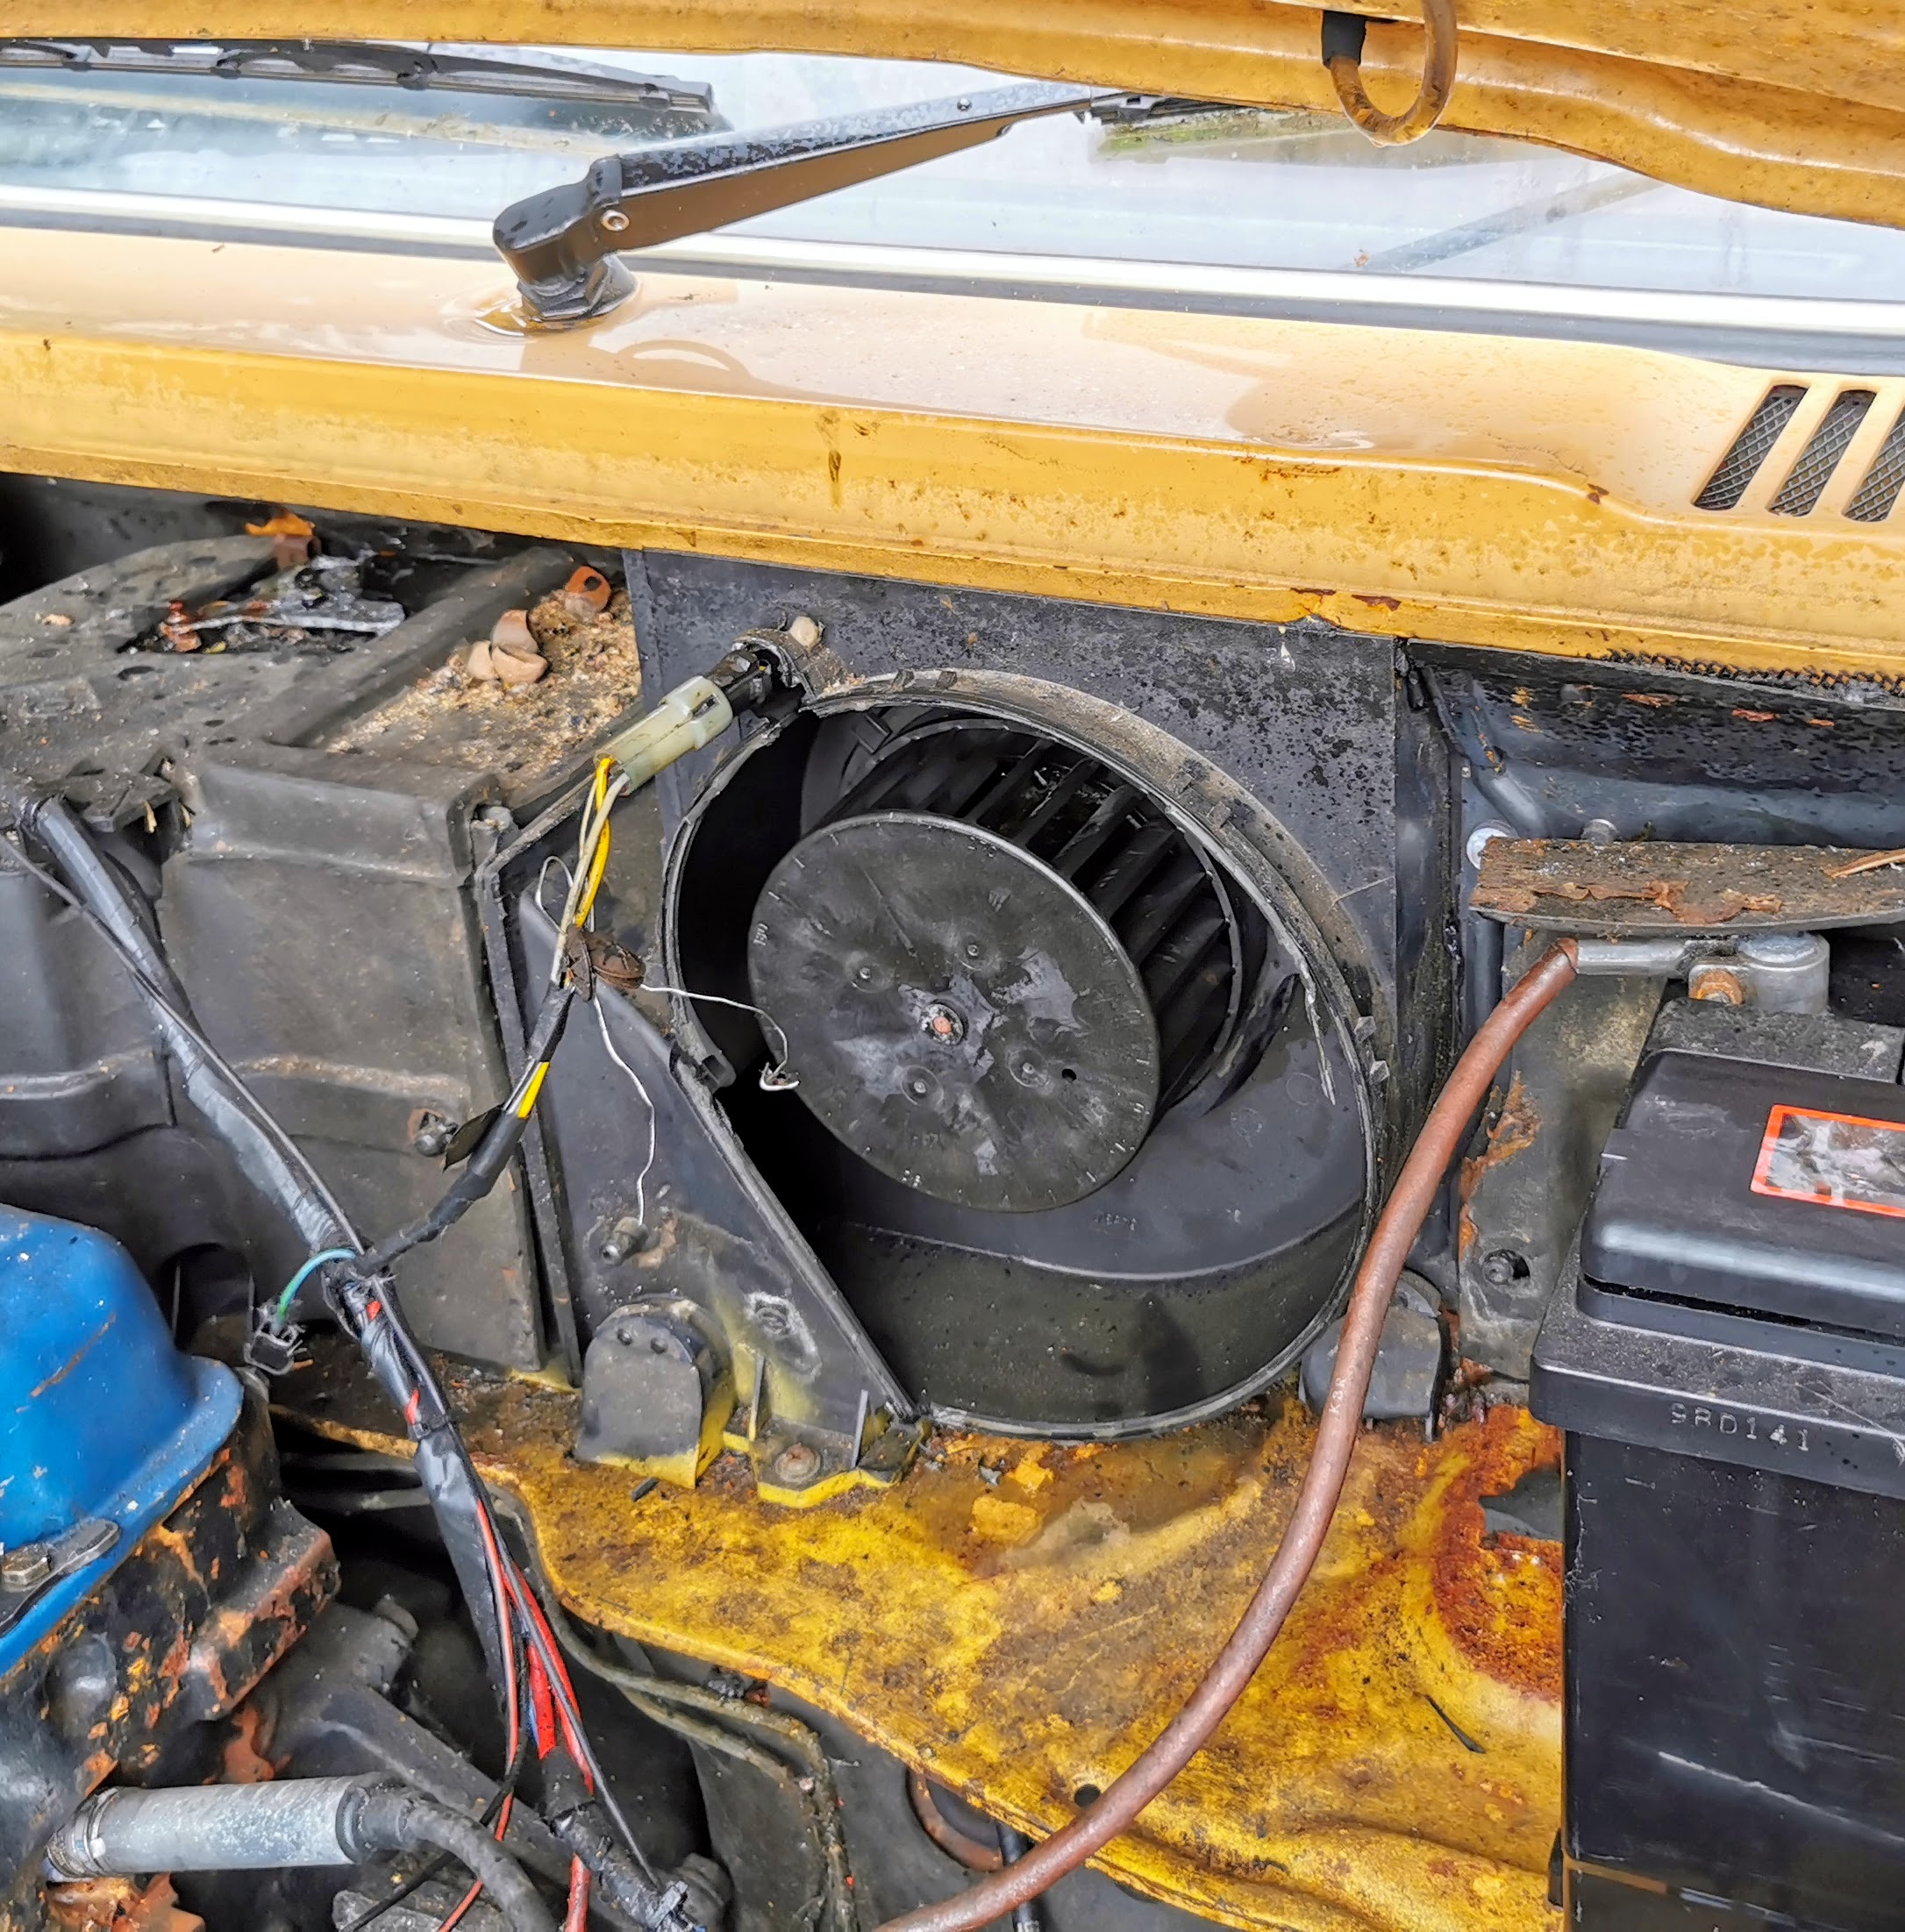
Then another (three if I remember right) screws to remove, a little wrangling to get the cable free of the housing, then and that's it free.
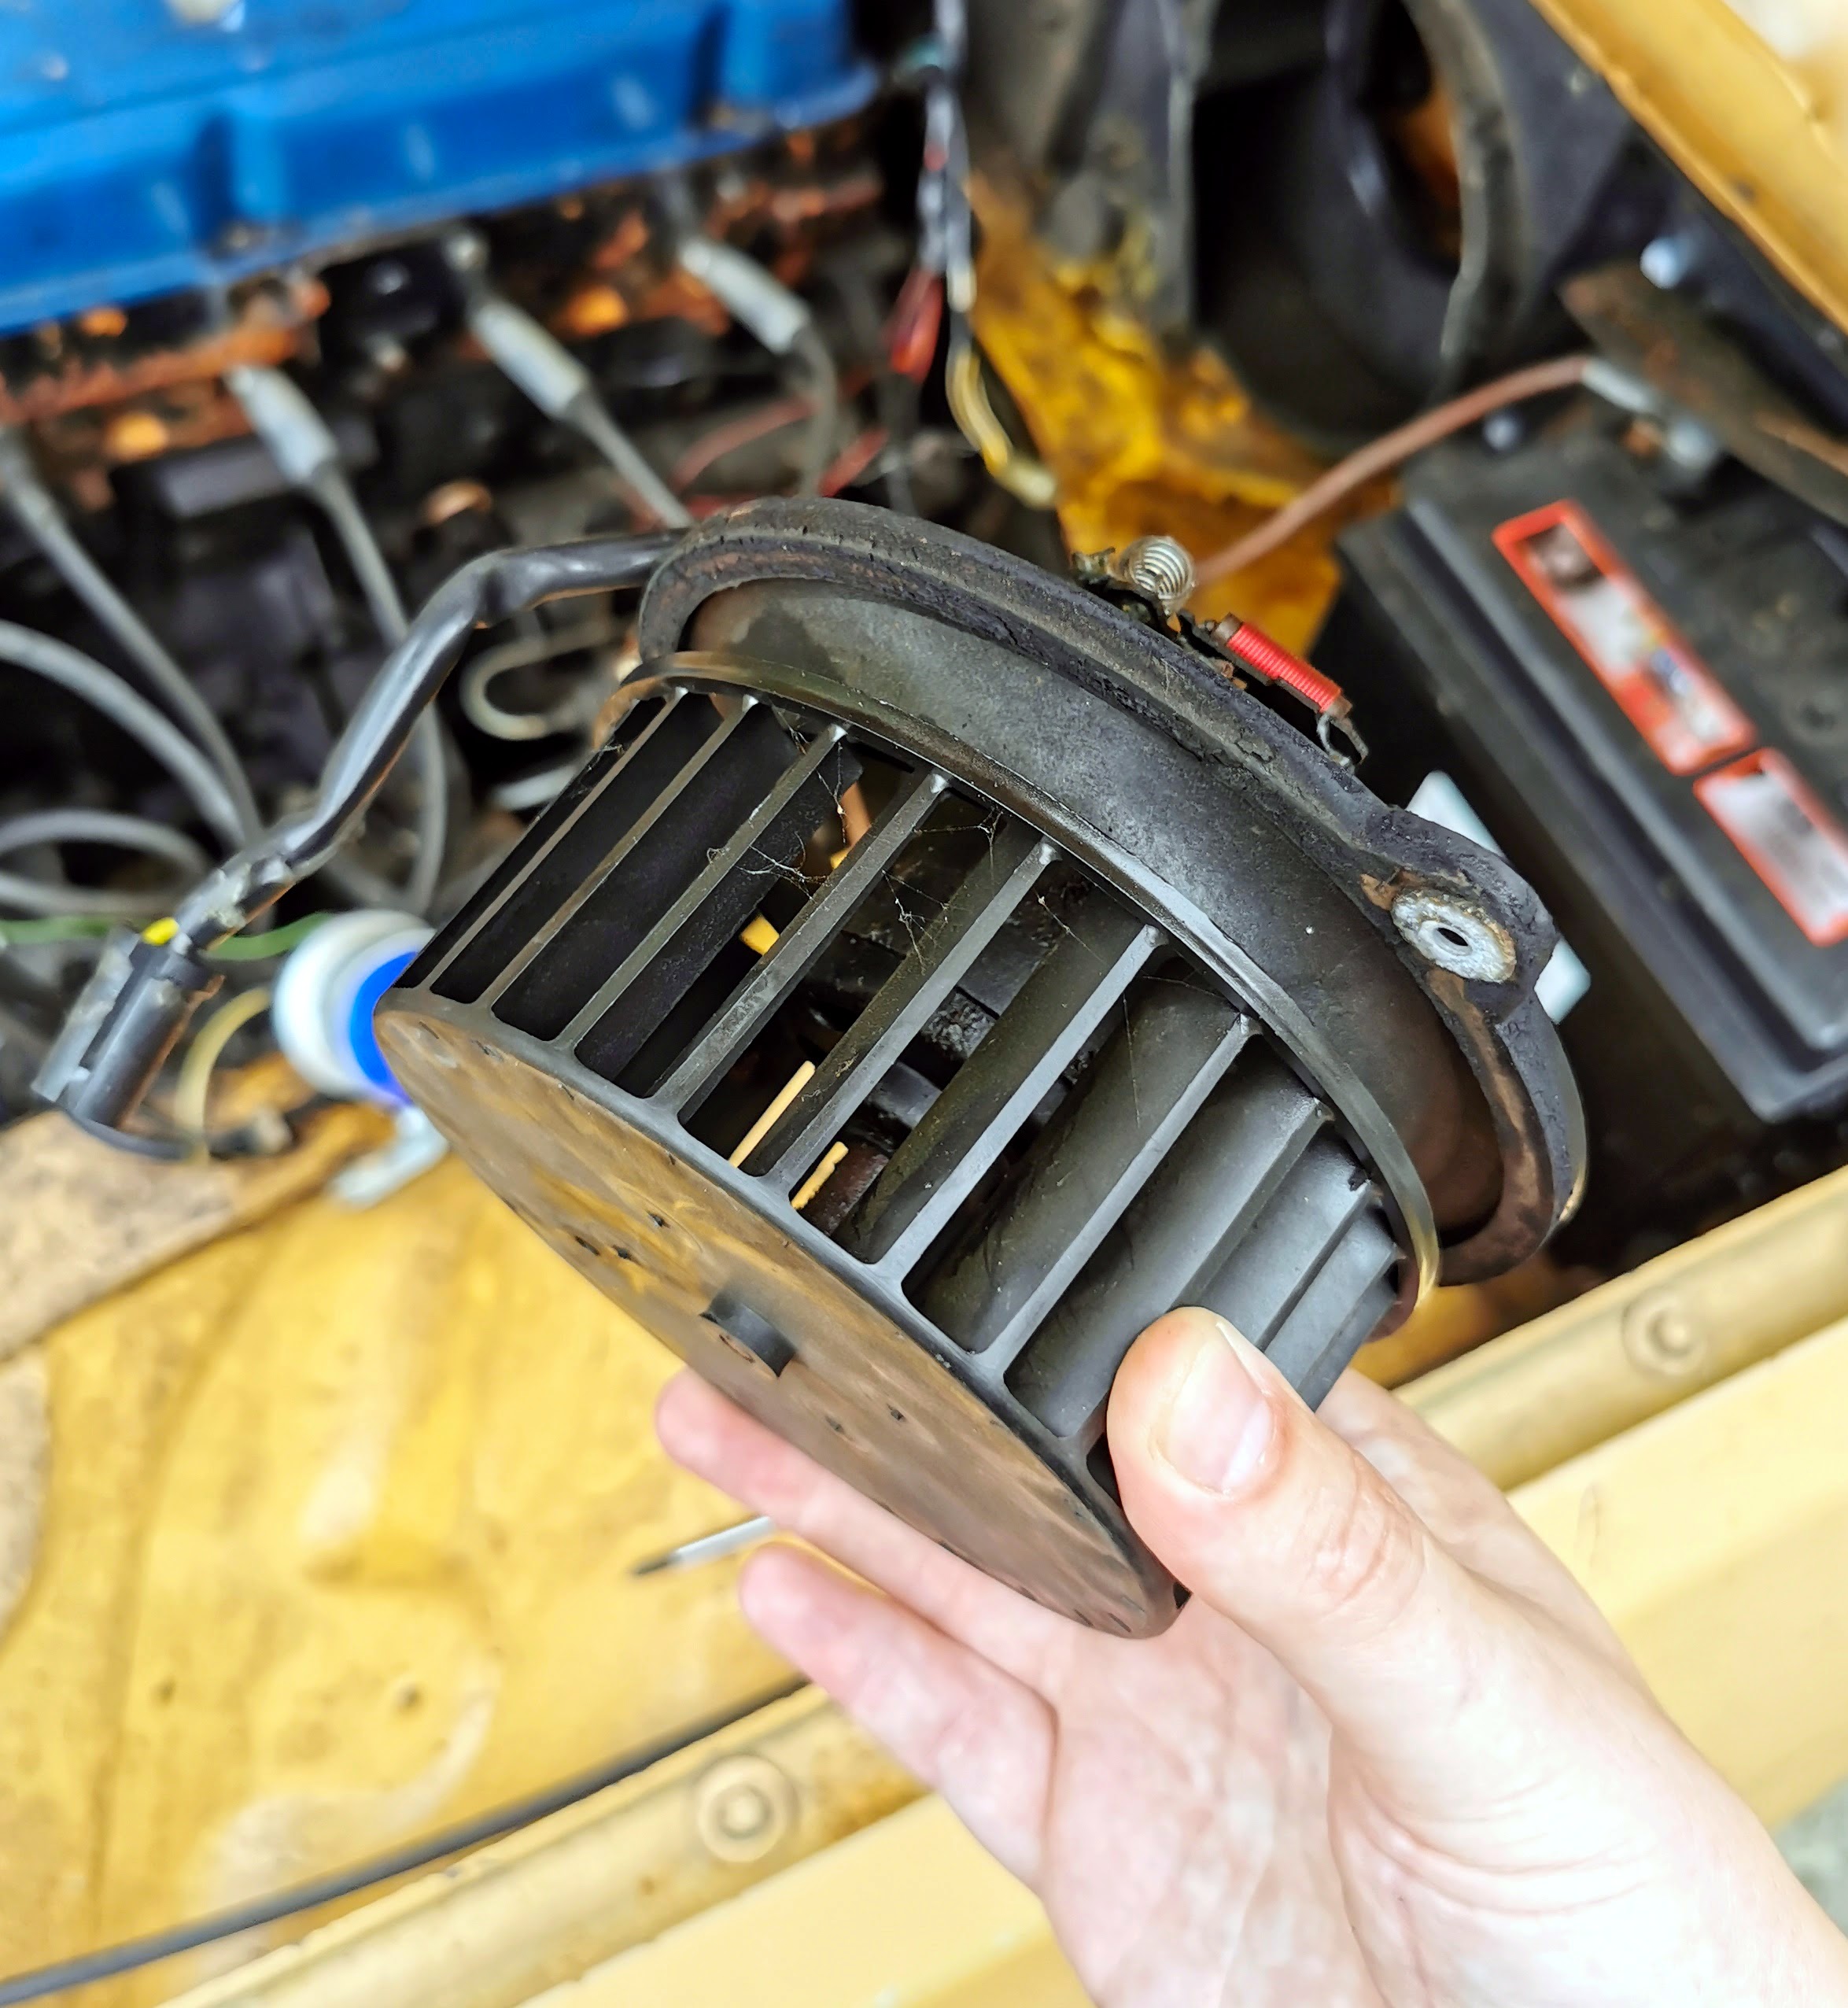
I did have a quick look around to see if I could find a replacement, and immediately drew a blank. So set about attacking this with penetrating oil. Once I figured out which of the bearings it was (the rear one - which makes sense as it's the most exposed to the elements being directly beneath the intake grill) I was able to focus my efforts a little. Took a reasonable amount of time, but eventually I got it spinning freely. Back in the car it was left running for about half an hour - aside from generating quite an impressive amount of smoke as the oil burned off the ballast resistor initially it seemed happy enough. It's not even all that noisy by the standards of the time. Though I'll be keeping half an eye open for a replacement to keep in stock as I imagine the bearings that had jammed up are probably on borrowed time.
The clock sadly appears to be defective internally. It is actually running but doesn't seem to keep anything resembling actual time.
First check after dark revealed that we had a few lamps out in the dash.

Think we've got two out of the two in the instrument cluster itself working, one out in the rear window demister switch, one out in the clock and I thought one out in the headlight switch though it turns out that's just not lit.
The rear window demister switch deserves a bit of a mention for making me smile itself. Something that you sometimes find with cars dating back to the 70s is that they predate complete adoption to a lot of the conventions that we're used to these days, especially where colour coding and symbology is concerned. I had a Jaguar XJ-S recently which demonstrated this by having the warning light on the dash for the rear window demister being green rather than amber as we're used to these days. The marker on the switch here follows a similar theme of not being what we would expect these days, rather than being white, red, orange or similar as you might expect instead they chose...purple.
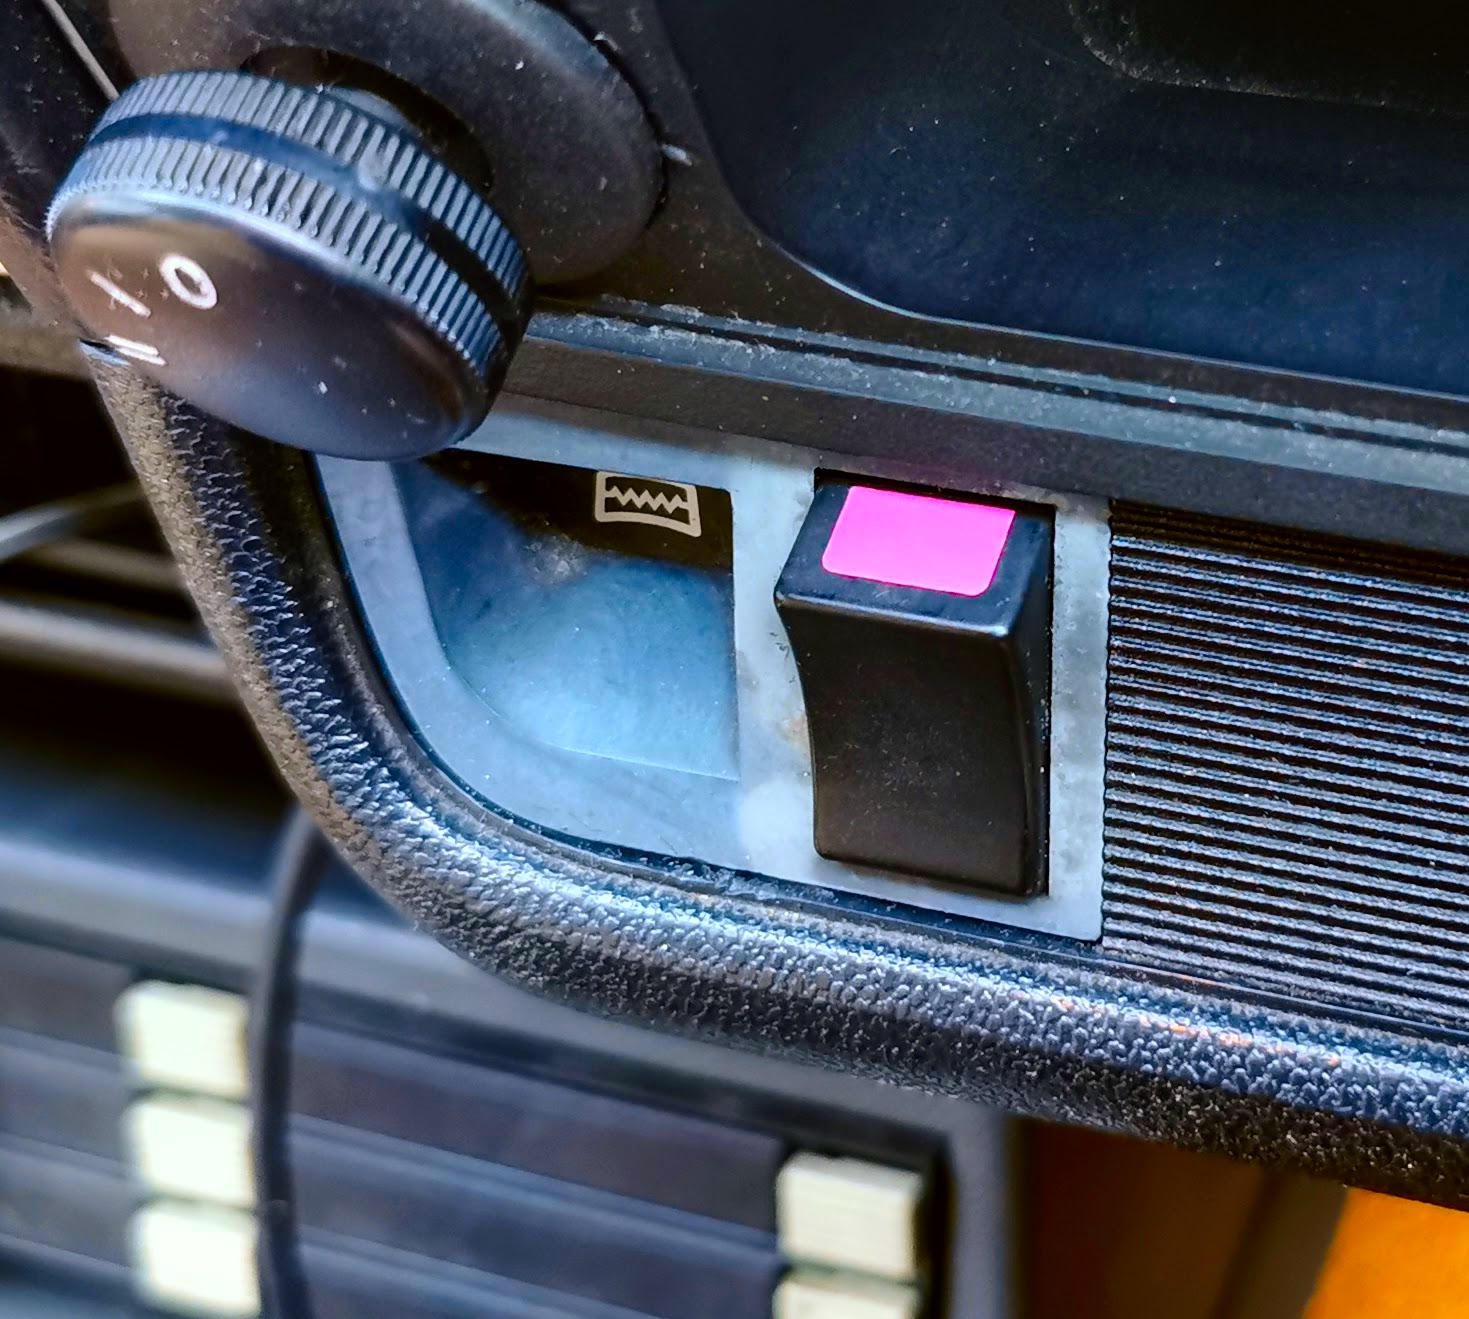
With a new lamp fitted the illumination here was restored.
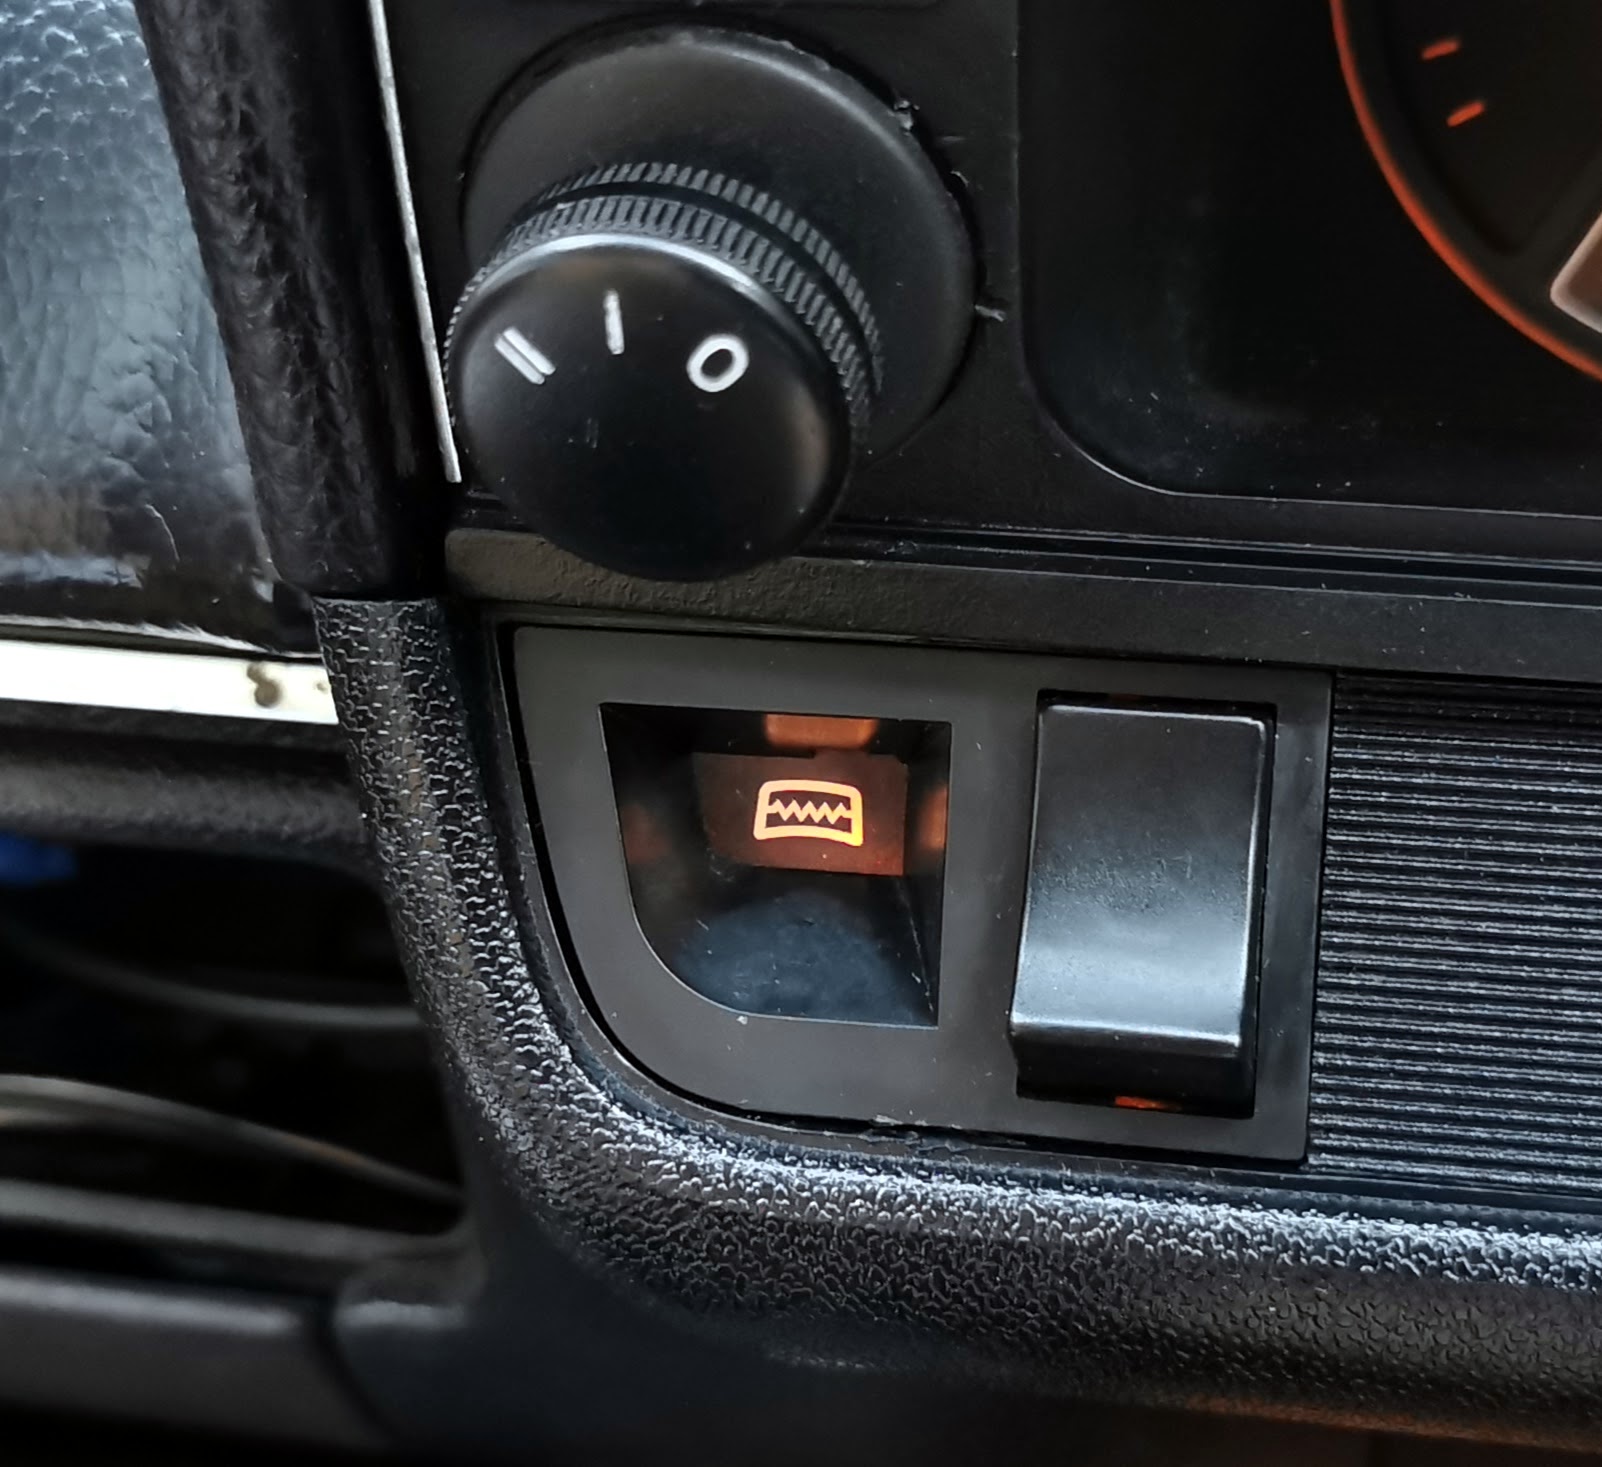
What I hadn't expected was for the illumination of the symbol to change colour (matching the pinkish purple) when it's switched on.
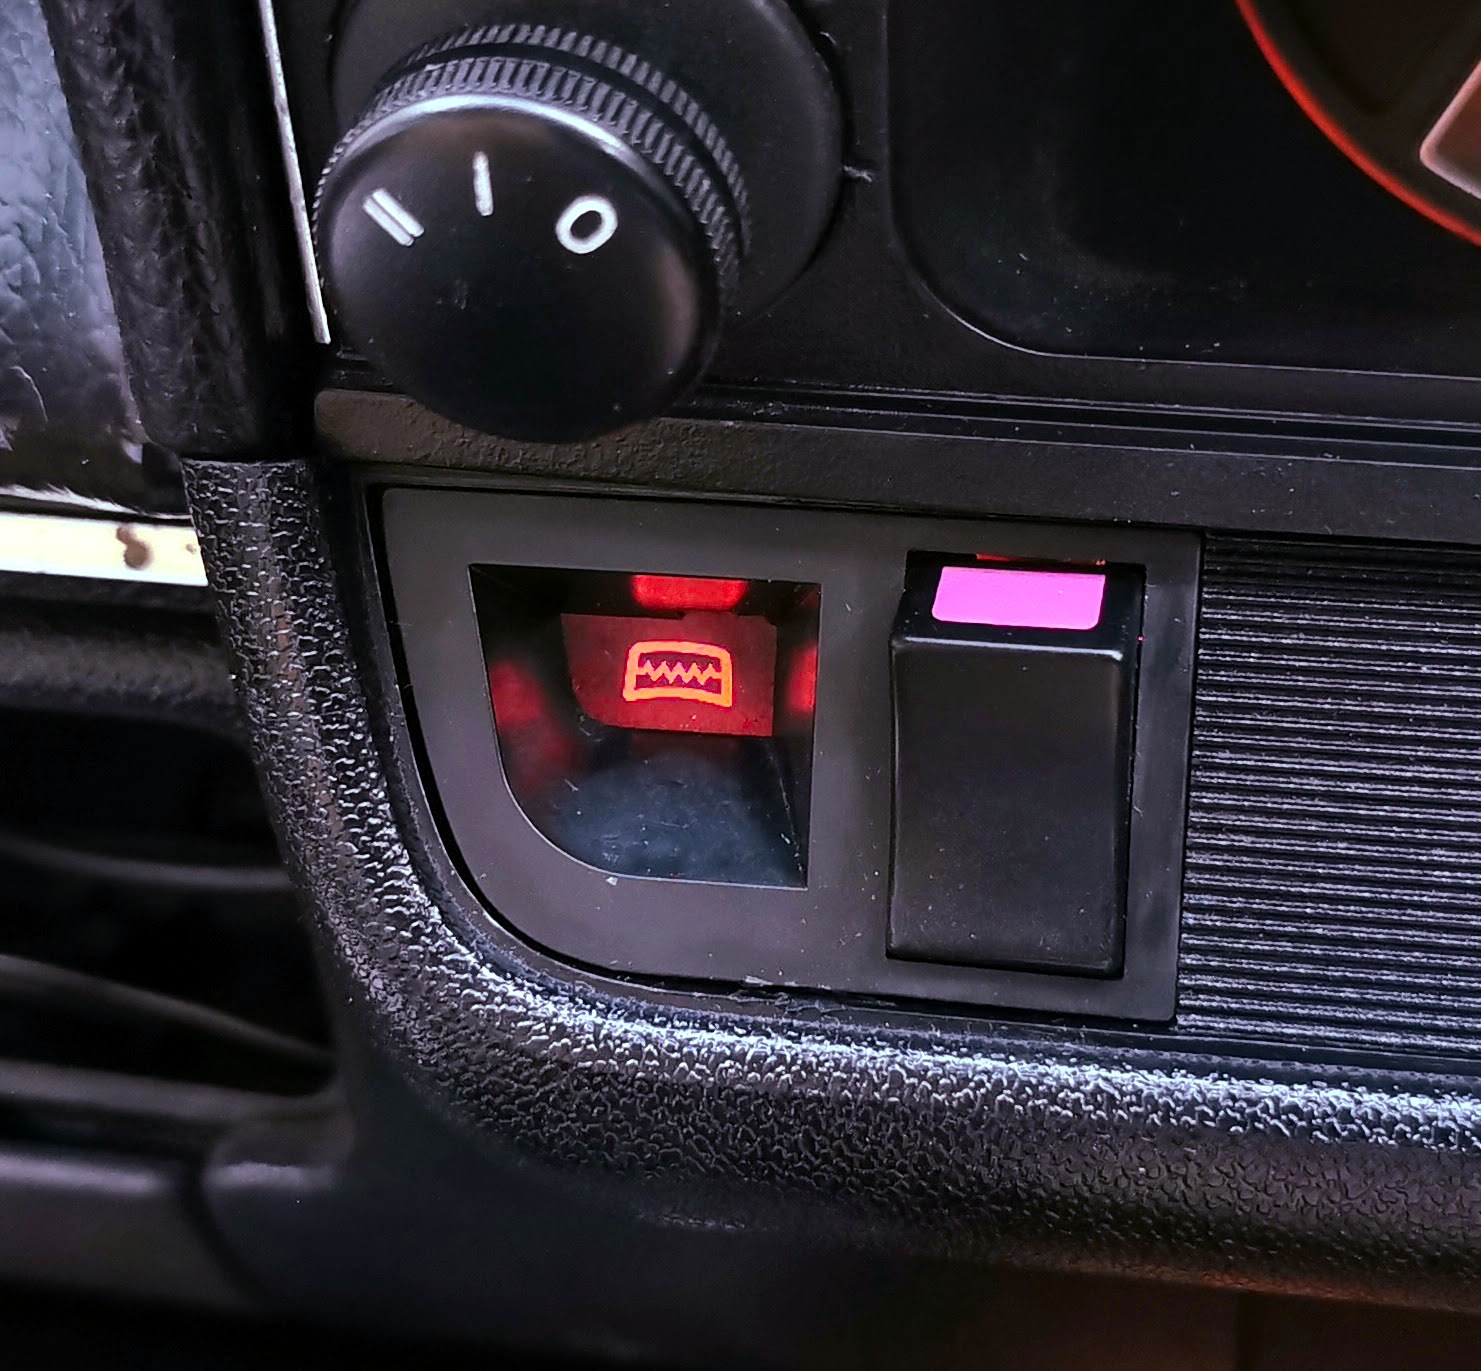
Nice touch. Lot of cars of this sort of era would have left you to figure it out for yourself if the switch was on or off in the dark.
No such funky colours on the counterpart on the other side of the dash which is for the heater blower. Just two white marks, thin one for low, thick one for high.

The instrument panel design I find rather pleasing. It's really a simple setup, fuel, temp, speedometer and six warning lights. Yet they've managed to inject enough design flair into it to keep it visually interesting. I particularly like the little wedge shaped warning lights.
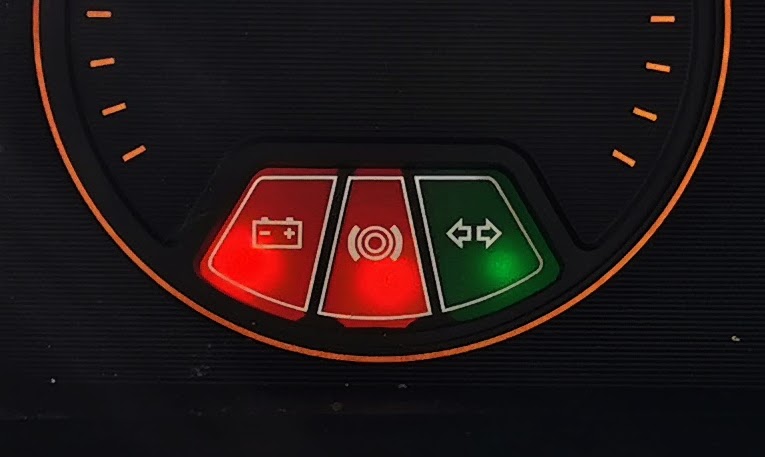
I appreciate the symmetry too - the outer two lights on both sides are red, with the inner two being the different ones.
To actually get the car running after it had sat in a shed for several years the total work involved was to replace a of bit of fuel line (there's only a rubber tail at either end of the car - the main line is nylon), clean the points and top up the coolant. Despite that it was running like this.
YouTube Video Link (0:12) Idle Sample.
Which is quite incredible really. The only sign that the carb isn't maybe 100% happy is the accelerator pump being a little lazy sometimes. Despite the engine seeming healthy enough, a standard service was definitely on the cards. The oil in particular reeked of stale fuel, and the filter had clearly been on there for a while.

Conveniently the Coopers Z25 filter cross references to a Mann W712 - which is the same as used on the Invacar, so was one I already kept in stock. That old filter *really* didn't want to come off though, the gasket had well and truly welded itself in place and I was starting to get seriously worried about ripping the cartridge itself in half with the amount of torque that was getting involved - thankfully it did eventually come free.
Even after running for a couple of hours the new oil that went in still looks like this, so it obviously wasn't too full of gunge internally.
It's something you definitely need to keep on top of with these engines, especially as the sump really isn't very big for an engine of this size. So oil quality and quantity need to be kept an eye on.
I think long term I may need to find something slightly more durable than duct tape to plug off this missing PCV port in the rocker cover. Though its having stayed put so far at least is a decent indication that this engine doesn't have any excessive blow by I guess.
The coolant lines are all definitely past their best. All quite hard and showing signs of perishing.

The heater hoses definitely look to be the worst of the bunch though. While this isn't leaking now, I don't doubt for a minute that it would let go after very little time at all if the car was pressed back into use. Suffice to say they'll all be getting changed.
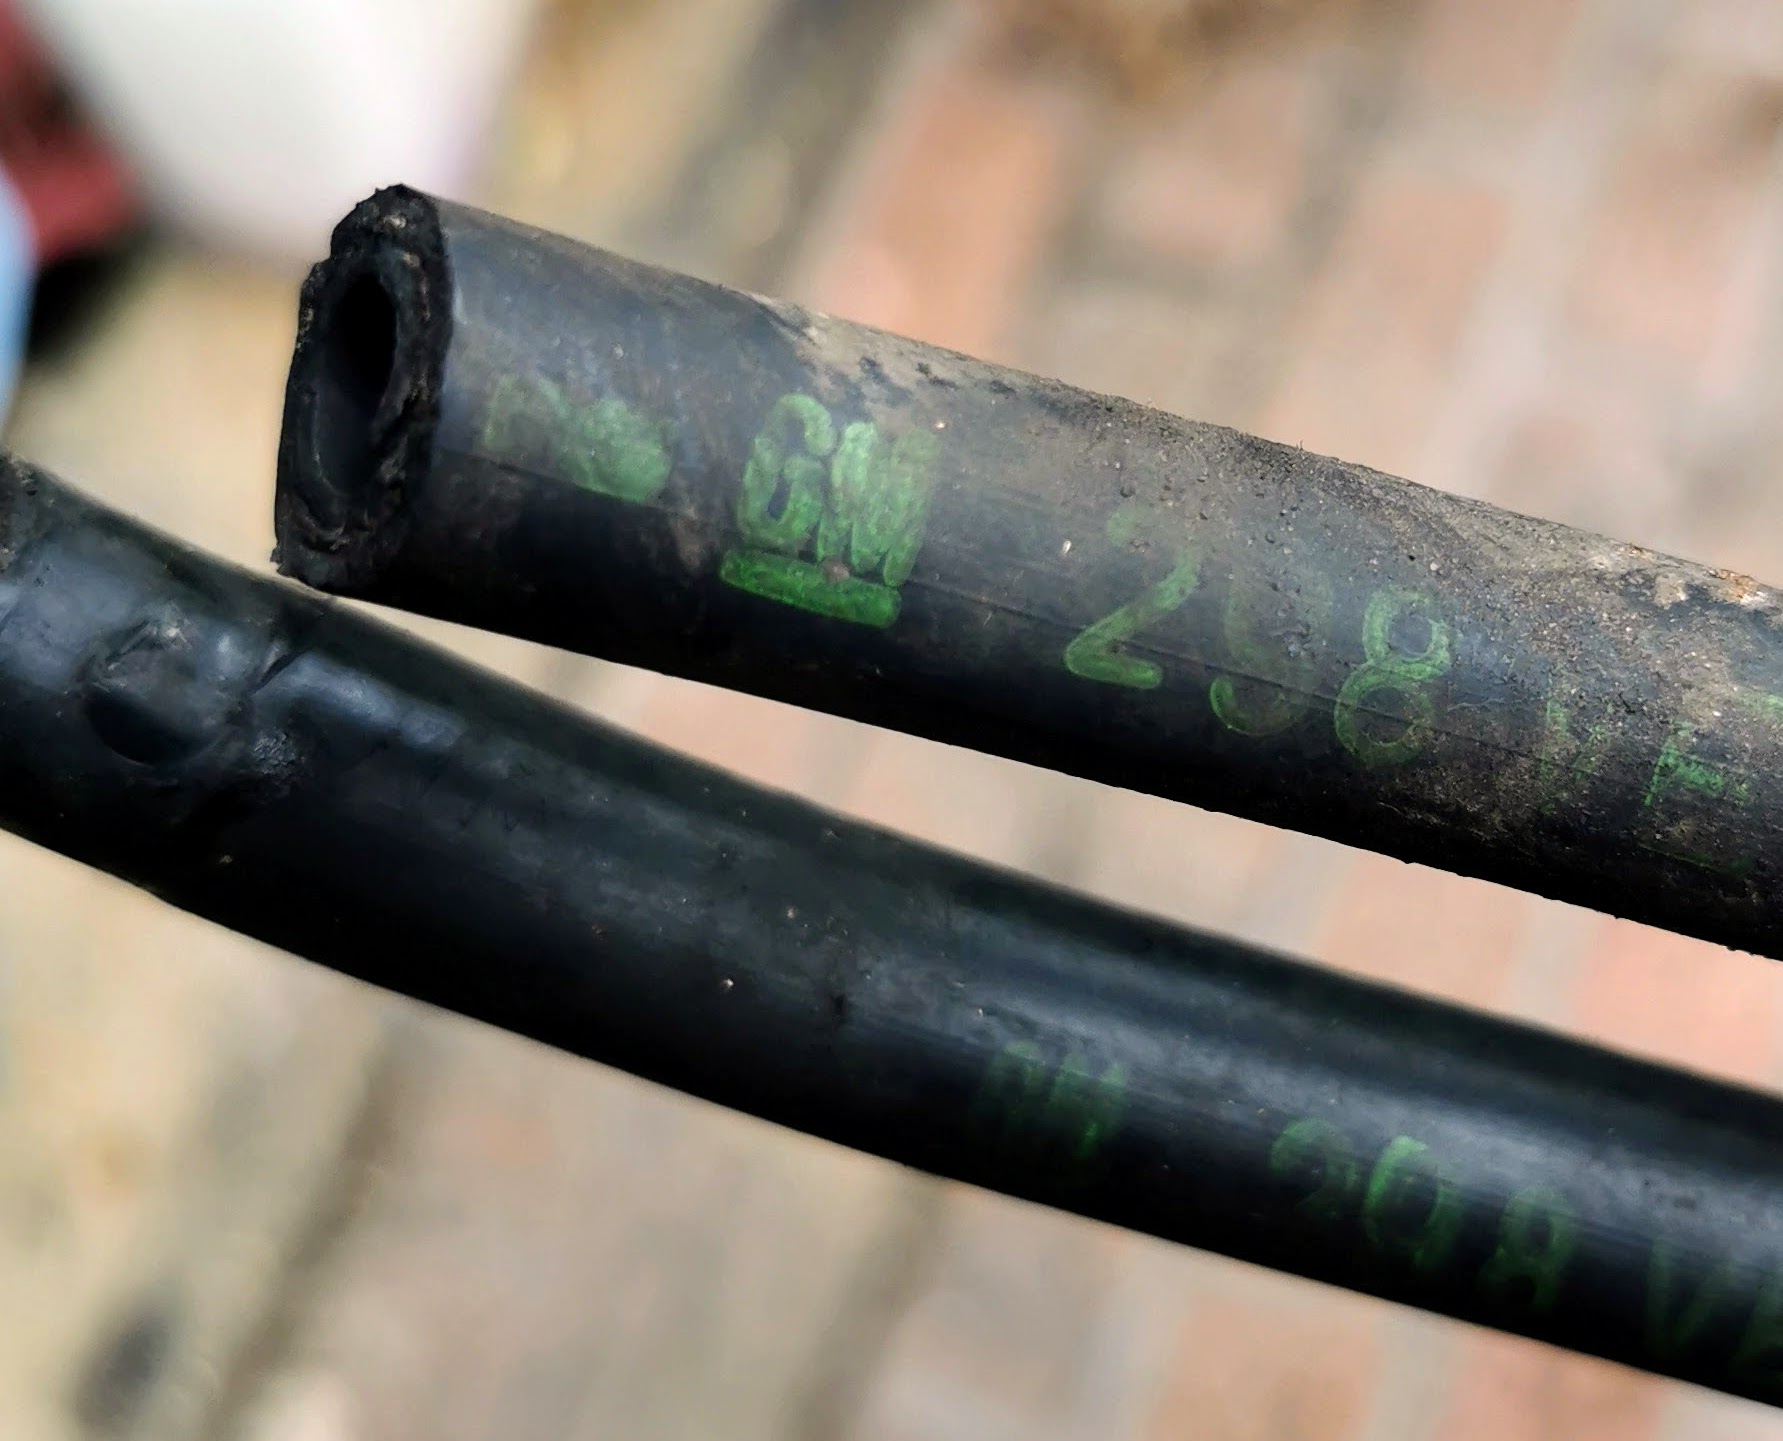
While the rubber fuel line at the tank end had already been replaced, the stuff in the engine bay hadn't been touched so that was swapped out as well. I was slightly surprised to find GM markings on the hose that came off, could this be original to the car?
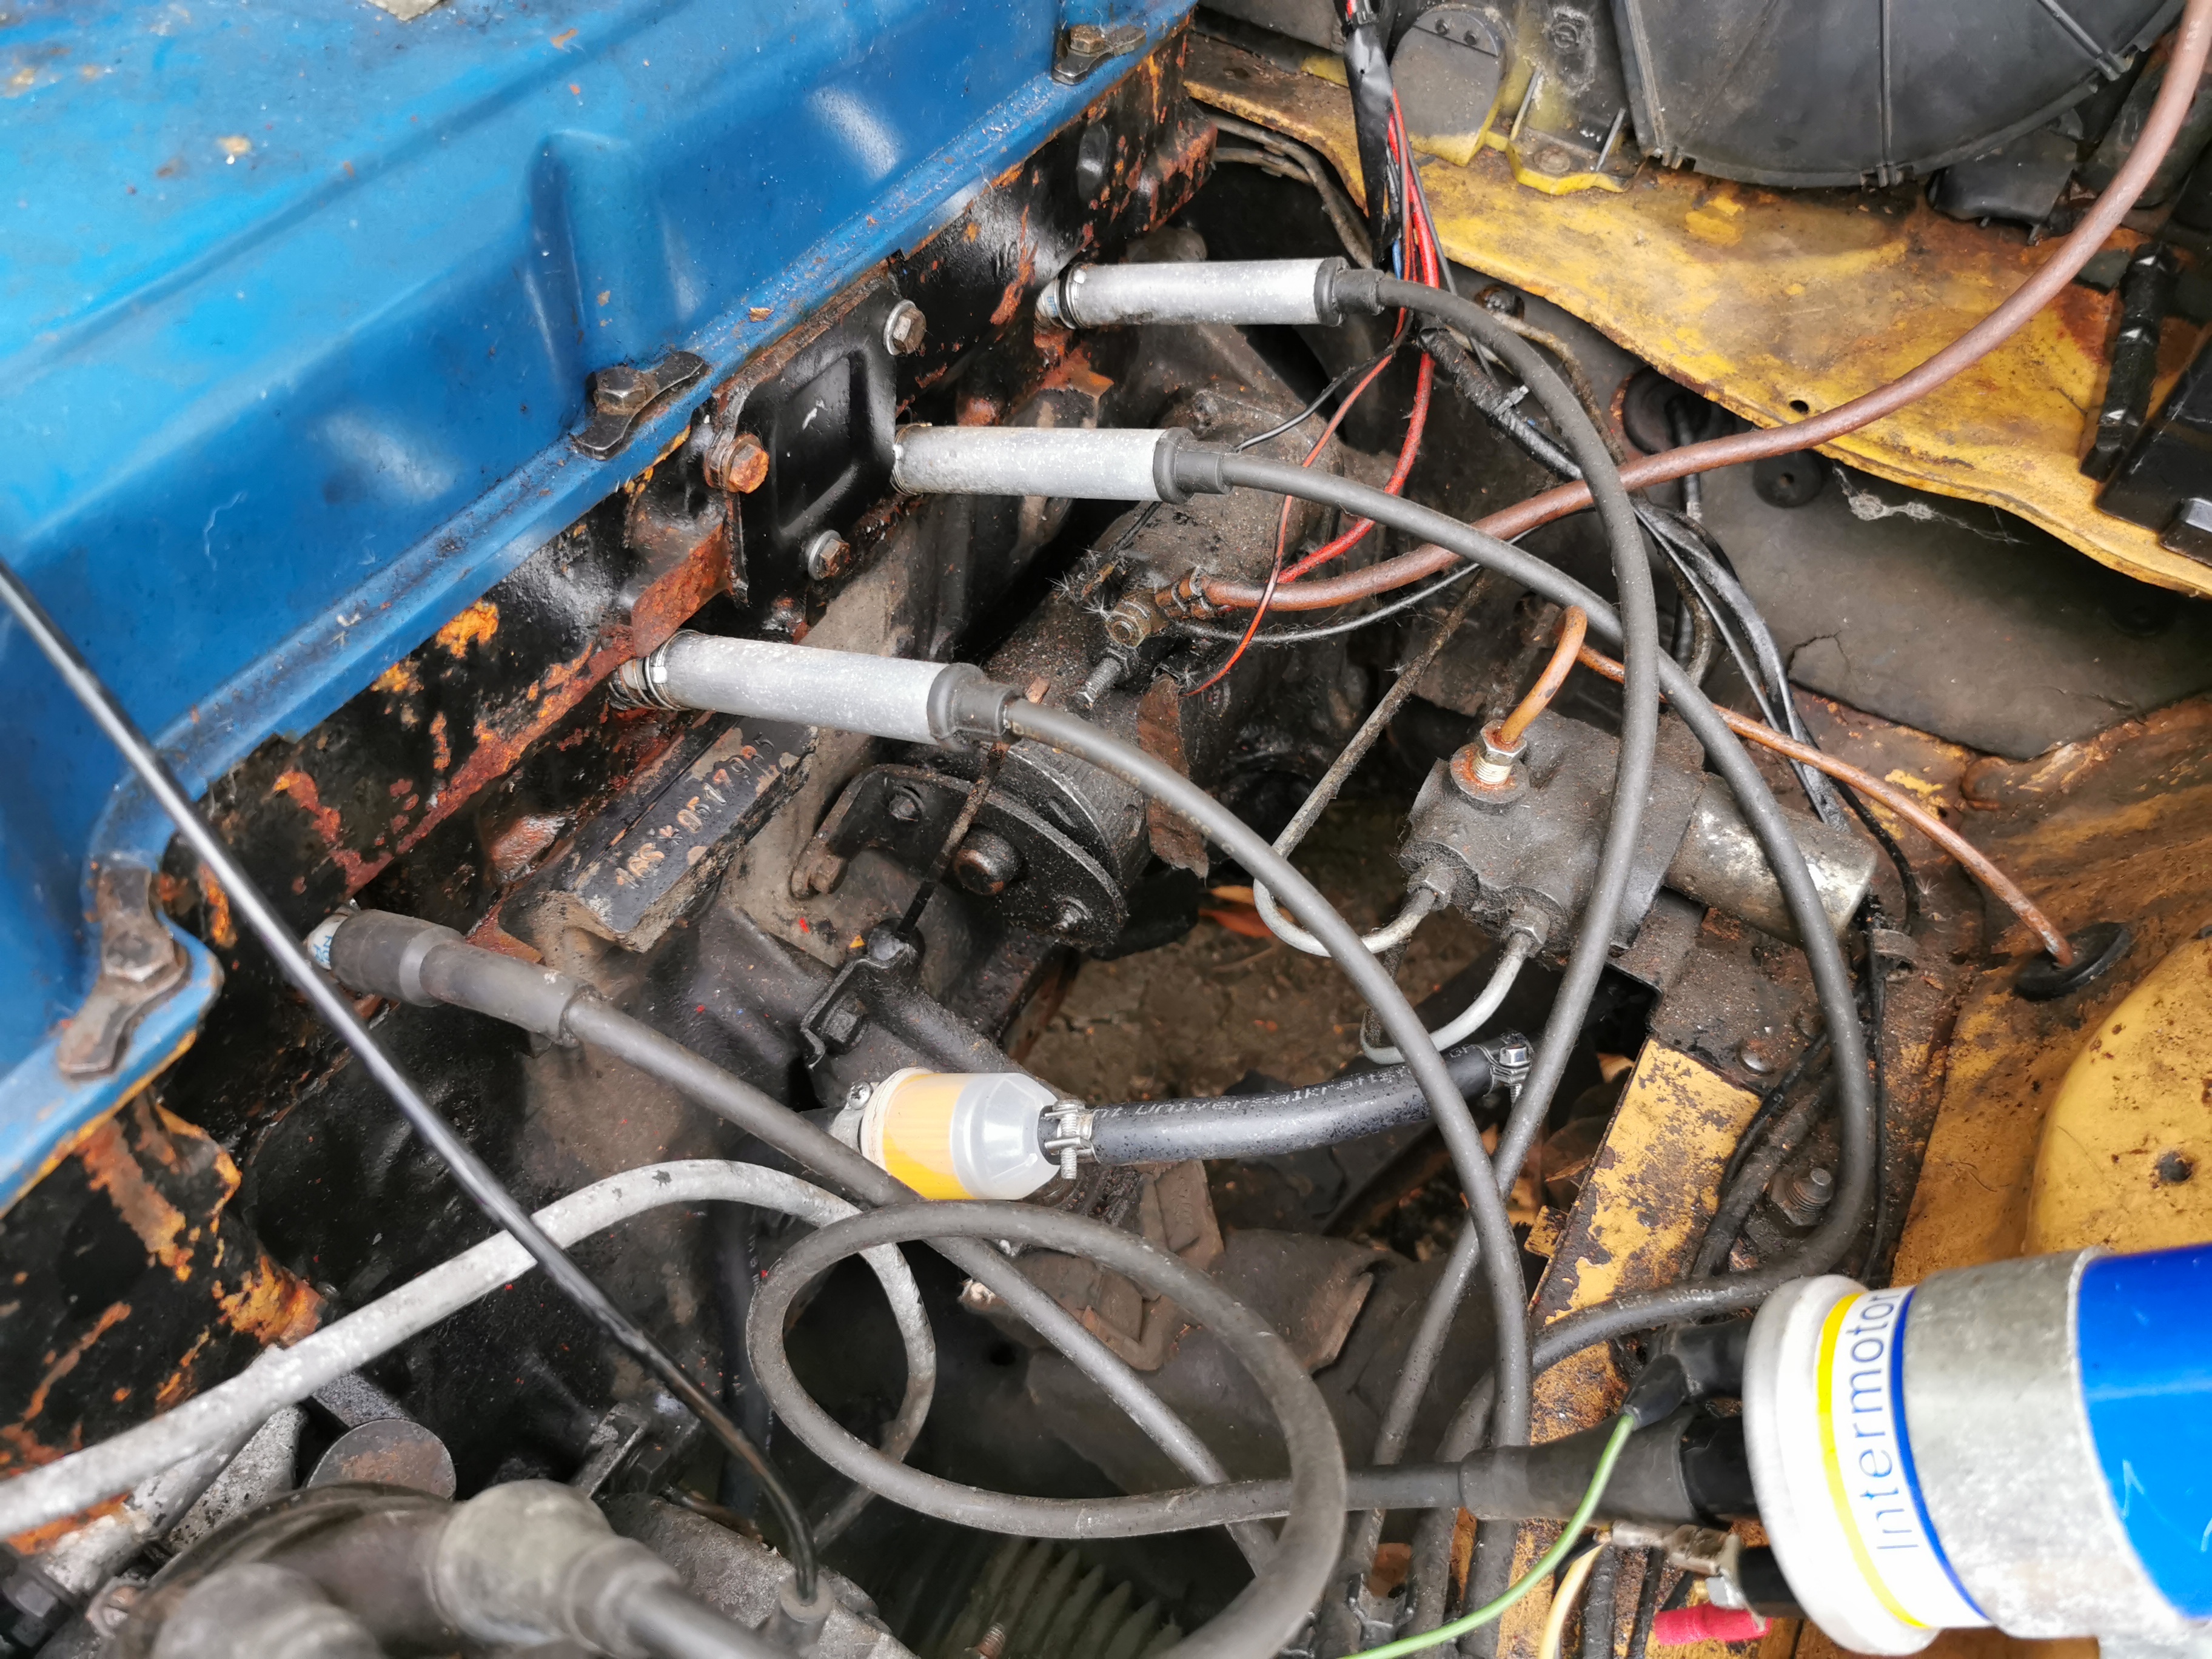
I couldn't find any evidence of a fuel filter on the car so was was added in an easily accessible location.

I've no real idea what state the inside of the tank is in so this seemed a very sensible precaution.
Next on the list of things I expected to have to change was the coolant - though it was spotlessly clean and according to my tester still providing more than sufficient frost protection, so I'm going to leave that be until the replacement coolant hoses turn up as I'll obviously have to drain the system then.
The engine bay on this car was generally rather grubby.

Having cars where you get covered in gunk just by looking at them is something for which I have very little patience.
Down here in particular was in a right state.
The bonnet also had a nice coating of gunk that had been sprayed there over years by the belts and fan.
Nothing however that a load of degreaser and an appointment with the pressure washer couldn't sort. Fair to say that this looks a lot better and more pleasant to work on I think.


A lot of people seem to respond with complete terror when I mention pressure washing the engine bay of a car. Fact of the matter is that so long as you use a bit of common sense and everything is in good order there's absolutely nothing to be afraid of. If my ignition system has issues with being waterproof I'd far rather find out about it on my driveway rather than when I hit a puddle I didn't see on the road. This car started straight up after this cleaning as though nothing had happened at all. This is something that all of my cars have done usually once a year or so and I've never had any issues. That includes a V12 Jaguar XJ-S. Engines and their associated systems are designed to deal with getting wet. Cover the air intake and don't go out of your way to directly blast stuff like the distributor and it'll be absolutely fine.
While I had the pressure washer out it seemed a good time to give the car as a whole a quick going over.
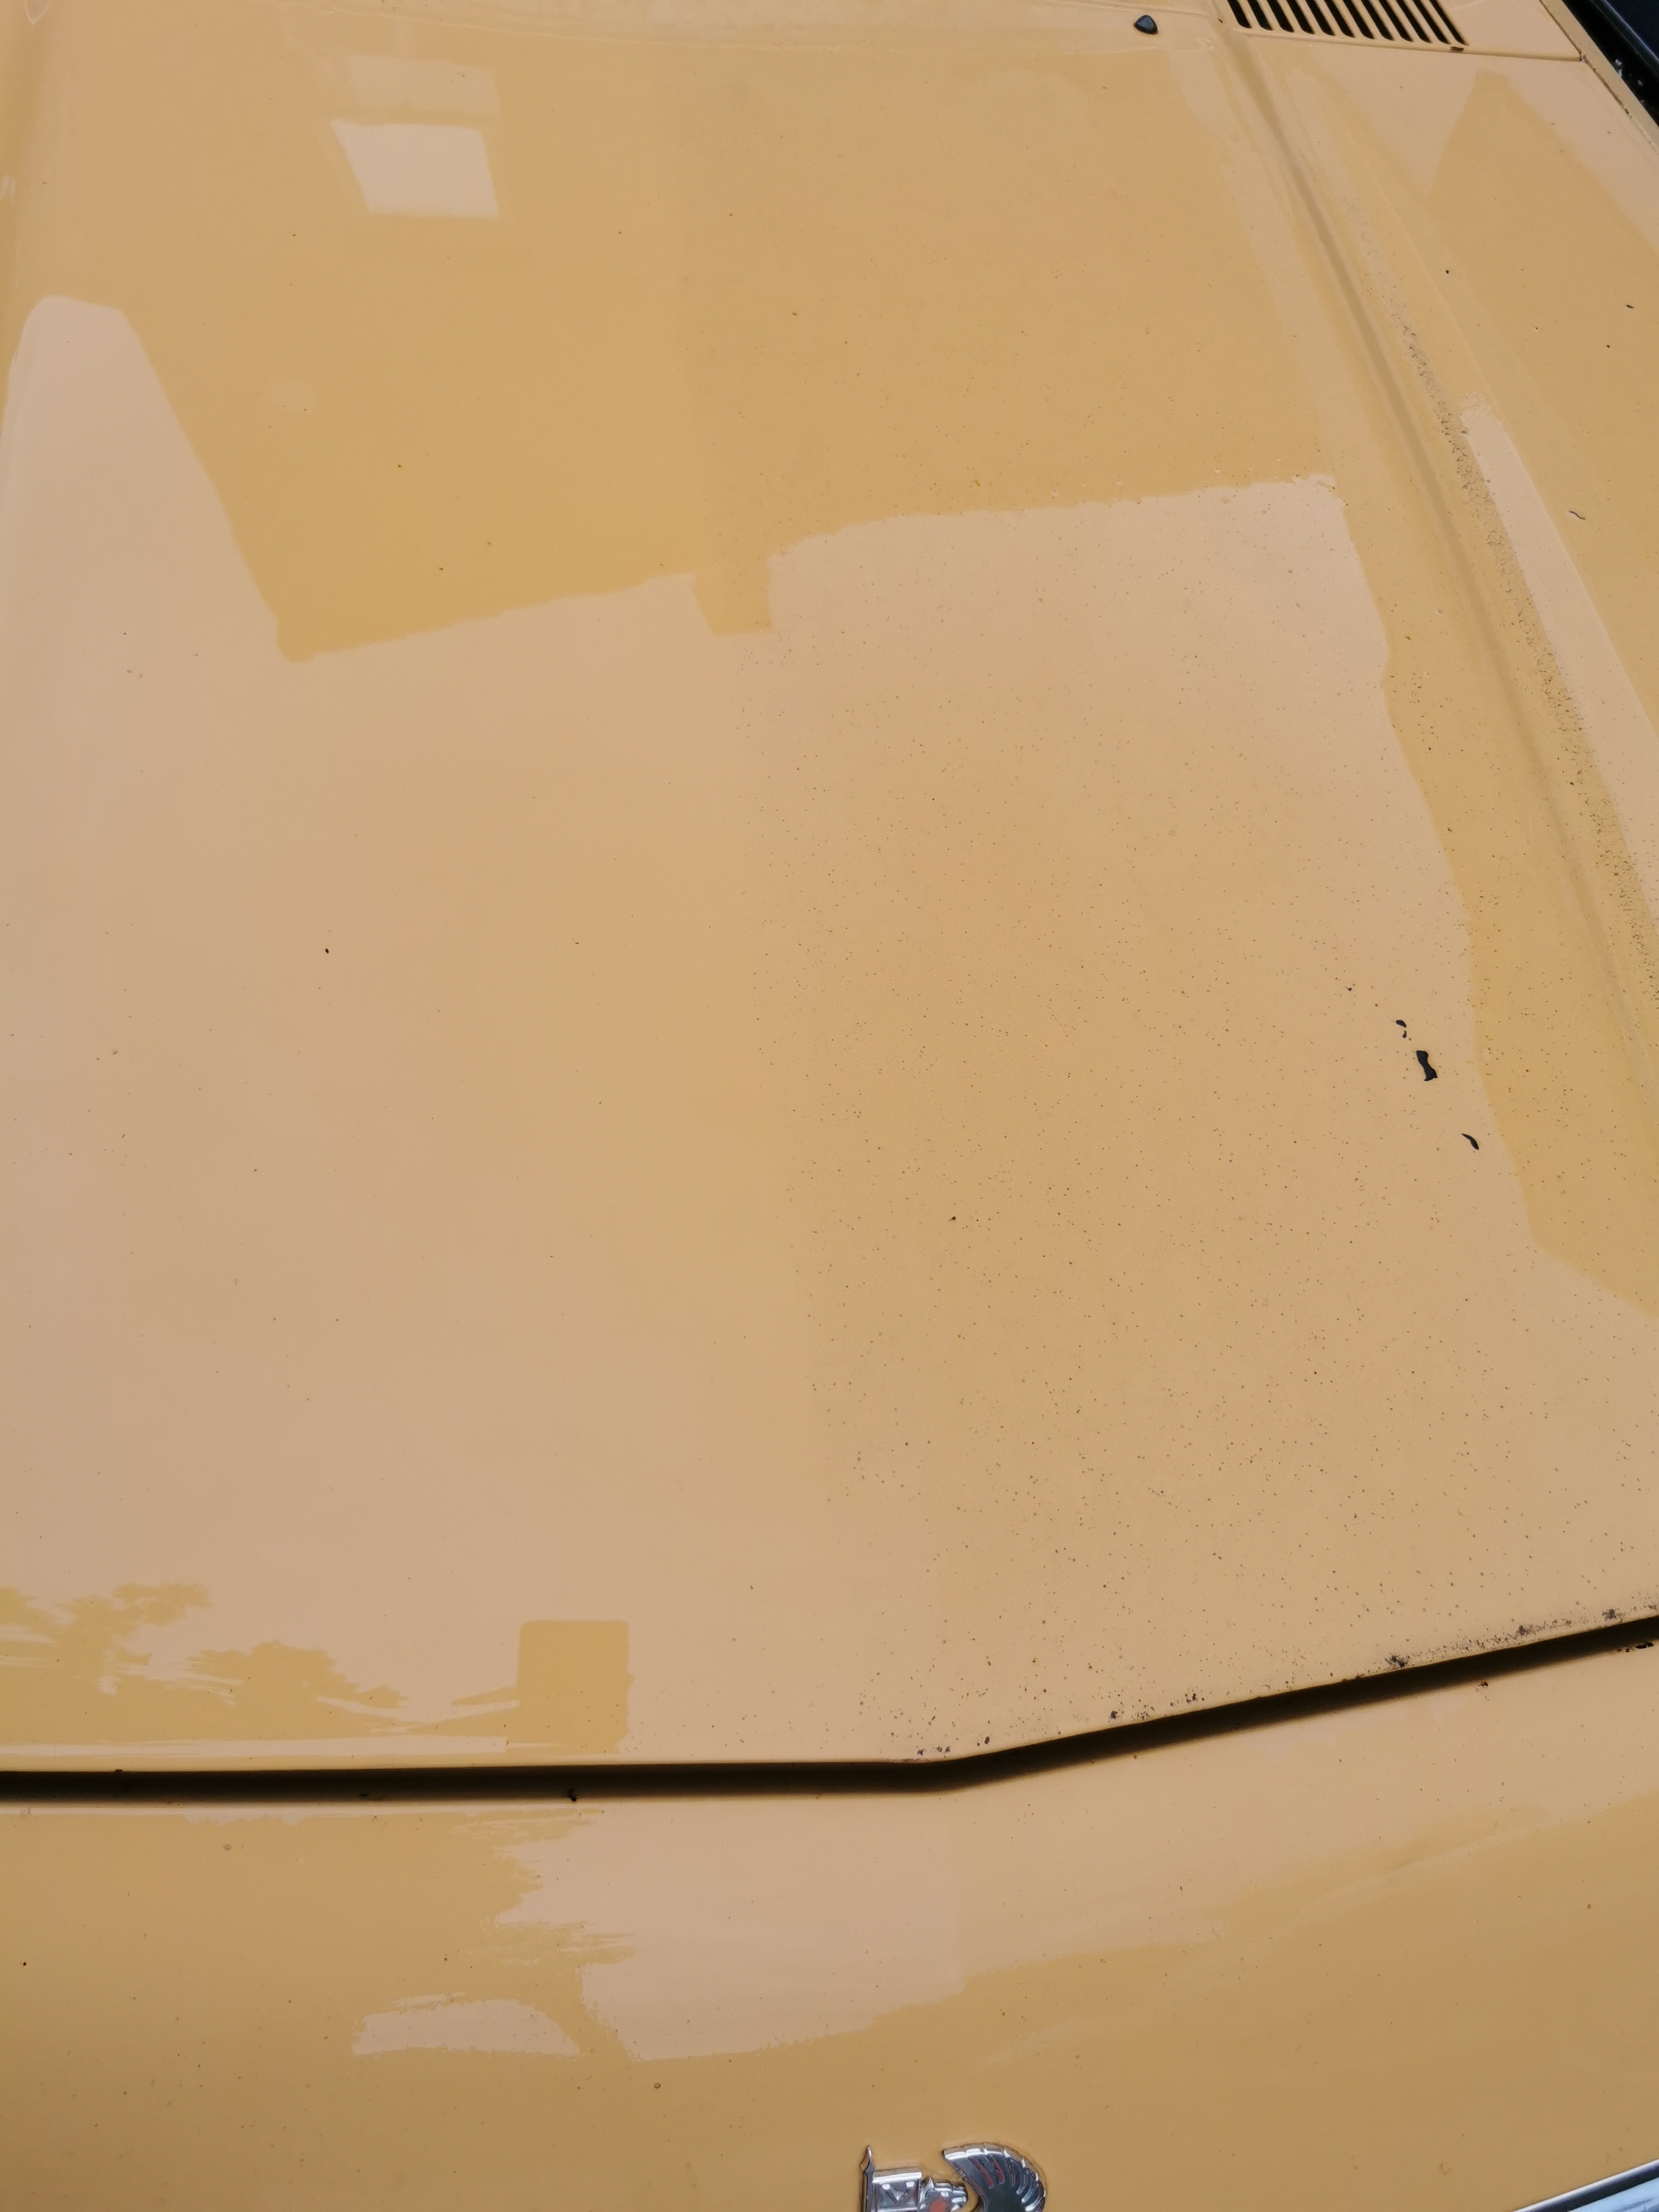
While it's obvious at a glance that the paint desperately needs a polish, the amount of surface contamination also quickly became apparent once I started washing the car - it's always a sign that you're going to need to do quite a bit when there's a clear visible difference on the areas that have been rinsed versus those which haven't just with water.
Car looked a bit more respectable once I was done.

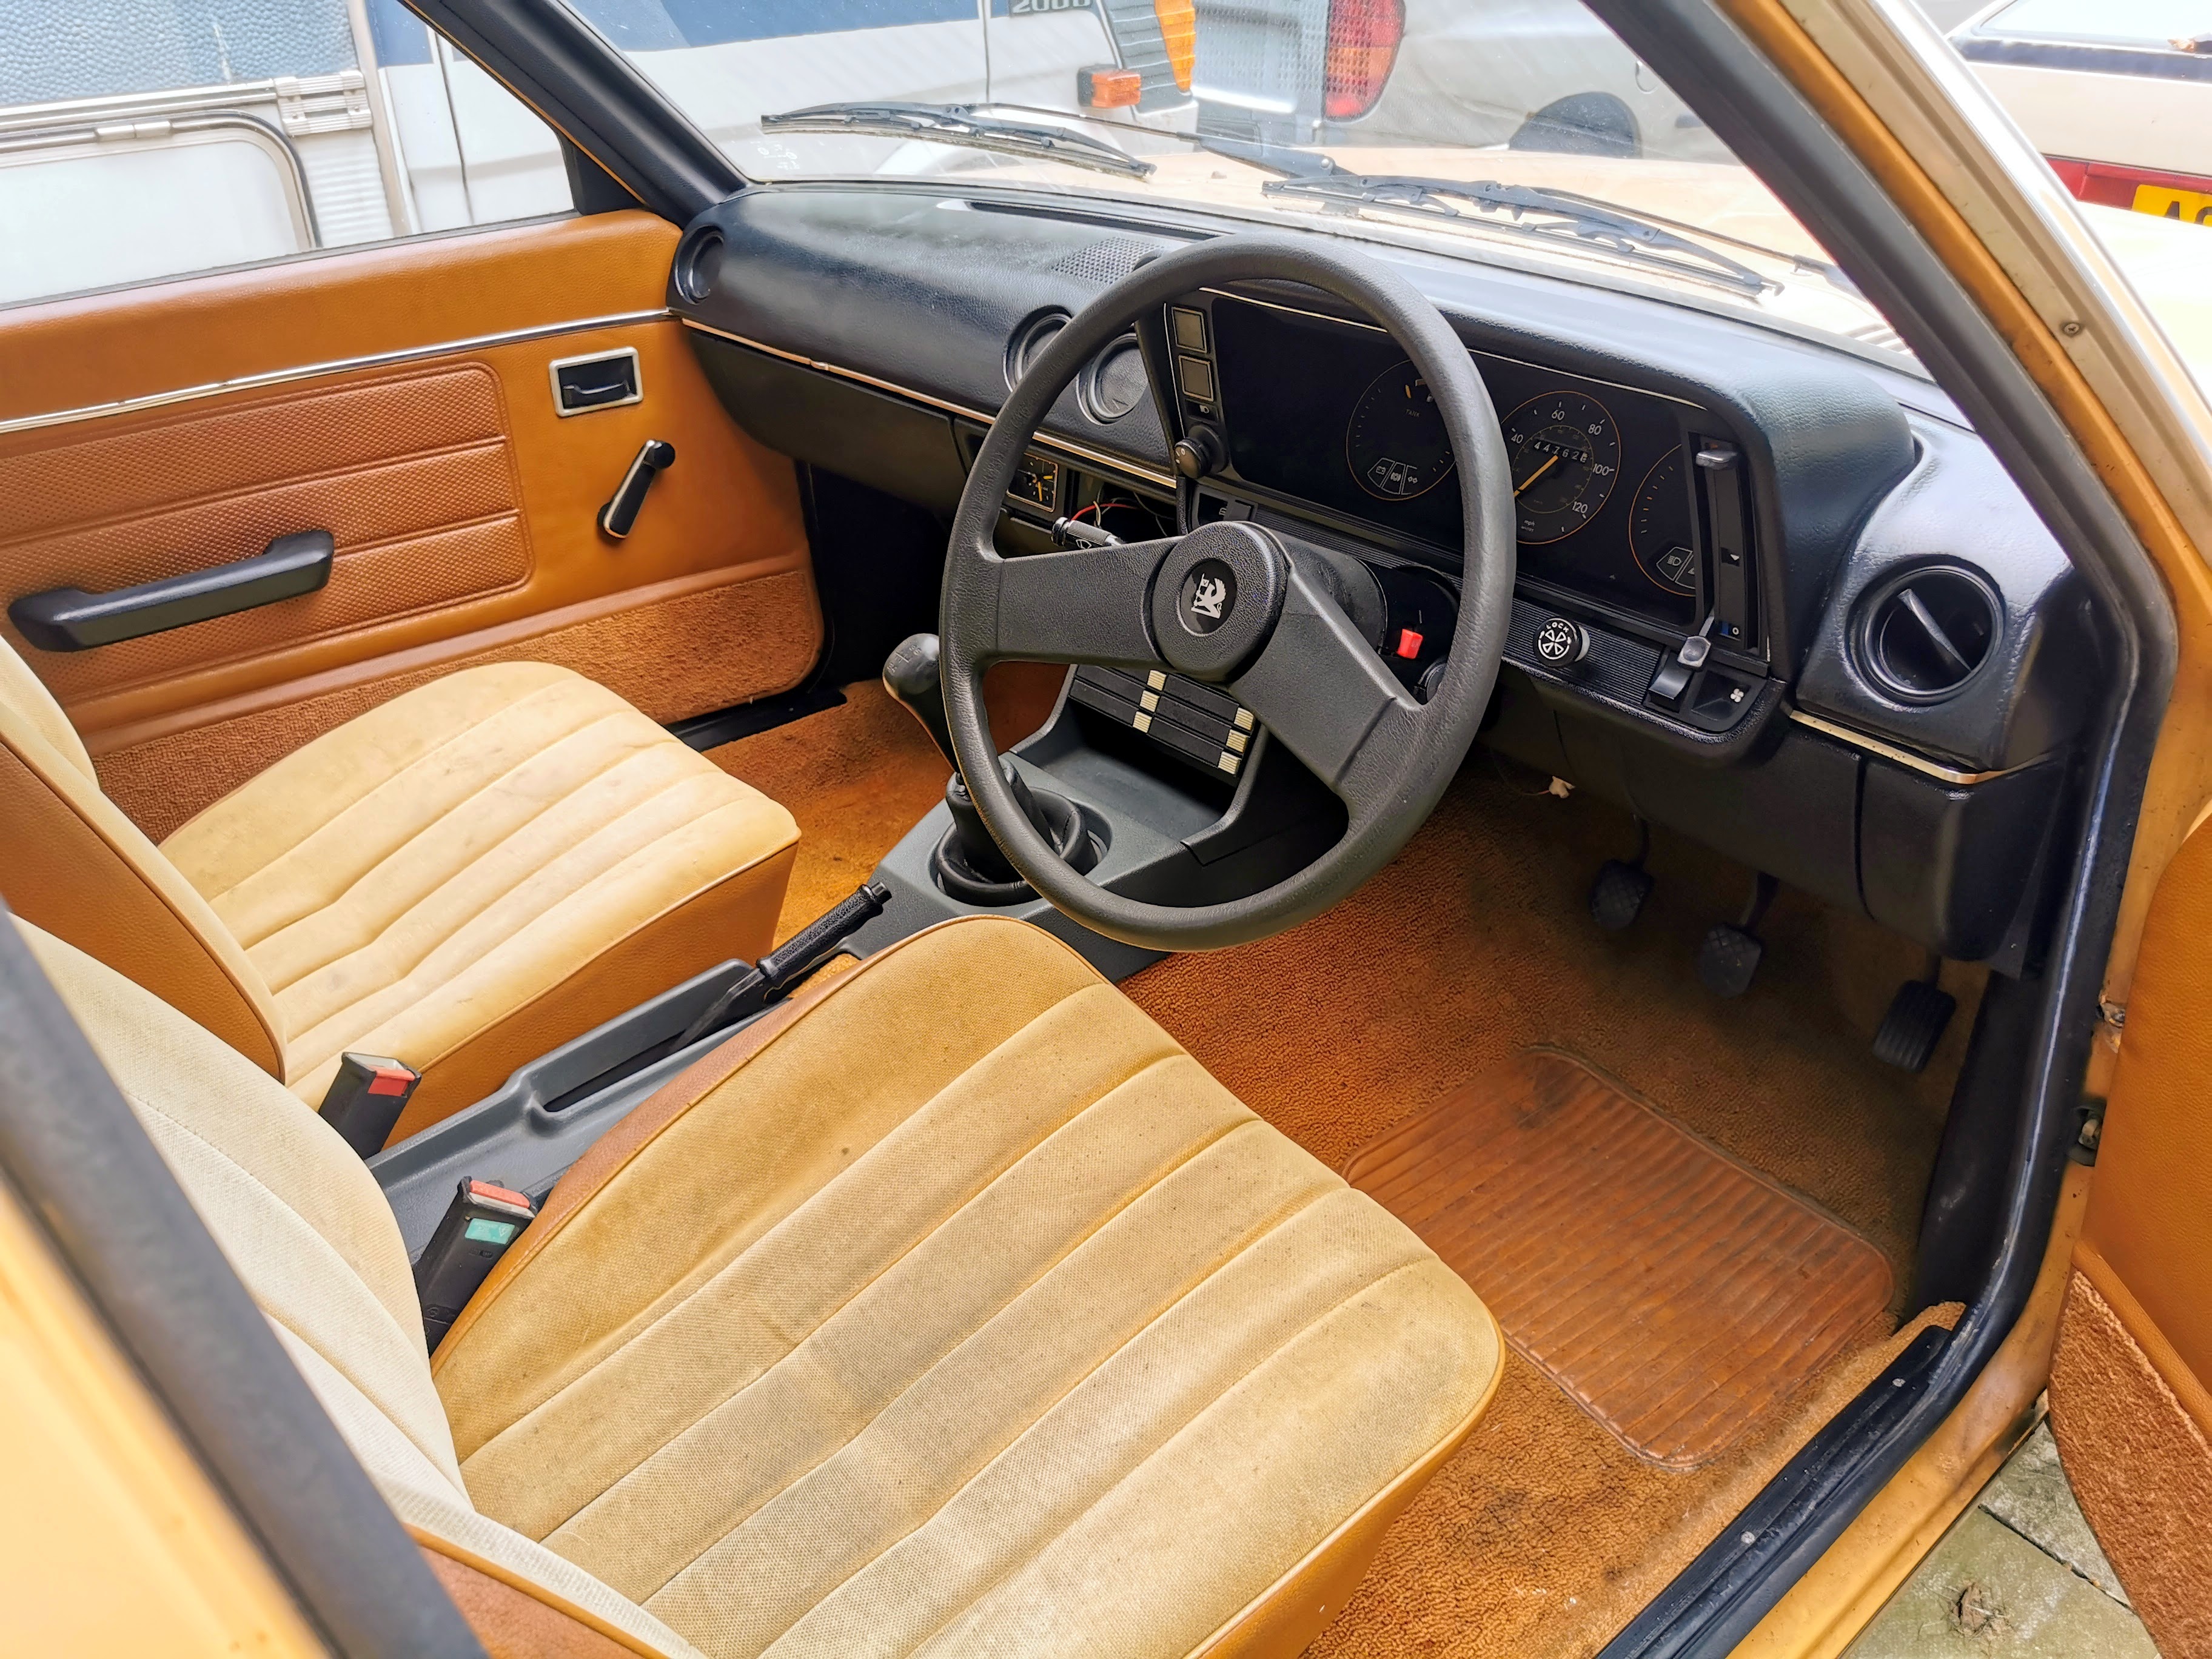
The interior came up astonishingly well with just a quick clean.
Yes, it really is that vibrant in person. Why does nobody make car interiors in colour any more?
With normal service items out of the way it was time to turn my attention to things actually preventing the car from being driveable. A complete lack of brakes being high on that list. When the car was originally being moved to the location I picked it up from it had been necessary to split the halves of the offside front caliper to make the car roll. The nearside one was more or less free, but clearly needed some help. My intention here given that new calipers aren't all that readily available was always to send the pair away for refurbishment.
Thankfully there's enough space to get the impact gun onto the caliper retaining bolts as they were biblically tight. I still reckon this is one of the best tools I ever bought.
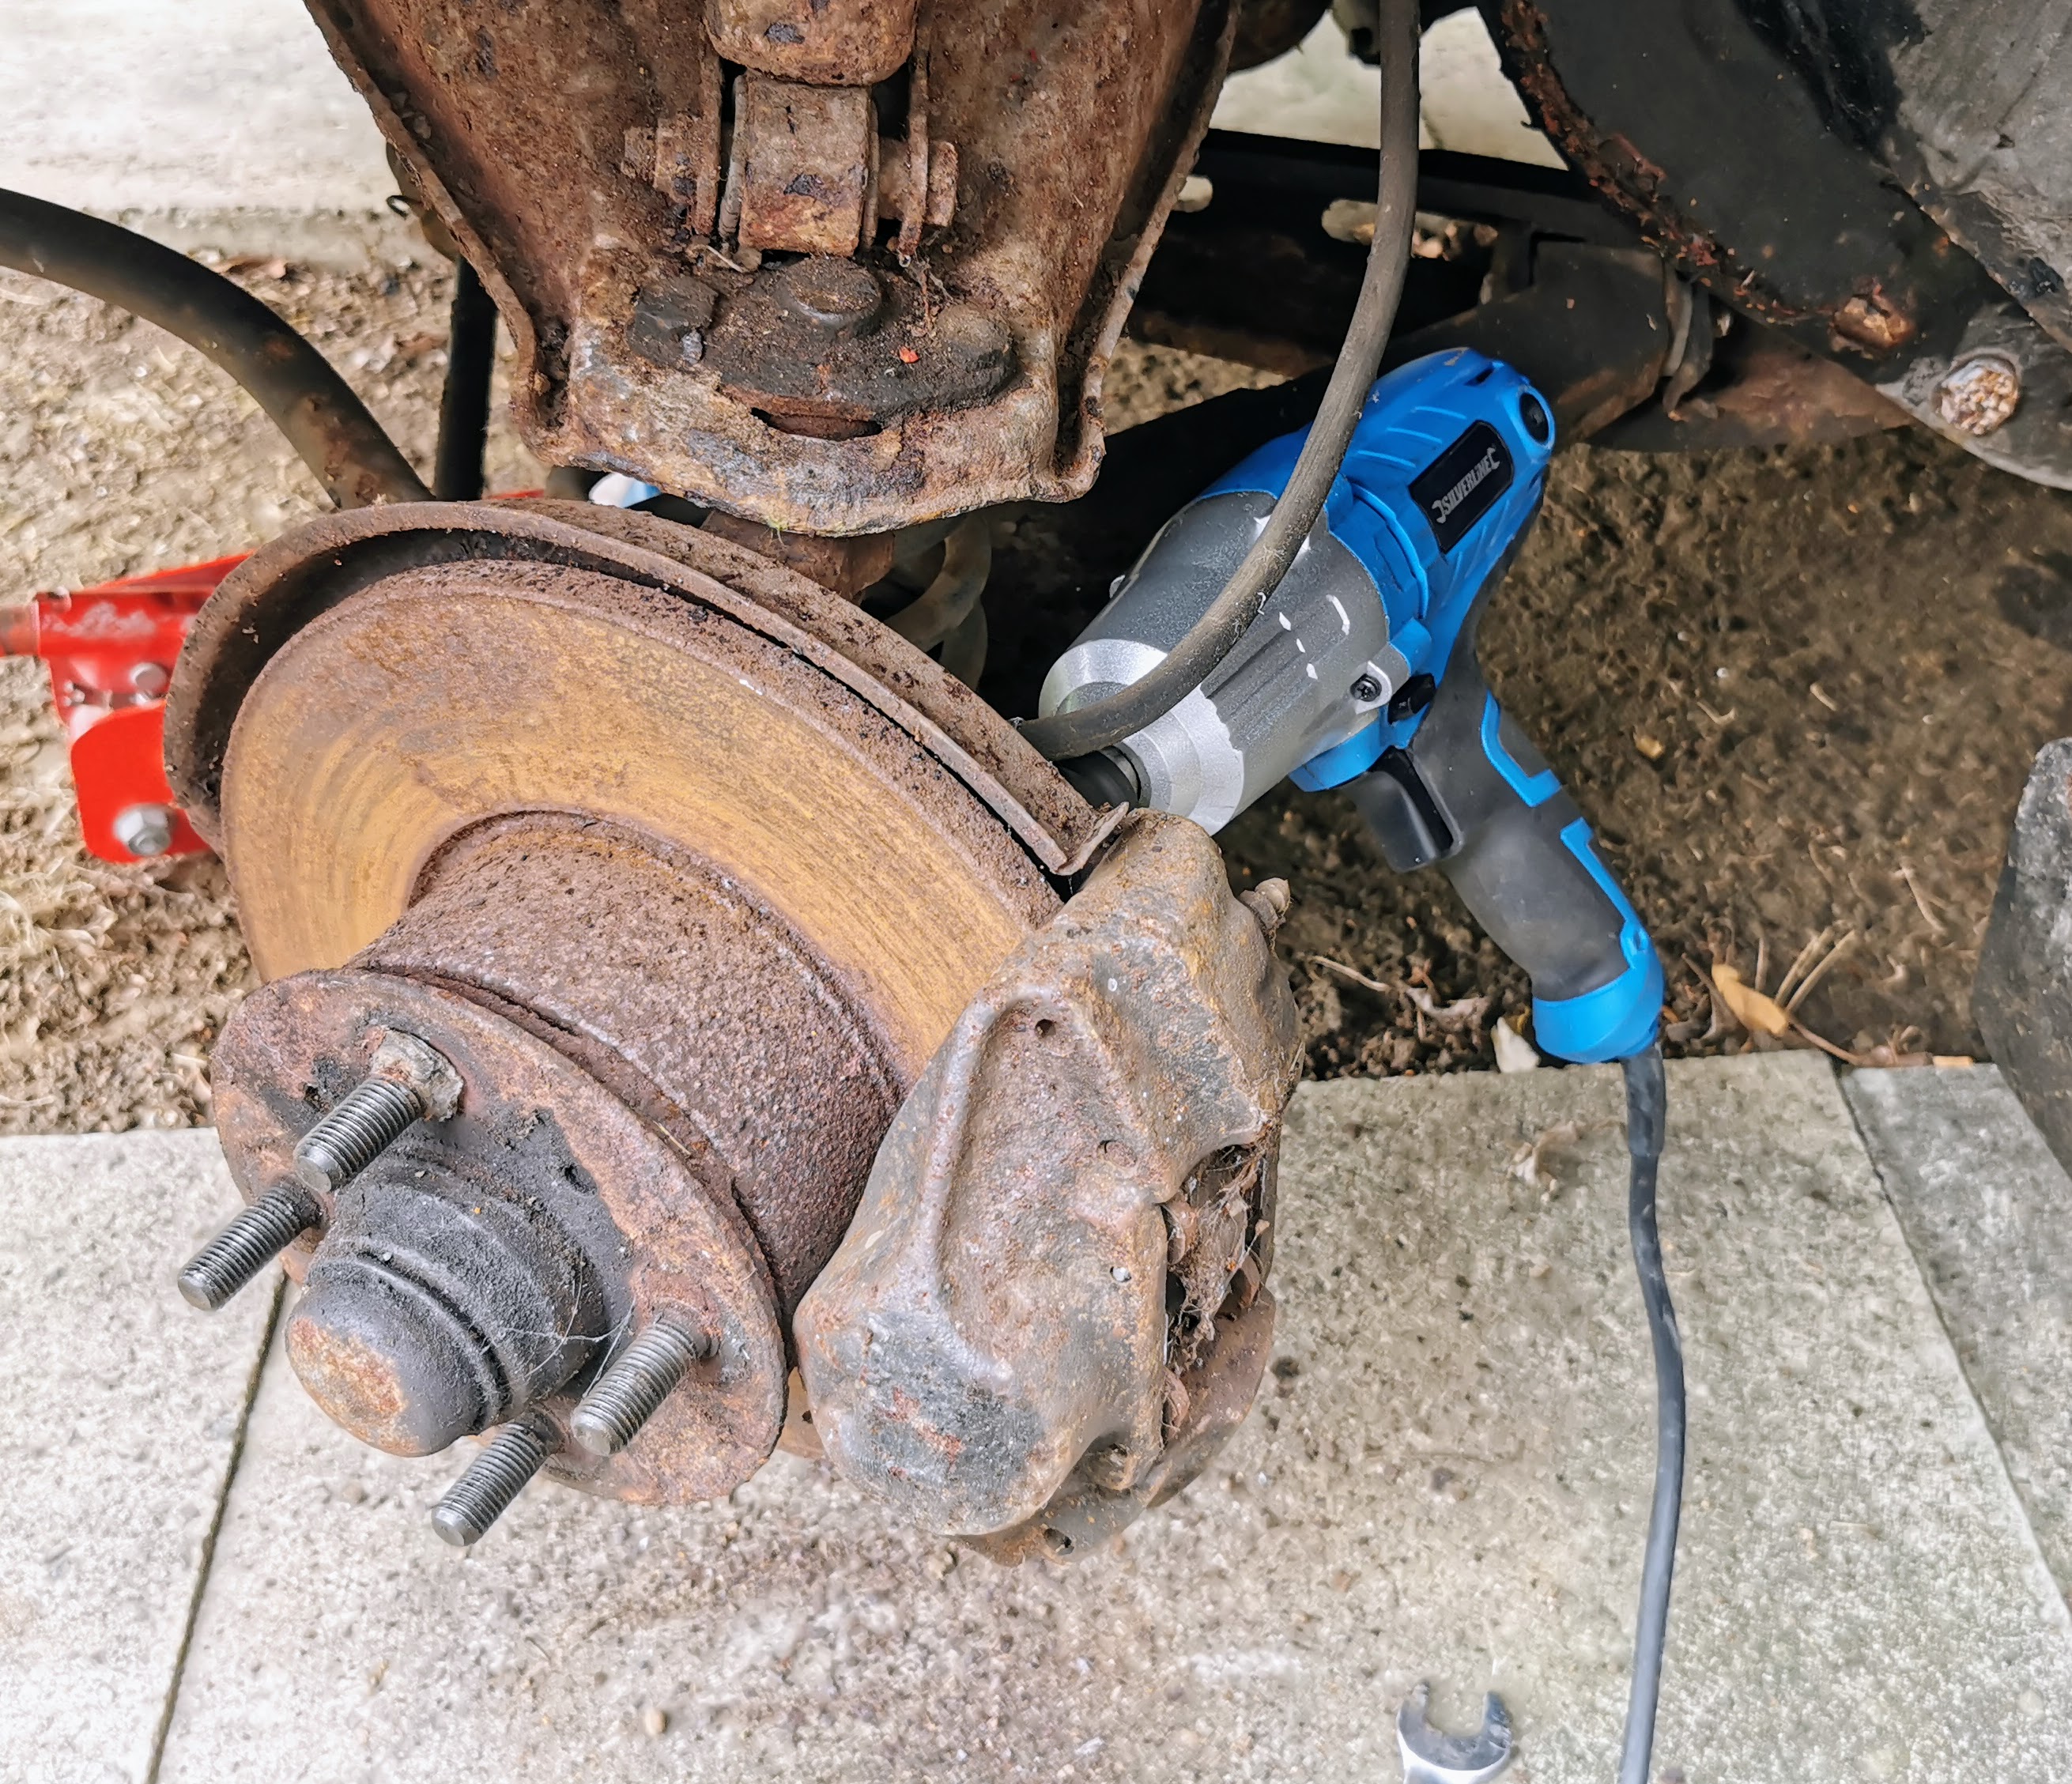
Within a matter of minutes I had the caliper off the car.

Removing the offside one was a matter of repeating this procedure...though at that point I ran into a problem.
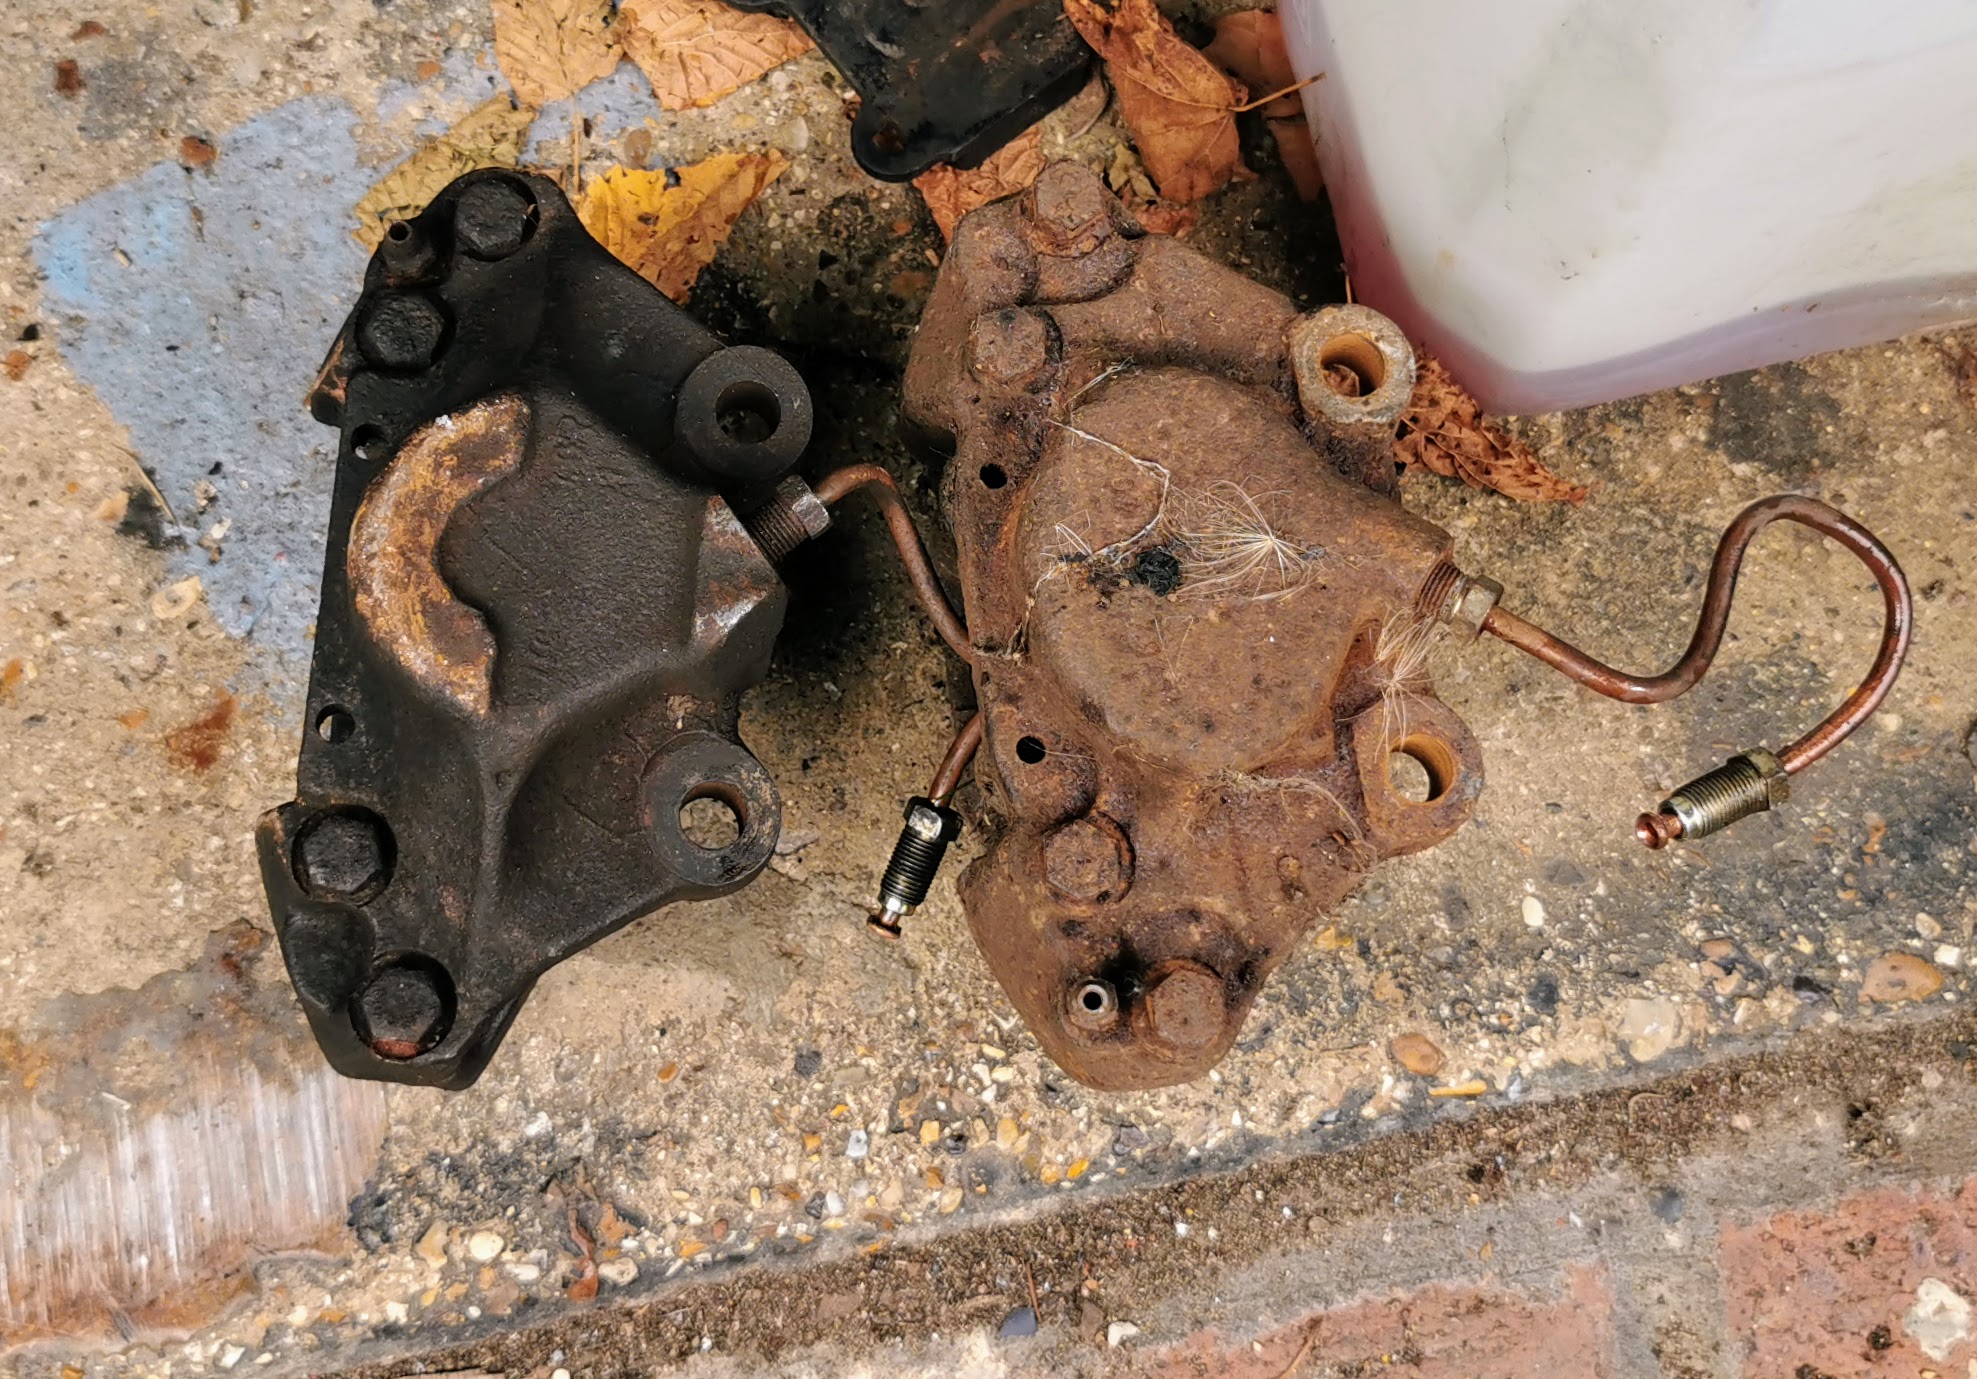
These calipers are not the same. The one on the left is made by ATE, the one on the right Girling. While specification wise they're the same, I'd really rather not have mixed and matched parts on an axle where brakes are concerned...so off to eBay I went looking for a matched one to one of these - ideally the ATE one as it seemed to be in better condition so more likely to be rebuildable.
Didn't take long for a "new, factory refurbished" one to appear. Yeah, unfortunately it looks like it was factory refurbished in the 90s, if not earlier if the condition of the packaging and surface rust on some surfaces are anything to go by.
Nevertheless it means I now have a matched axle set.

These will both be getting sent off to Bigg Red brakes to be inspected and overhauled as necessary. I already have a new set of brake discs and pads ready to install along with new wheel cylinders for the rear - so once they're back we should be in a position to get the braking system back up and running.
Which brings us to the current state of play with this car. Given the weather has firmly decayed into the cold damp of an English winter now there isn't likely to be a massive amount of progress made until spring. My hope though is that this car will be back on the road by Summer 2023. So far I've found nothing which should be a huge barrier to that.
27th December 2022:
Well it turns out that the story on this page is going to be a fair bit shorter than I had originally expected. Following the entirely unexpected arrival of a Renault 25 Monaco on my doorstep I'm afraid that I had to move the Cavalier on to a new home. Simple fact of the matter is that I've honestly not got enough space for the vehicles that I have, so there was an absolutely non-negotiable one-in-one-out requirement in place. While I've long fancied having a Mark I Cavalier on fleet, this one was something of a target of opportunity. It's a car that if I really want to I would be able to buy another example of further down the road, albeit probably costing a fair bit more than this one did. However the Renault was one which had very much been on "The List" for the last 19 years, and is basically extinct - so it wasn't difficult for me to make a choice between the two.
So just before Christmas I waved goodbye to this car.
The new owner is far better equipped in terms of having the experience and equipment to properly undertake the welding repairs this car really needs doing than I am being totally honest. I'd be quite surprised if we don't see this back on the road at some point in the next few months. If they provide me with the information I'll update this page to reflect when that happens.
Page updated: 2nd May 2023.
![]()
![]()